Application Service
Introduction
Application Service lets user deploy their application to TCUP platform. Once hosted in TCUP cloud, the users have the application url which is available over internet along with the performance and security of TCUP. Currently TCUP Application Service is available as a RESTful API and it supports war, nodejs, aspdotnetcore, flask and play application types. Application can be deployed in TCUP either by using the swagger or from the TCUP portal.
Purpose of the Document
After going through this document the users will able to register,deploy and perform various action like start/stop etc. on their application using TCUP portal.
Reference Document
Please refer to the following documents to get more details on Application Service
To understand the basic concepts of Application Service please refer to the Concept guide.
To deploy the application using swagger please refer to the API guide.
Deploying Application Using Portal
Register an Application
Applications can be registered by clicking the register button present on the top-right of the application-service page.
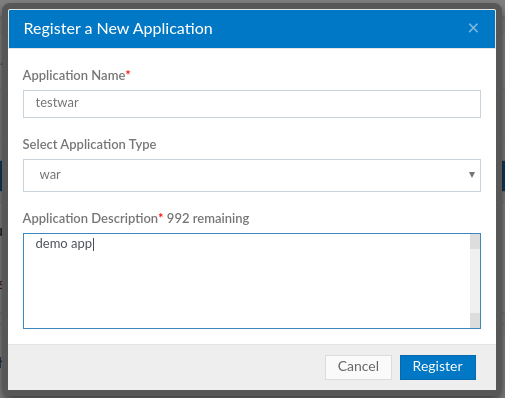
This will open the registration form where you will be required to fill in all the details of your application.


1. Application Name
This is the name of your application.
2. Application Type
This is the type of application that you are deploying. The options available here are war, play, nodejs, aspdotnetcore and flask.
3. Application Description
A brief description about your application.
On successful registration, a unique app-id will be generated for your application.
Note
app-id serves as the unique identification for your application.
Search an Application

You can easily search your application by just typing in your application’s name.
Deploy an Application

On clicking the DEPLOY button, a dialog will open where you have to upload your application.
Note
Upload the war file in case of war application and for rest of the applications (play, nodejs, aspdotnetcore and flask) upload zip file.
Once the application has been successfully deployed, you have to start your application.
Start an Application

On clicking the START button, a dialog will open where you have to select application specific environment and number of instances. This will produce a url for your application.
Upon clicking this url, you will be taken to your application’s home page.

Stop an Application

On clicking the STOP button, your application will be stopped.
Undeploy an Application

On clicking the UNDEPLOY button, your application will be undeployed. This will also remove the url for your application.
Delete an Application

On clicking the DELETE button, your application will be deleted.
Note
Your application should be undeployed before you delete it.
Application Logs

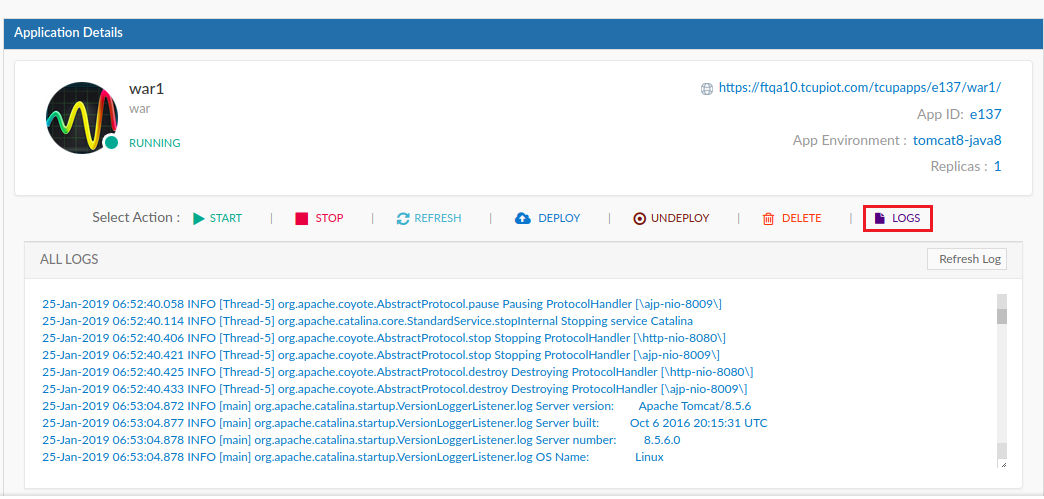
On clicking the LOGS button, your application logs will be displayed.
Note
Your application should be started to generate log files.