Task Service
Introduction
Task Service is used for batch oriented data processing on historical sensor data stored and managed by external data services such as TCUP Sensor Observation System. IoT applications require the ability to process high volumes of data collected over a period of time and perform analysis on the data in batch mode. Typical processing involves machine learning algorithms for generating and executing analytical models.
Task Service enables a large number of batch programs running analytics workloads to be executed in parallel on large server clusters. Developers provide the path to the program and specify the path to the data. Using Task Service APIs, users can upload the program to be executed. Task Service APIs can be used to execute these programs written in C, Java, Python etc. Application developers have the option of managing the schedule and specifying the number of nodes that will execute the tasks.
Purpose of the Document
The following document describes how to work with task service using the portal. After going through this document, the users will able to perform the following activities:
Create a project
Create task under that project.
Deploy task with executable file, dependent files (in a .zip file), input files (in a .zip file) and runtime arguments.
Start task.
Pause/ resume, cancel and stop task if required.
Delete/ restart task.
Export existing task and import the exported task.
Delay tasks where the task can be deployed with a future execution time and
Recurrent tasks where the tasks can be deployed at recurrent intervals (daily, weekly, etc.) using Cron pattern and optional argument of recurrence limit (Value should be any positive number or 0 if task has to be run infinitely).
Reference Document
Please refer to the following documents to get more details on Task service
To understand the basic concepts of Task Service please refer to the Concept guide.
For API details please refer to the API guide.
Working on Task Service Using Portal
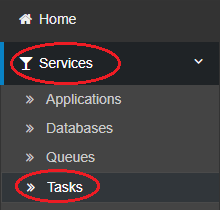
To navigate to Task Service portal, after signing in to TCUP, click on Services on left hand side menu and then click on Task .
Project
A Project is group of related tasks. Tasks must be grouped under a project
Register Project
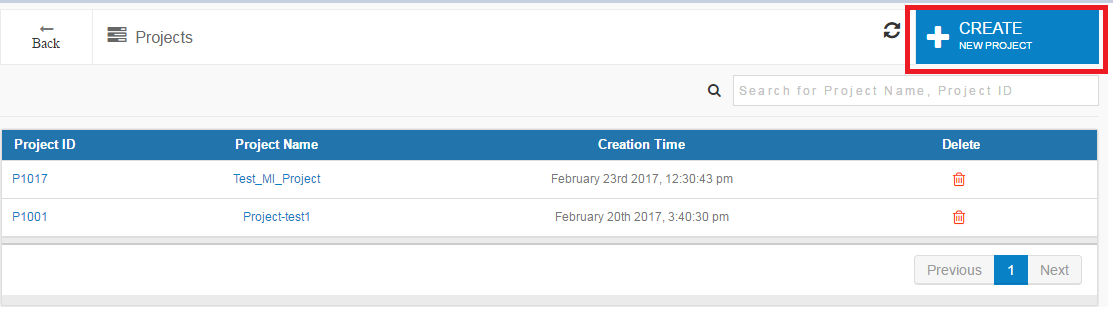
A Project can be registered by clicking the register button present on the top right corner of the project page. This will open the registration form where the details have to be filled in.
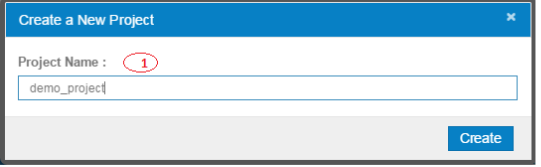
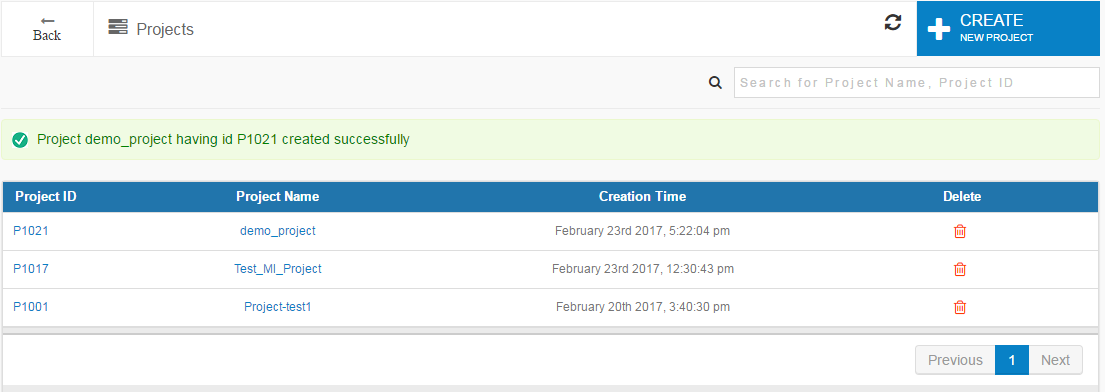
On successful registration, a unique projectId will be generated against the given project name.
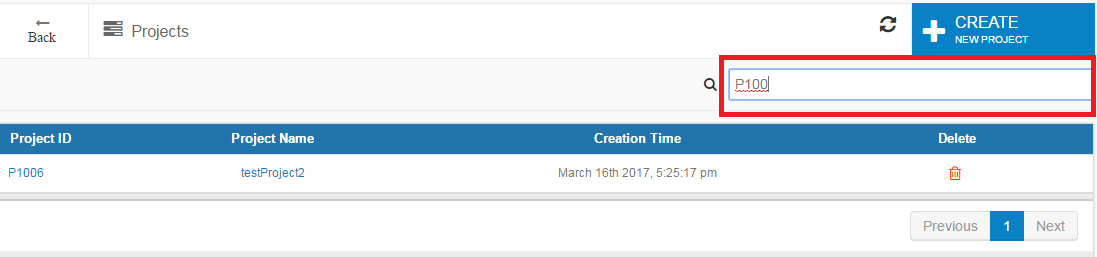
Search a Project
Project can be searched by just typing the project name or project ID on the top right search field.
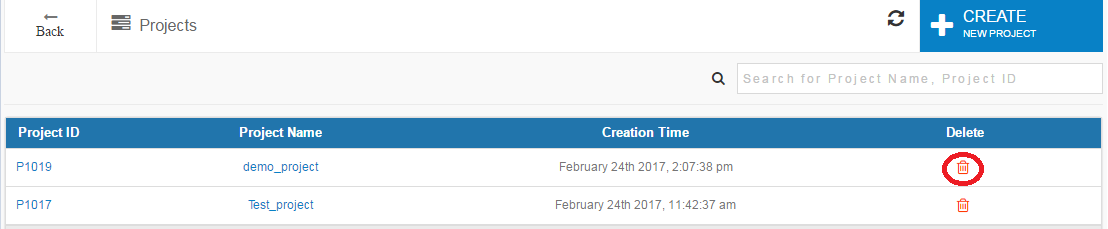
Delete Project
Any project can be deleted by clicking on the Delete button beside the project name.
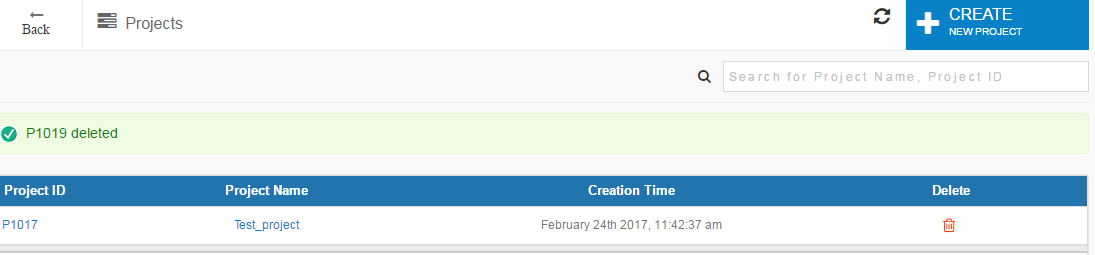
A popup appears asking to confirm whether to proceed with the deletion.
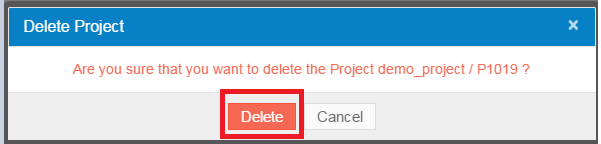
Upon agreeing to proceed the project gets deleted successfully.
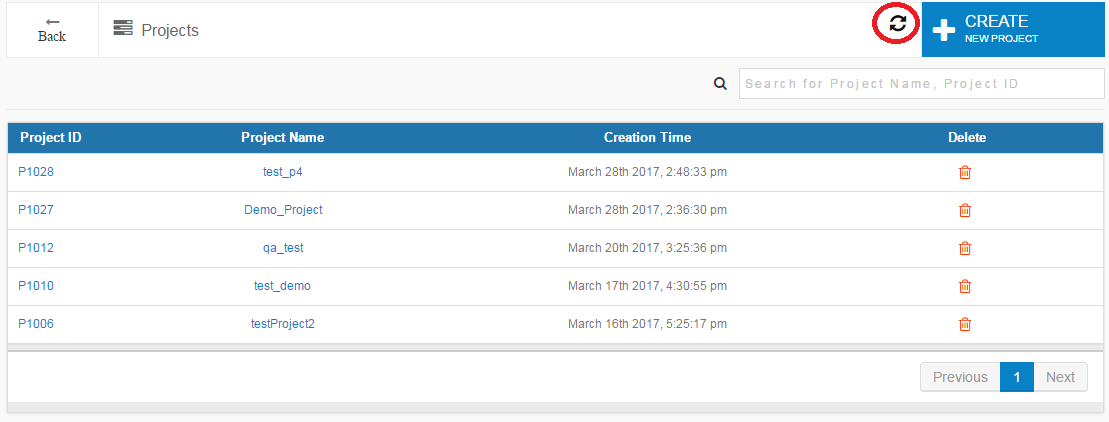
Refresh Project List
Project list can be refreshed by clicking the refresh button as shown in the image below:
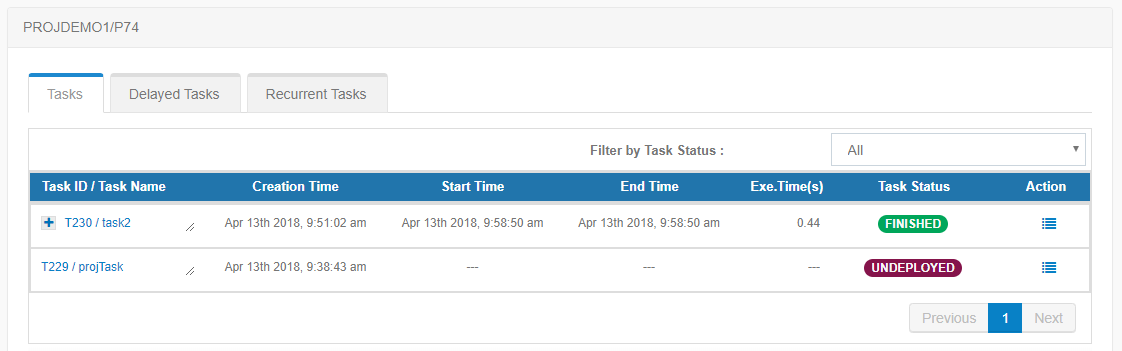
Task
A task is an executable package of a program.
To enter the task page, the user has to click on the project name to fetch all the tasks created under a single project.

Register Task
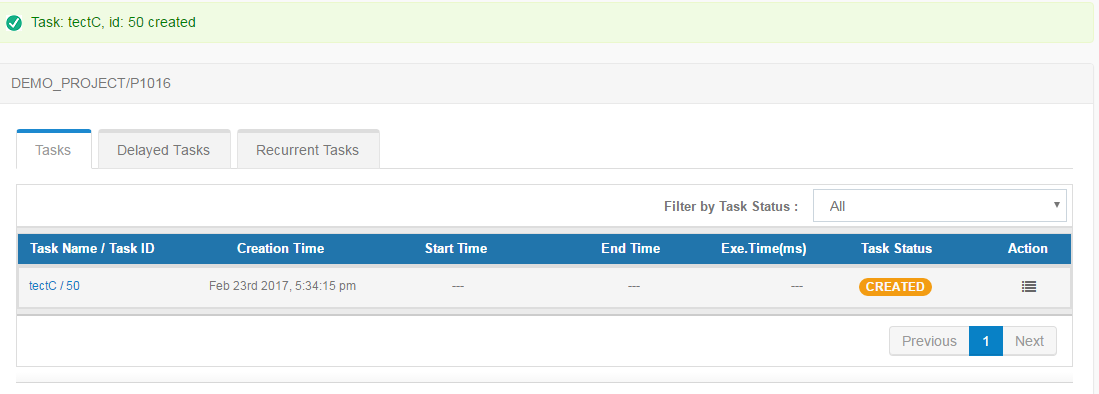
A Task should be registered by clicking the register button present on the top-right corner of the task page.
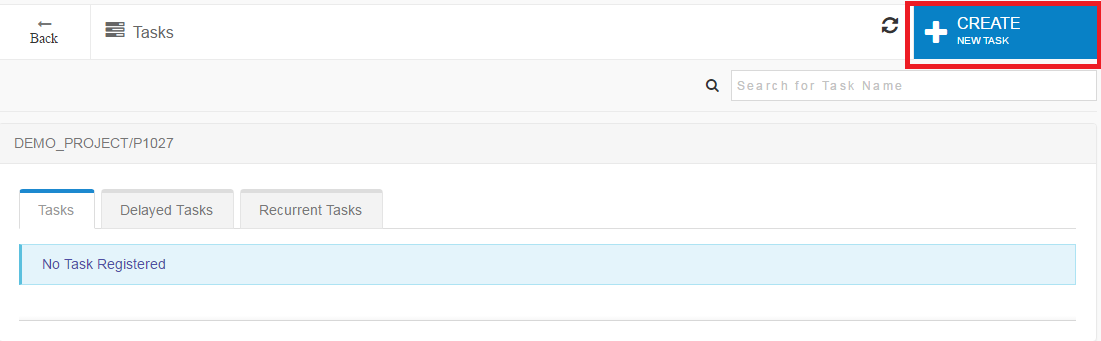
This will open the registration form where the task name has to be mentioned.
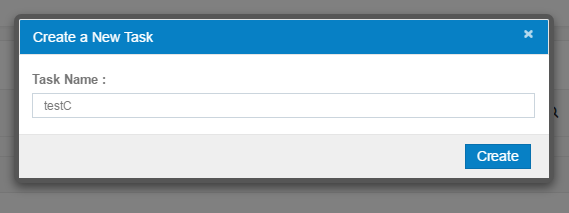
1. Task Name
On successful registration, a unique taskId will be generated for the task.
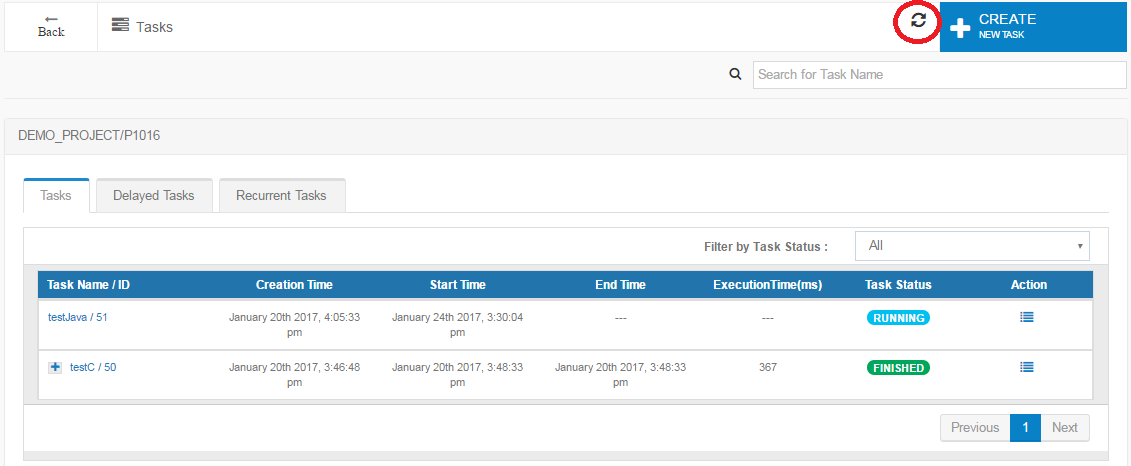
Refresh Task List
The icon shown in the image below allows to refresh the current task list that appears in the page.
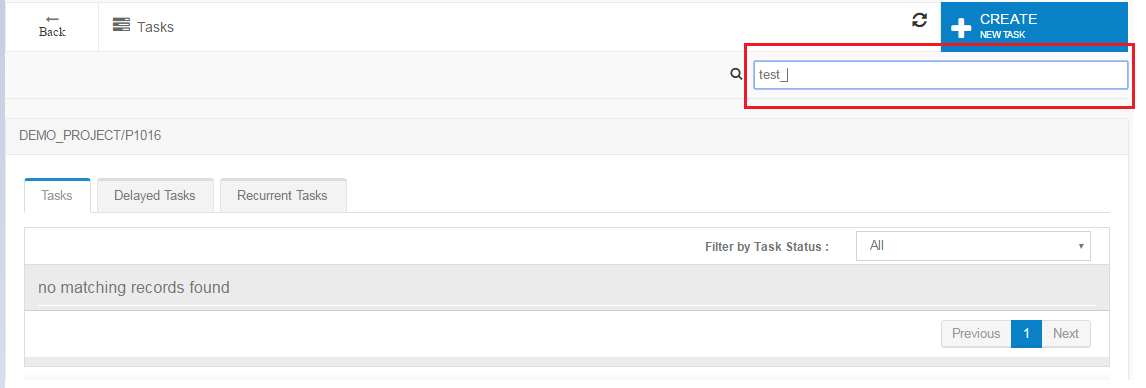
Search a Task
Tasks can be searched by typing the task name in the search box as shown in the image below.
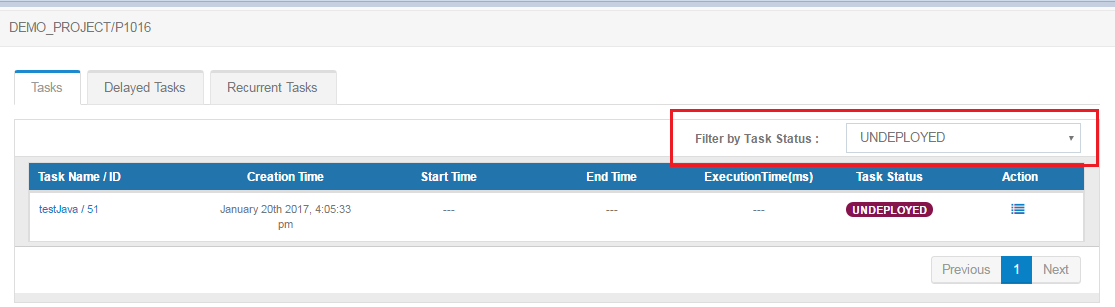
Filter Task by Status
Tasks can be filtered by their status by just selecting the task status from the drop-down menu.

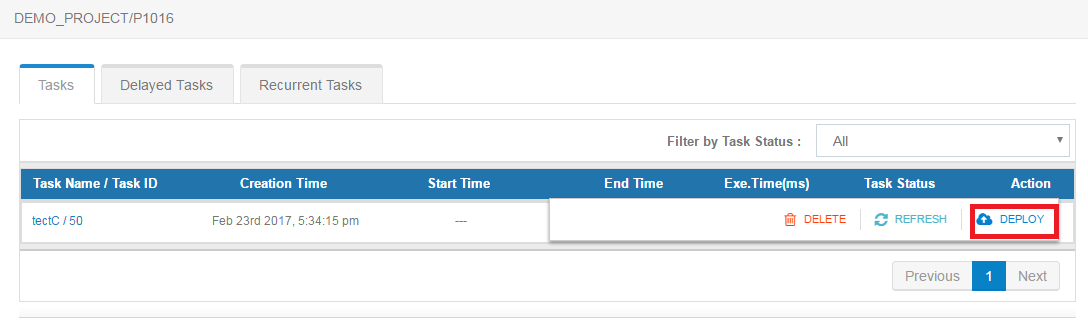
Deploy Task
On clicking the Action button against a task, Deploy button appears as shown in the image below:
On clicking on Deploy a form appears which is described below:
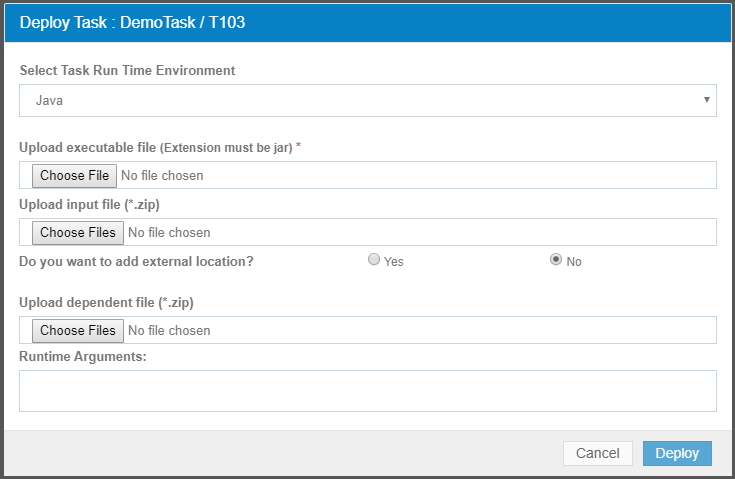
1. Select Task Run Environment
Here the run-time environment has to be selected in which the task will run. Python, Java, C, C++, Spark, Node-js are currently the supported formats.
2. Upload Executable File
Here the executable files have to be uploaded that will run according to the environment selected in the previous step.
3. Upload Input zip File
Here input files have to be uploaded in zip format that are needed for the executable file to run.
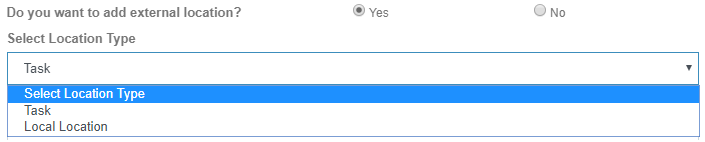
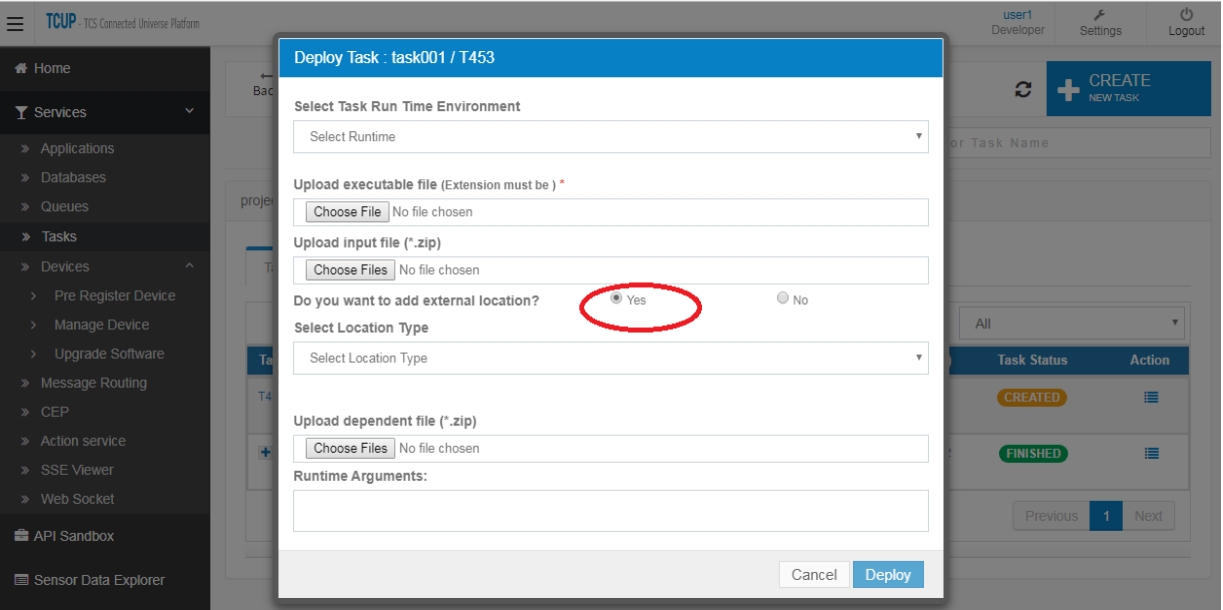
4. Do you want to add external location?
If we want output file of some other executed task or some local file to be the input of the current task then external location should be mentioned as ‘yes’ and the appropriate location type should be selected else the value should be ‘no’.
For details of external file please refer Add External Input and Output Config to Task
5. Upload Dependent zip File
Here dependent files are uploaded in zip format that are required for the executable file to run.
Note
Input File is used to provide data to the batch program. For example, if a program needs to read data from 2 data files for processing, then those 2 data files should be provided as Input File. Dependent File is required for running the program. For example, if a Java program needs some jar file for running it, then that jar file should be provided as a dependent file.
6. Runtime Arguments
Run-time arguments can be provided if it is required in the uploaded program.
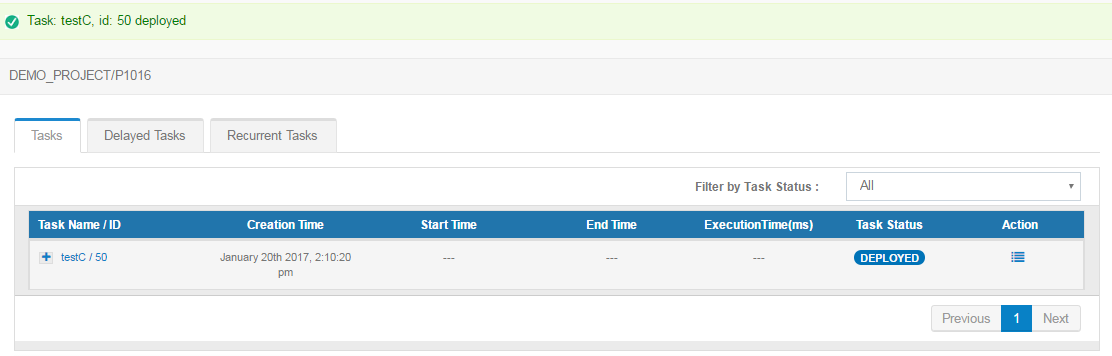
After filling up the required parameters, the ‘deploy’ button has to be clicked. A confirmation of the task being deployed will be provided as shown in the image below.
Start Task
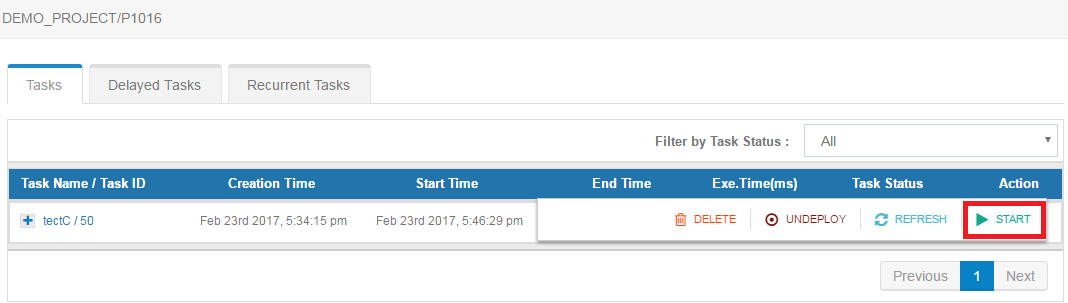
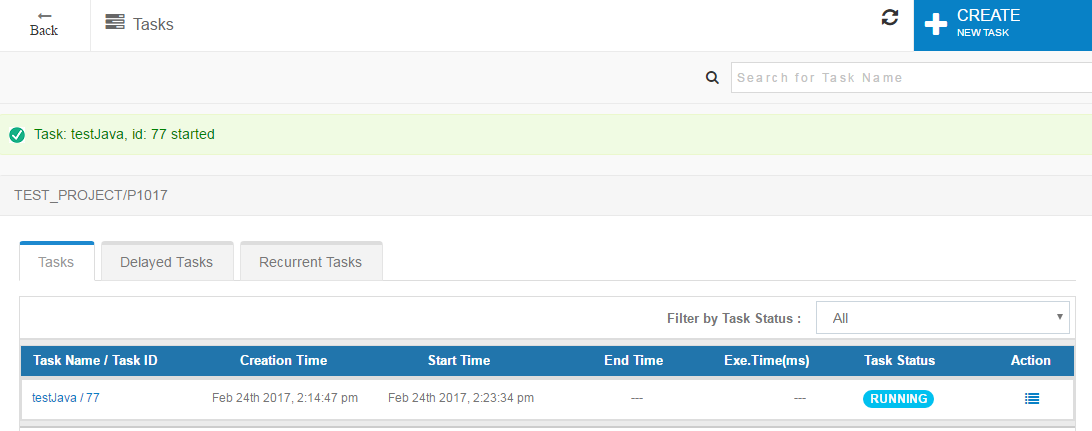
After deploying the necessary files, the START button has to be clicked to start the execution.
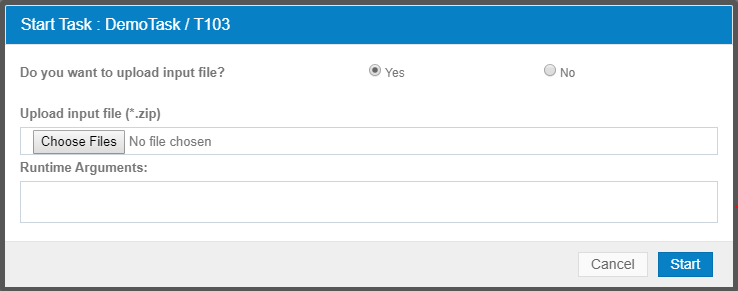
Input files (.zip file for required data files) can be optionally uploaded and runtime arguments can be updated during the task execution.
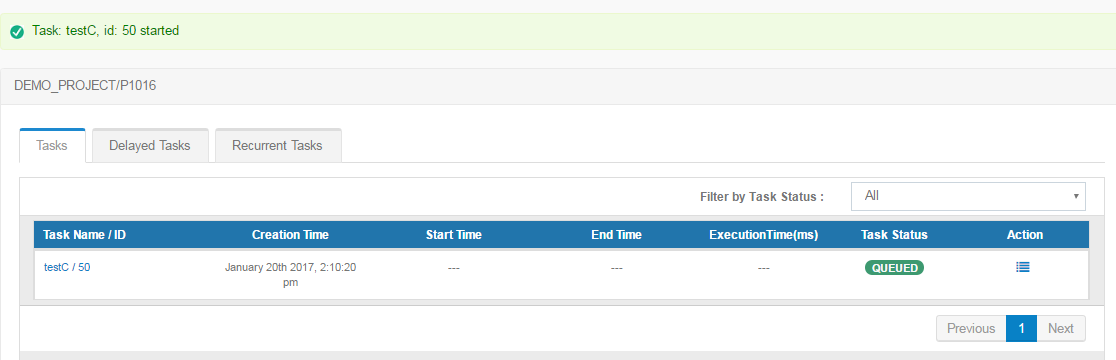
Once the execution of the program starts, the status is set to RUNNING.

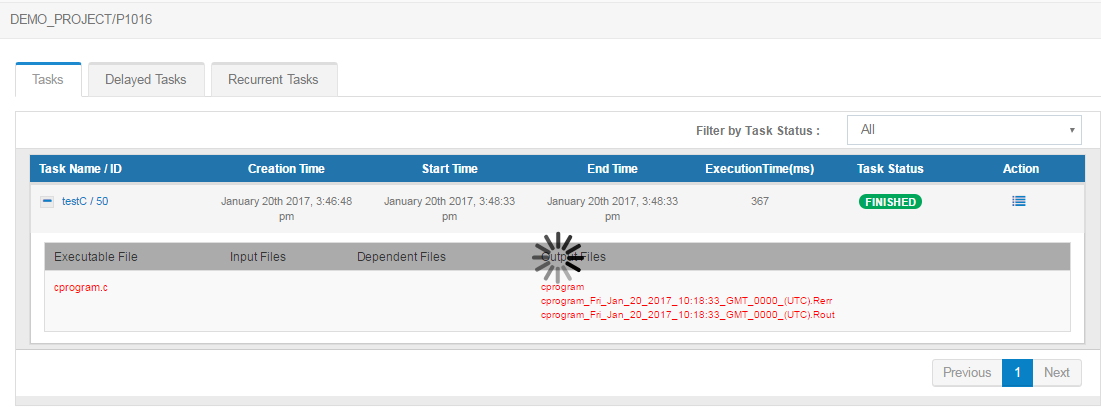
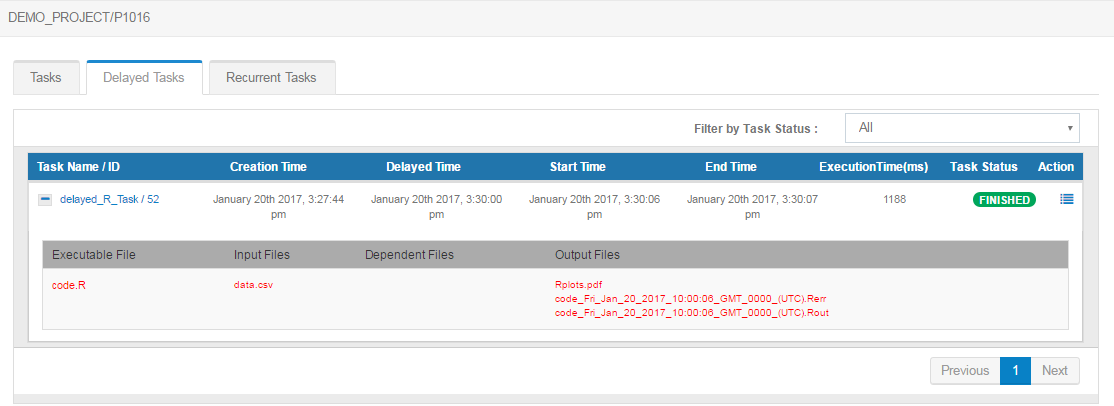
Once the execution of the program is completed, the status becomes FINISHED. The generated output files, start time, end time and the time taken to complete the execution can be viewed.

Stop Task
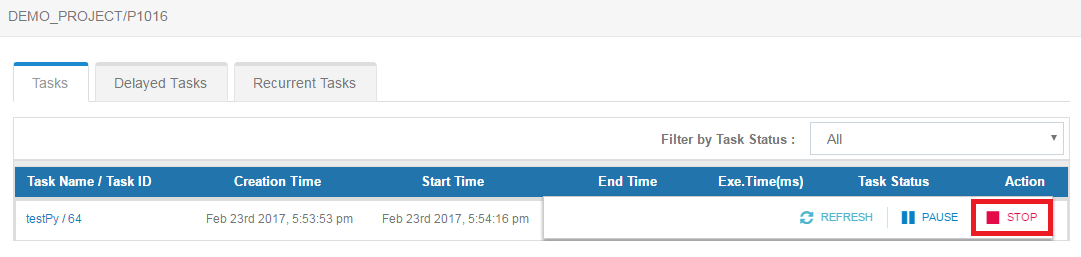
Any particular task can be stopped by clicking the STOP button.
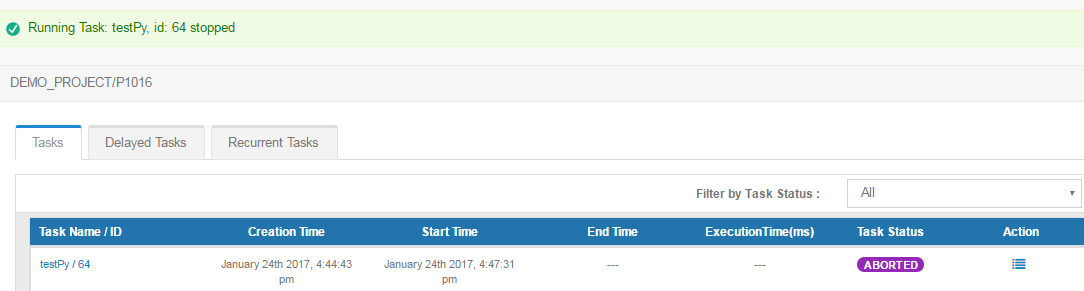
The status of the task becomes ABORTED.
Pause Task
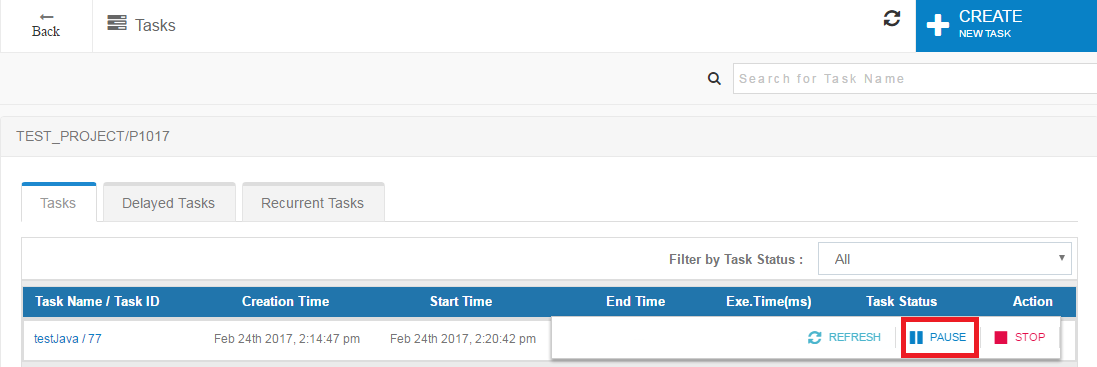
Any particular task can be paused by clicking the PAUSE button.
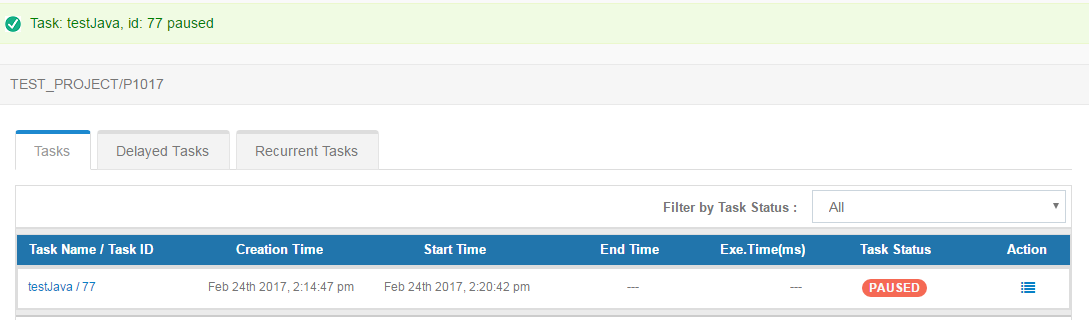
The status of the task becomes PAUSED.
Resume Task
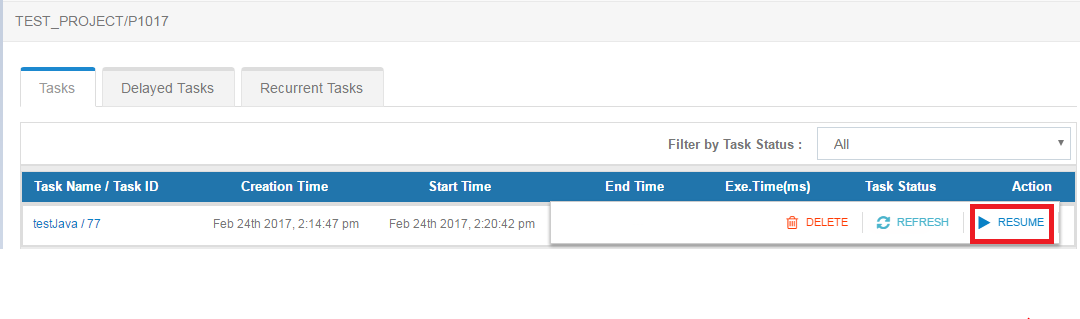
You can resume any particular task by clicking the RESUME button.
The status of the task gets updated to RUNNING/QUEUED.
Refresh a Particular Task
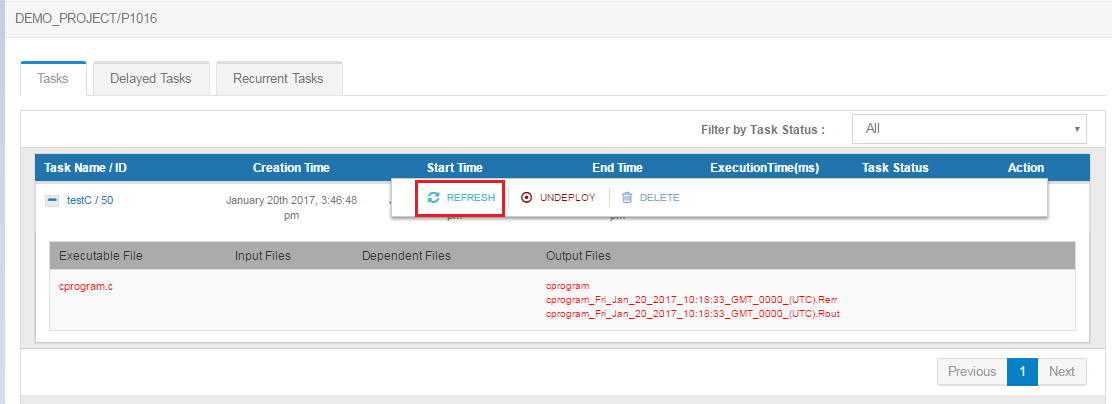
Any particular task can be refreshed by clicking the REFRESH button.
Undeploy Task
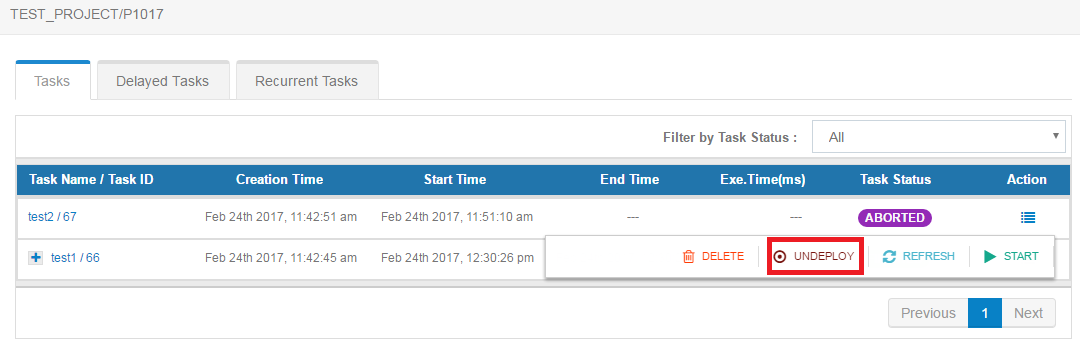
A task can be undeployed by clicking the UNDEPLOY button.
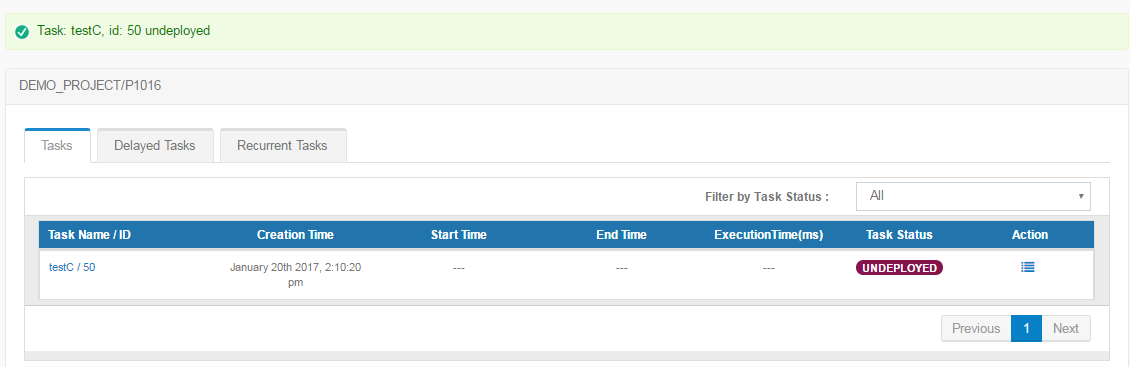
The status of the task becomes UNDEPLOYED.
Delete Task
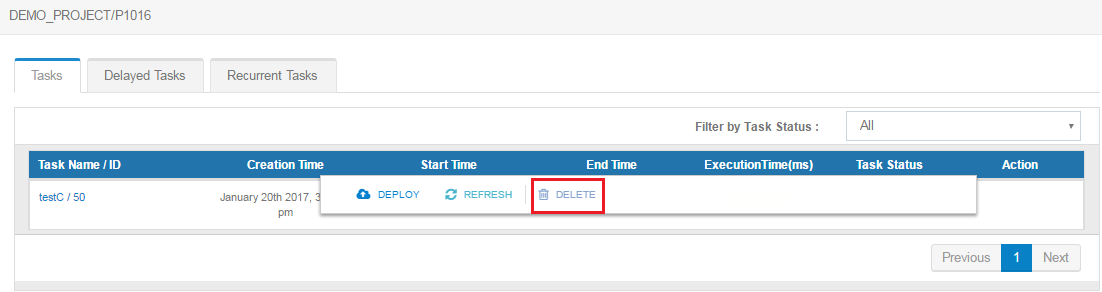
Any particular task can be deleted by clicking the DELETE button.
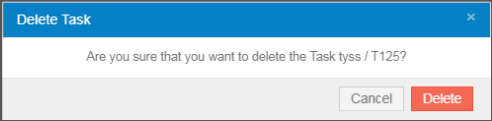
A popup appears to confirm whether one wants to proceed with the deletion.
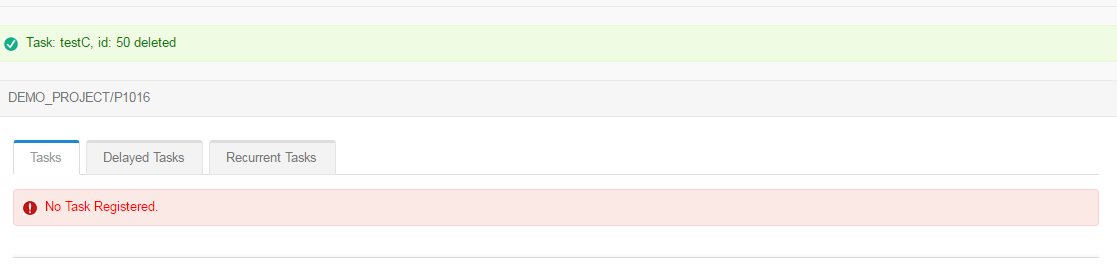
Upon confirmation the task gets deleted successfully.
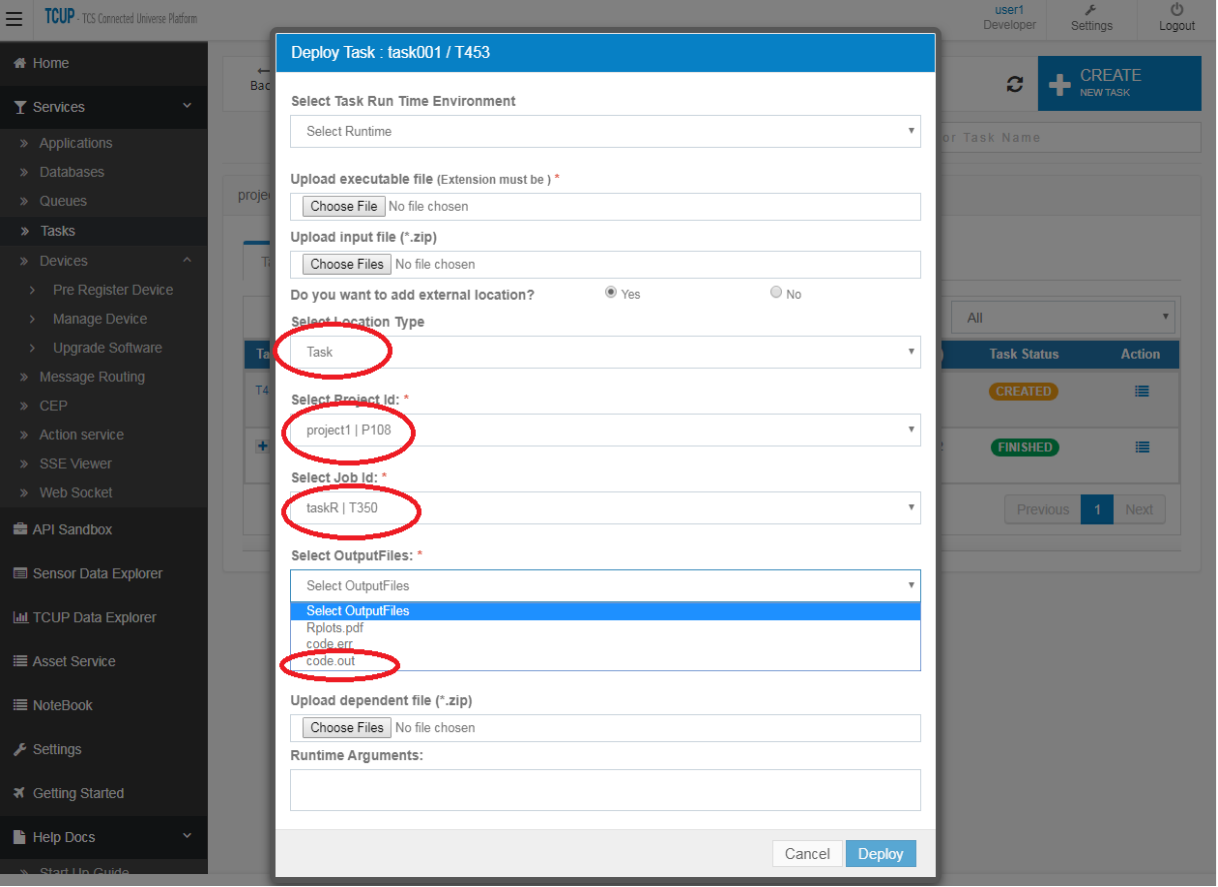
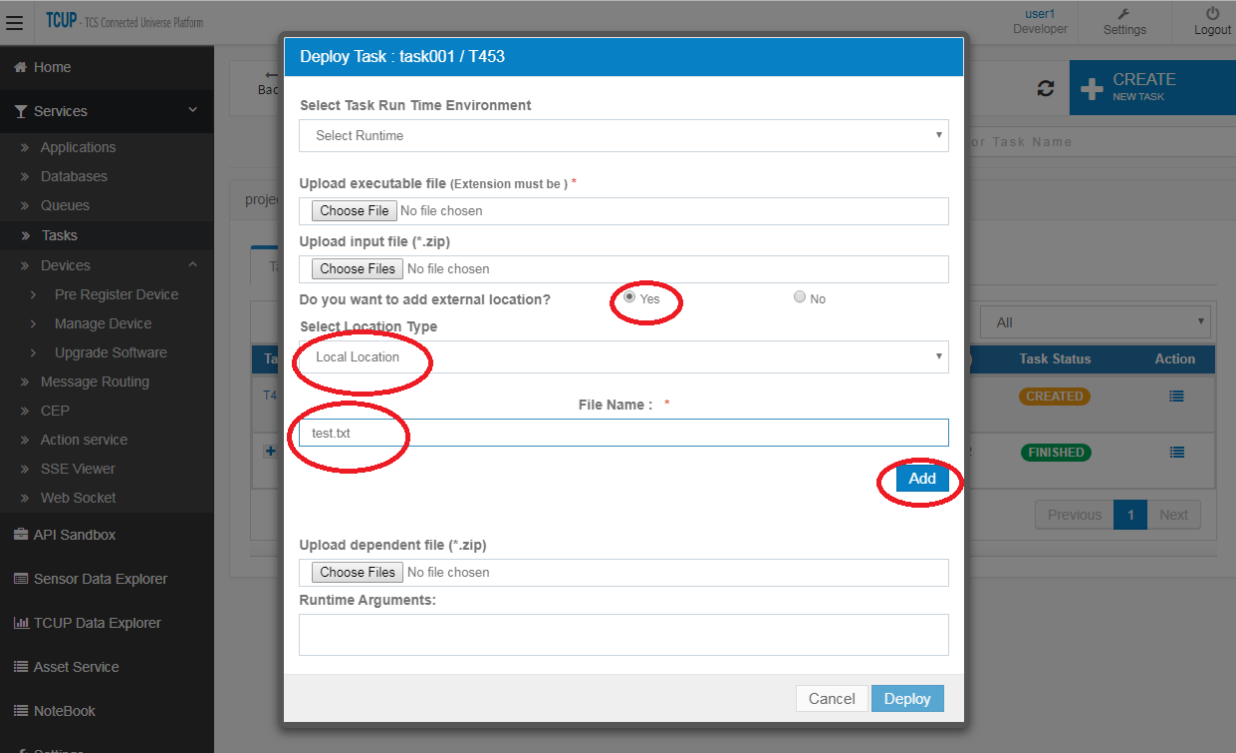
External File Linking
It is used to add inputs and outputs to pre-configured destination.
To add another task, the output file location type should be “task” and the corresponding project id, task id and output file to be mentioned as shown in the image below:
To add a local file, the location type should be “local” and file name to be mentioned as shown in the image below:
Delayed Task
Register Delayed Task
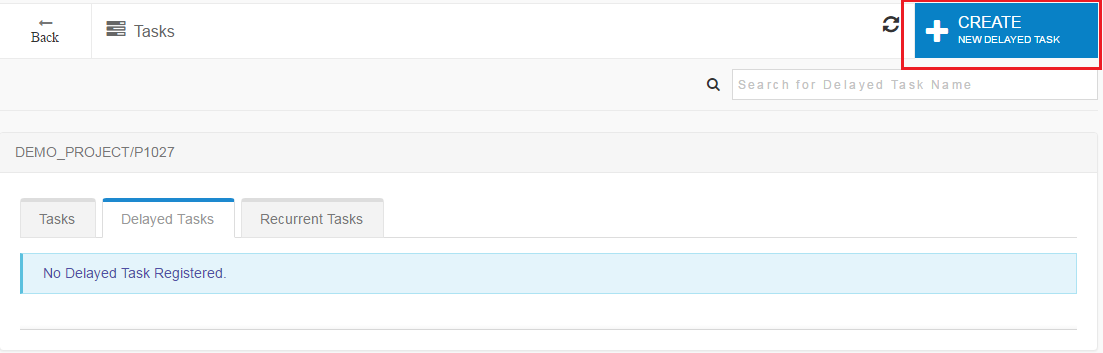
A delayed task can be registered by clicking the register button present on the top-right corner of the delayed task page as shown in the image below:
A registration form will open where the following task details have to be filled in.
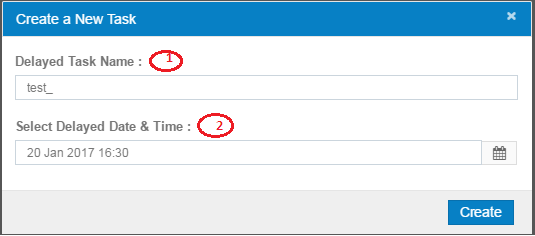
1. Delayed Task Name
This is the name of the delayed task.
2. Execution Time
This is the execution date-time of the delayed task.
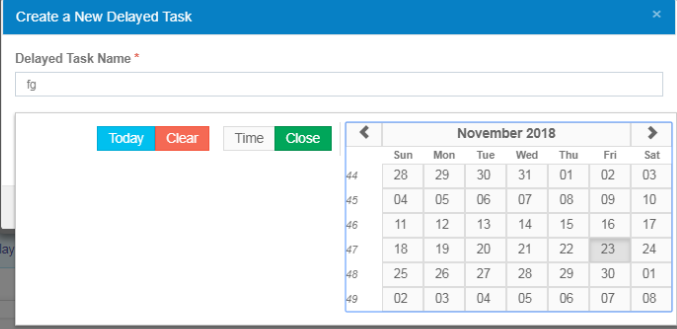
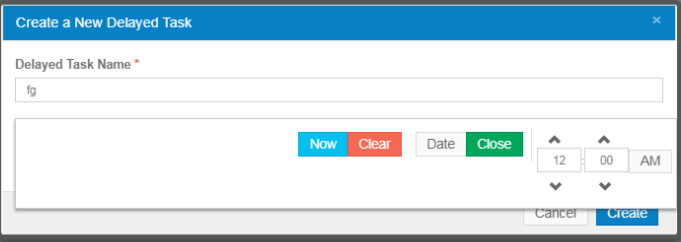
The date and time value have to be selected.
On successful registration, a unique taskId will be generated for delayed task.

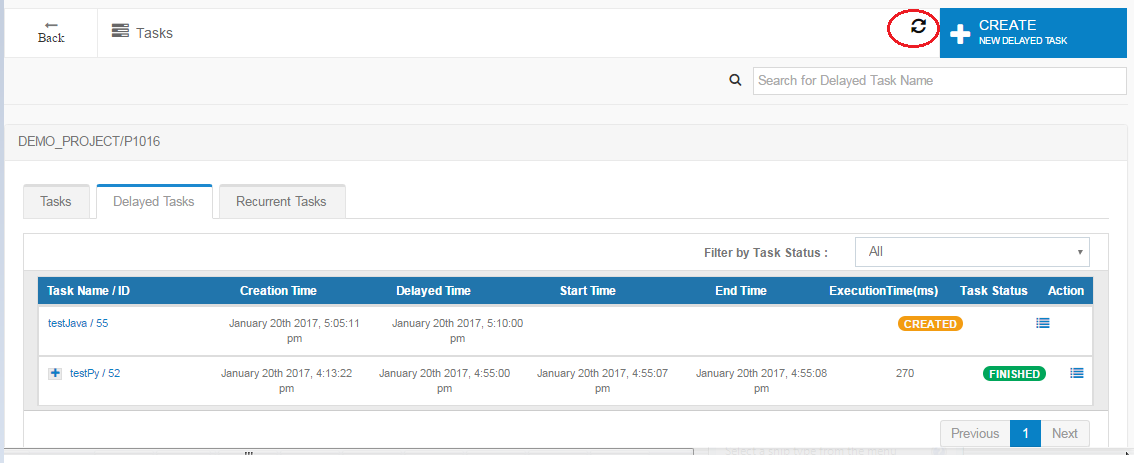
Refresh Delayed Task List
The icon shown in the image below allows to refresh the current task list that appears on the page.
Search a Delayed Task
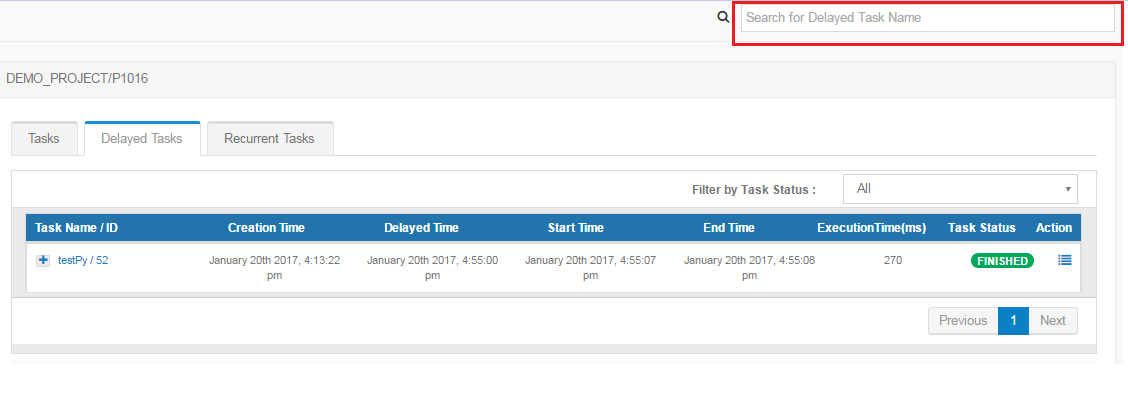
Tasks can be searched by typing the task’s name in the search bar as shown below:
Filter Delayed Task by Status
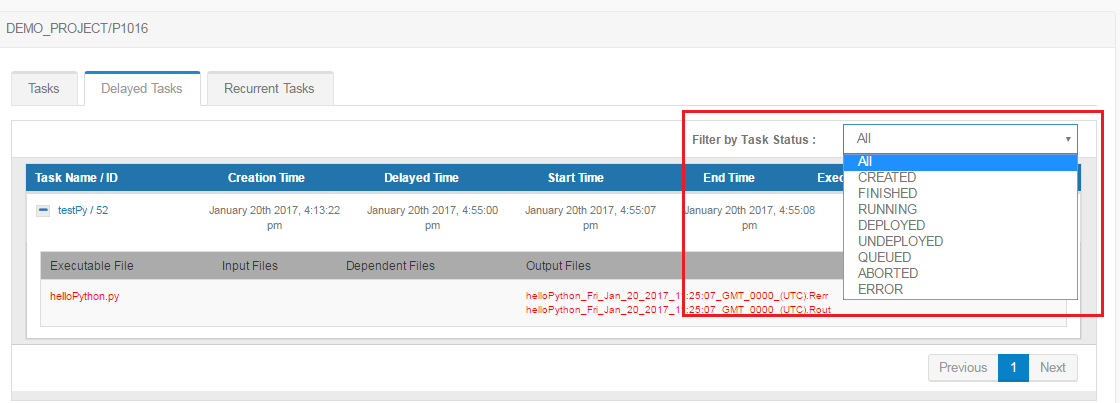
Tasks can be filtered by selecting the task status from the drop-down menu.
Deploy Delayed Task
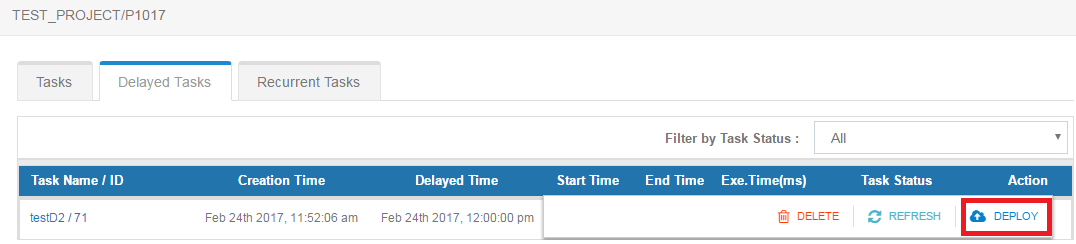
On clicking the Deploy button a form appears as described in the image below:
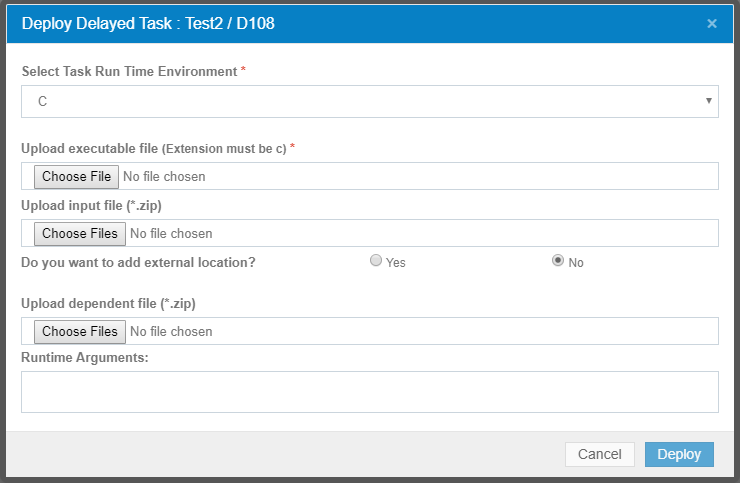
1. Select Task Run Environment
Here run-time environment has to be selected in which the task will run. Python, Java, C, C++ ,Spark and Node-js are currently the supported formats.
2. Upload Executable File
Here executable files have to be uploaded that will run according to the environment that was selected in the previous step.
3. Upload Input zip File
Here input files have to be uploaded in zip format that are required for the executable file to run.
4. Upload Dependent zip File
Here dependent files are uploaded in zip format that are required for the executable file to run.
5. Runtime Arguments
Run-time arguments can be provided if it is required in the program uploaded in the previous step.
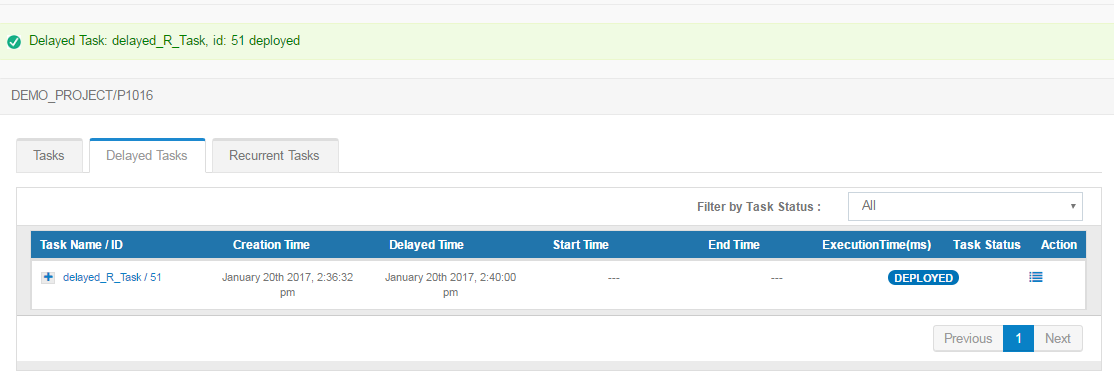
After filling up the required parameters, click the ‘deploy’ button. The task deployment confirmation will be displayed as shown in the image below:
Start Delayed Task
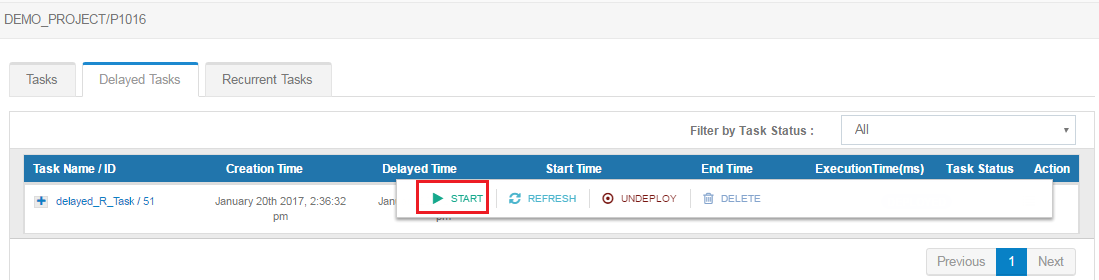
After deploying the necessary files, the execution can be started by clicking the START button.
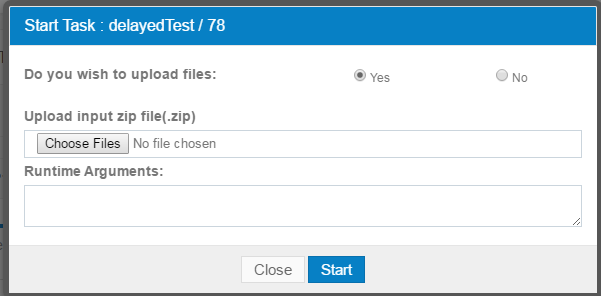
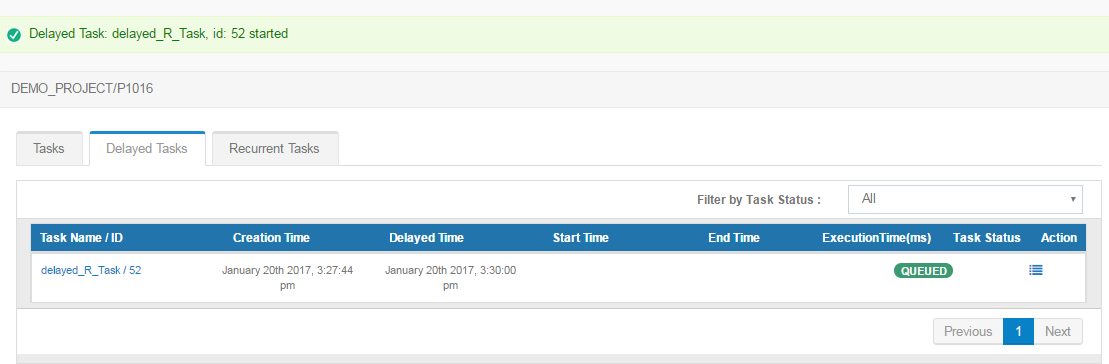
While starting the execution there is an option to upload the input files(.zip file for required data files) and/or update the runtime arguments for task execution. Now the status of the program becomes QUEUED.
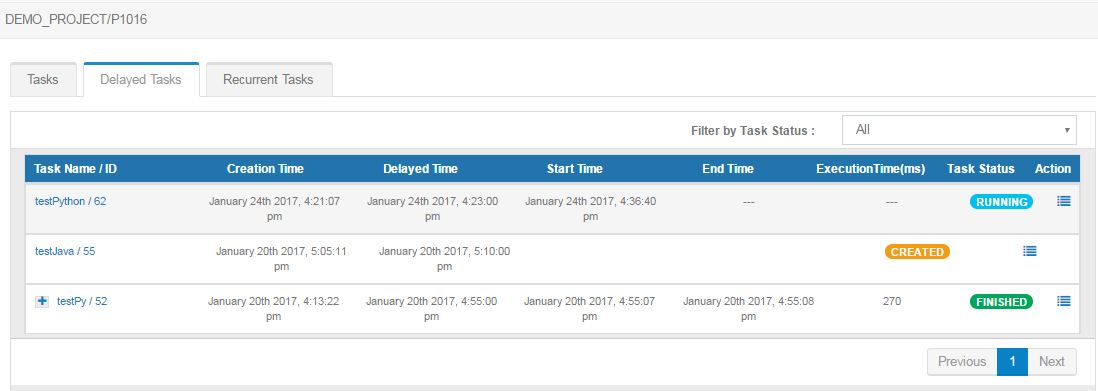
Once the execution of the program starts, the status becomes RUNNING.
Once the execution of the program is completed, the status becomes FINISHED. After the execution is completed, the generated output files, start time, end time and the time taken to complete the execution can be viewed.
Stop Delayed Task
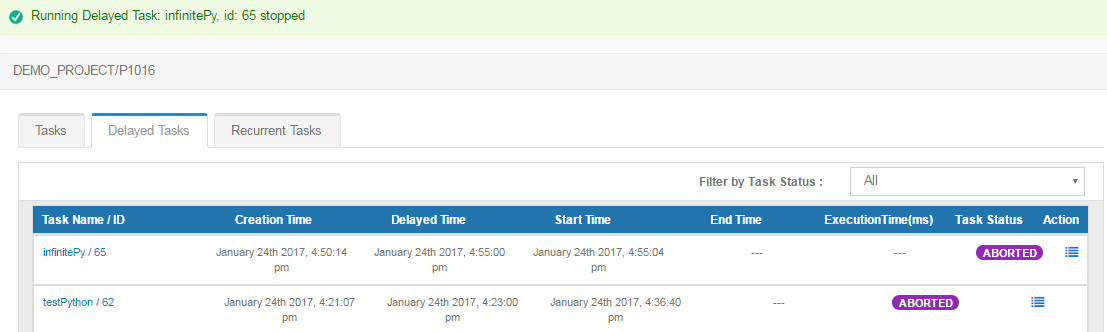
A delayed task can be stopped by clicking the STOP button.
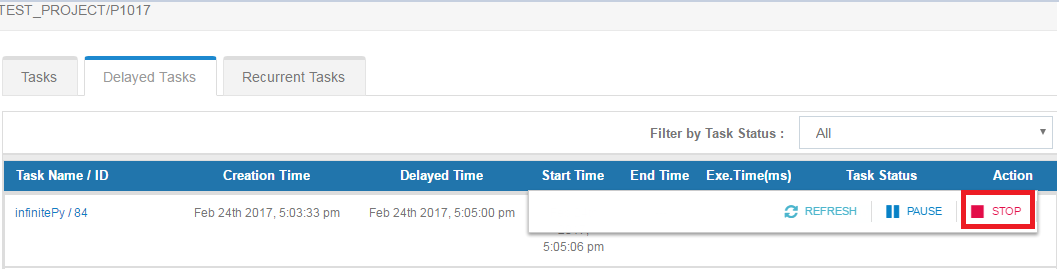
Once stopped, the status of the delayed task becomes ABORTED.
Pause Delayed Task
A delayed task can be paused by clicking the PAUSE button.
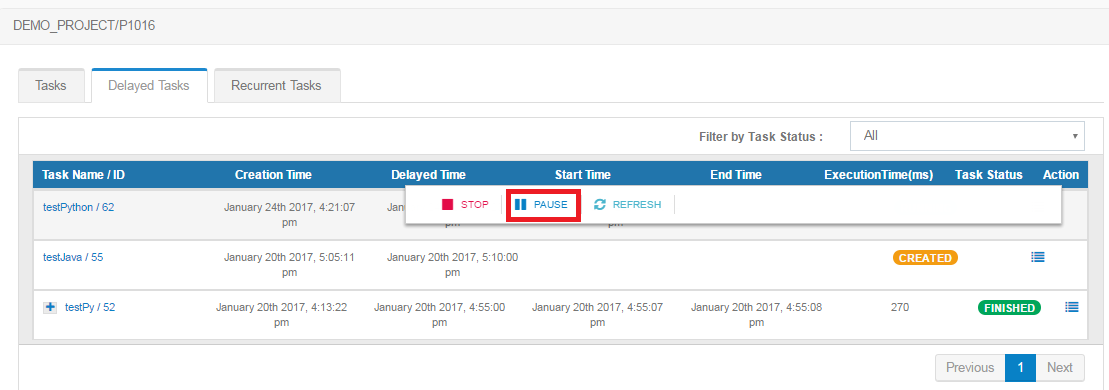
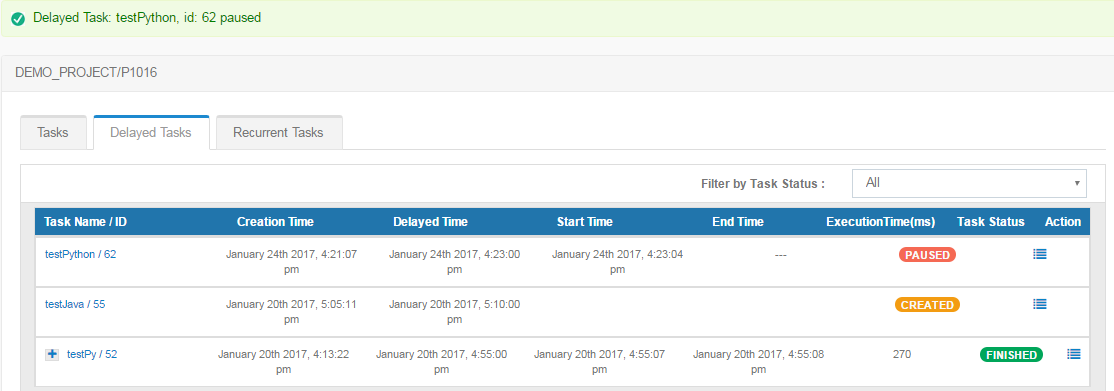
The status of the delayed task becomes PAUSED as shown below.
Resume Delayed Task
A paused or delayed task can be resumed by clicking the RESUME button.
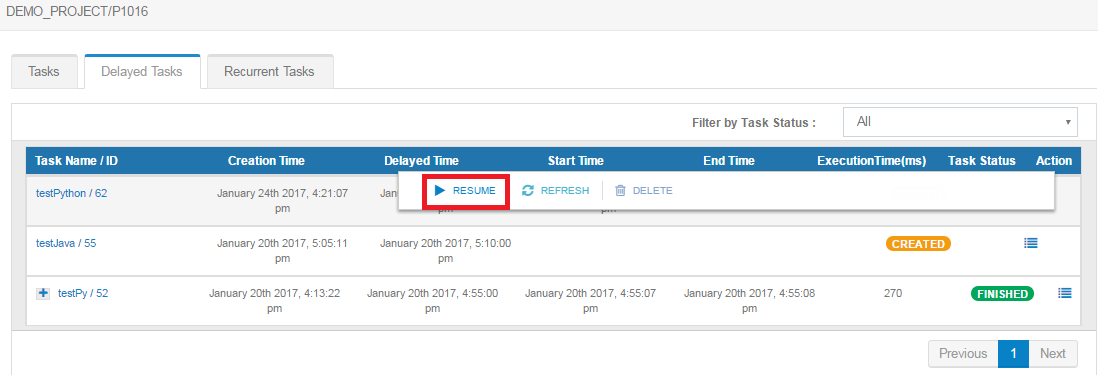
The status of the delayed task becomes RUNNING/QUEUED.
Refresh a Delayed Task
A delayed task can be refreshed by clicking the REFRESH button.
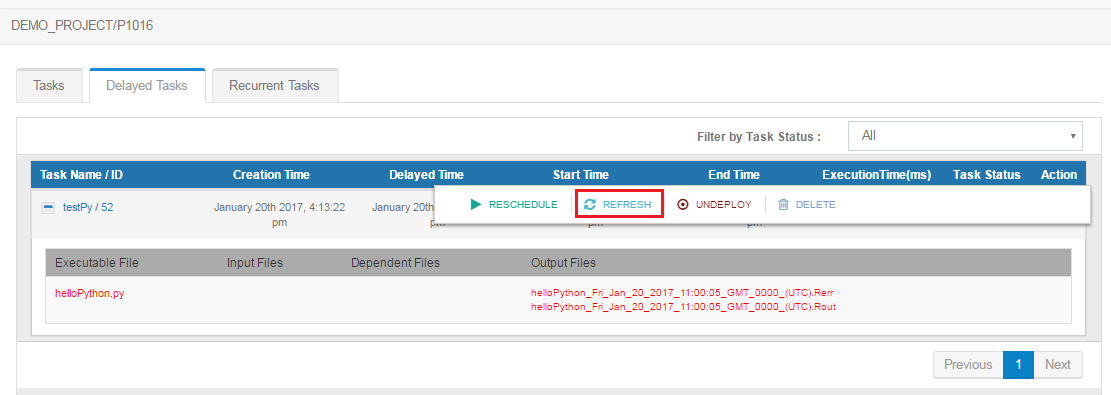
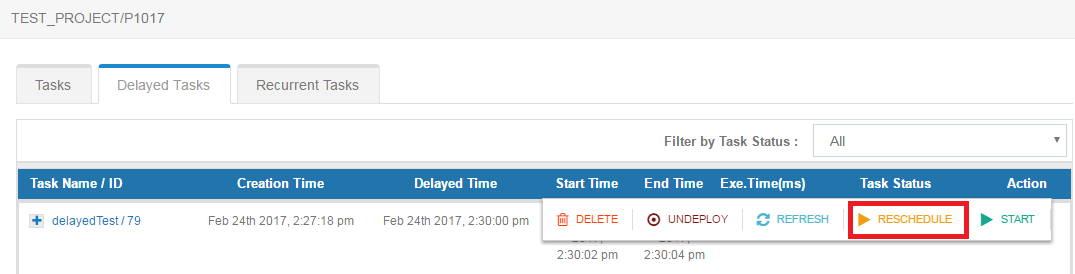
Reschedule Delayed Task
A delayed task can be rescheduled by clicking the RESCHEDULE button.
On clicking the reschedule button, the following form will appear:
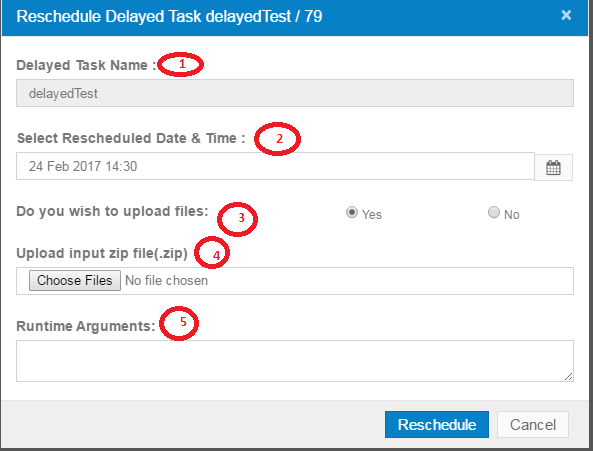
1. Task Name
This is the name of the task.
2. Execution Time
This is the execution date-time of the task.
3. Input File(Optional)
This is a .zip file containing the data file for task execution.
4. Runtime Arguments(Optional)
This is the command-line arguments for task execution.
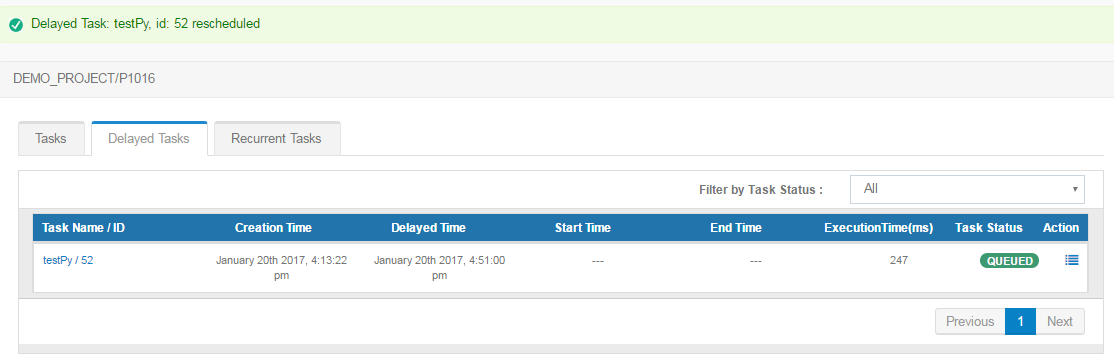
After entering the details, the ‘reschedule’ button has to be clicked on the form. The delayed task then gets rescheduled and queued successfully.
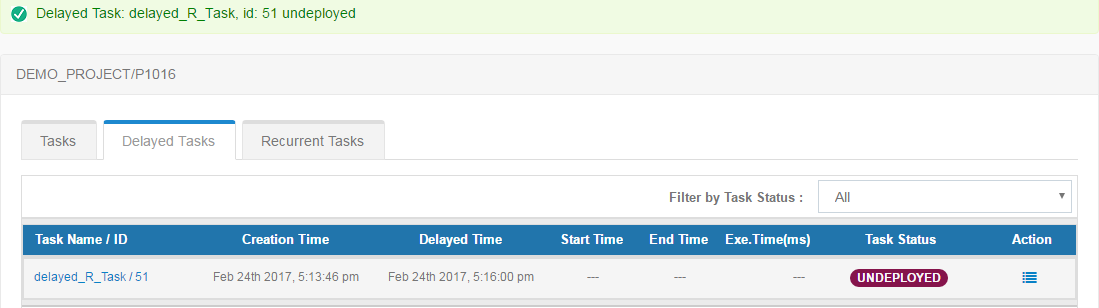
Undeploy Delayed Task
A delayed task can be undeployed by clicking the UNDEPLOY button.
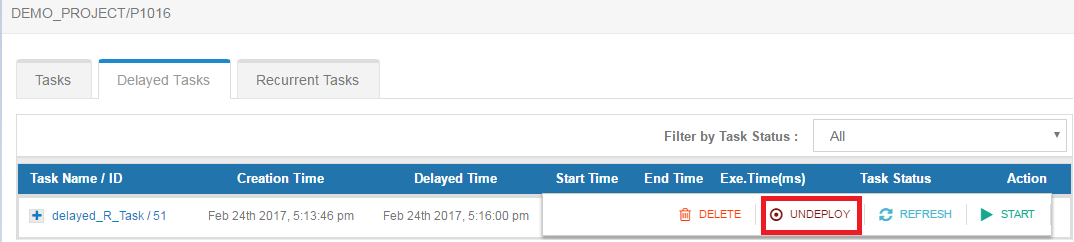
The status of the task becomes UNDEPLOYED.
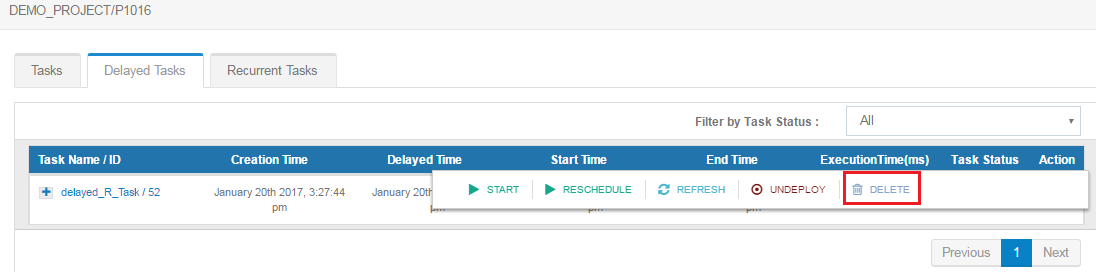
Delete Delayed Task
A delayed task can be deleted by clicking the DELETE button.
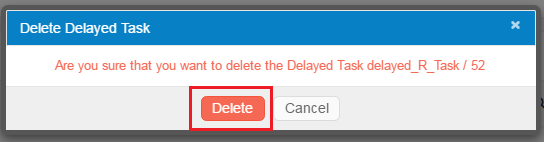
A popup appears asking to confirm whether to proceed with the deletion.
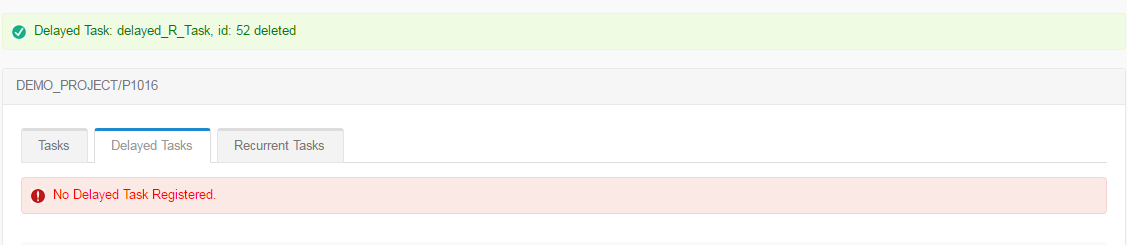
Upon confirming the delayed task gets deleted successfully.
Note
Delayed Task is for one time execution.
Delayed date-time must be greater than the system date-time.
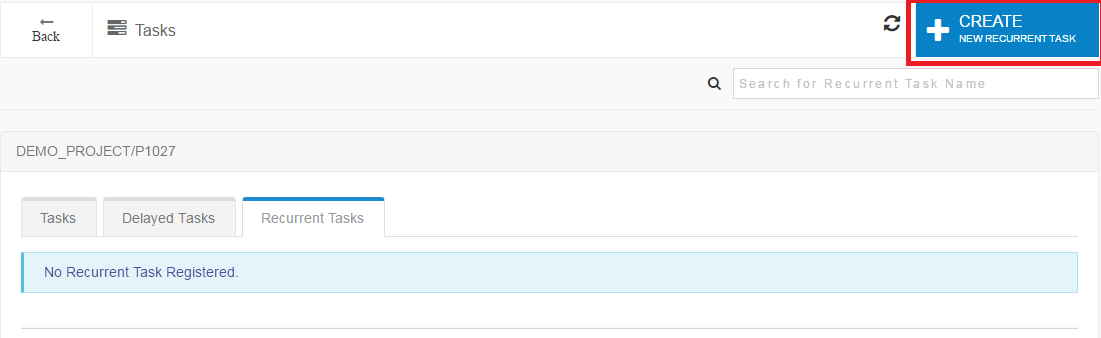
Recurrent Task
Register Recurrent Task
A recurrent task can be registered by clicking the Create New Recurrent Task button present on the top-right corner of recurrent task page.
This will open the registration form where the required details needs to be filled up.
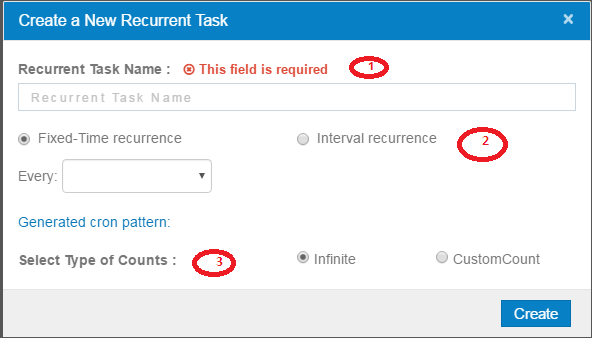
1. Recurrent Task Name
This is the name of the task.
2. Cron Pattern
This allows to select the cron pattern of the recurrent task.
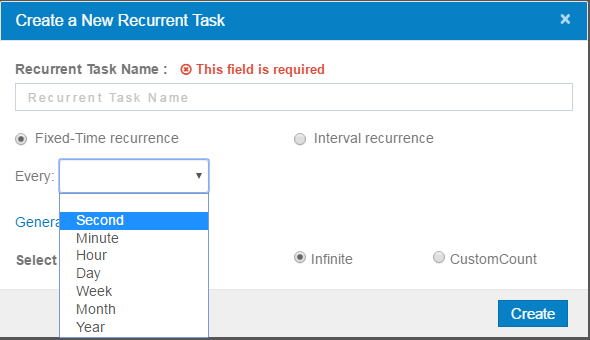
The recurrent interval of the task can be as follows:
a. Second
b. Minute
c. Hour
d. Day
e. Week
f. Month
g. Year
Two types of cron pattern can be set:
1. Tasks can be run at a fixed time of a day,every day, or on a fixed day and time of a week for every week, etc. For example, 7:30 AM every day, or 12:00 PM Monday, Tuesday, Wednesday every week, etc. 2. Tasks can be run at a regular interval of seconds, or minutes. For example, every 15 minutes or every 30 seconds, etc.
3. Counts
This allows to set the recurrence limit. If not set, i.e. if it is set at 0, the task will schedule and run infinitely.
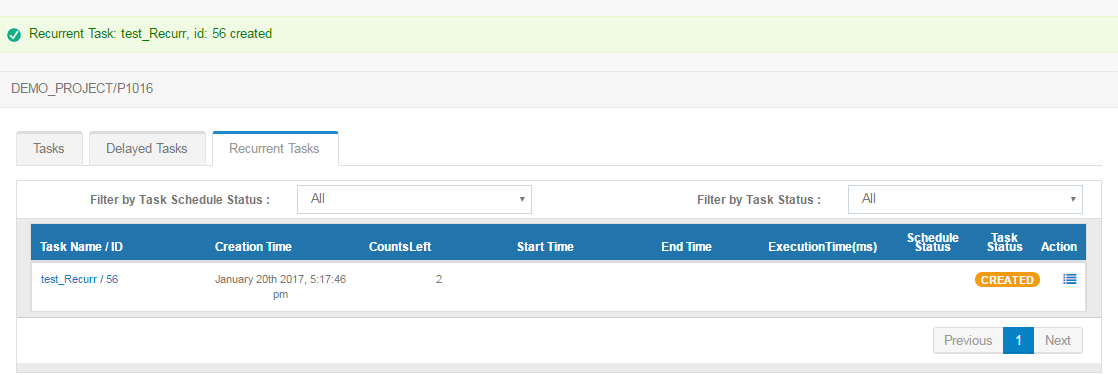
On successful registration, a unique taskId will be generated for the recurrent task.
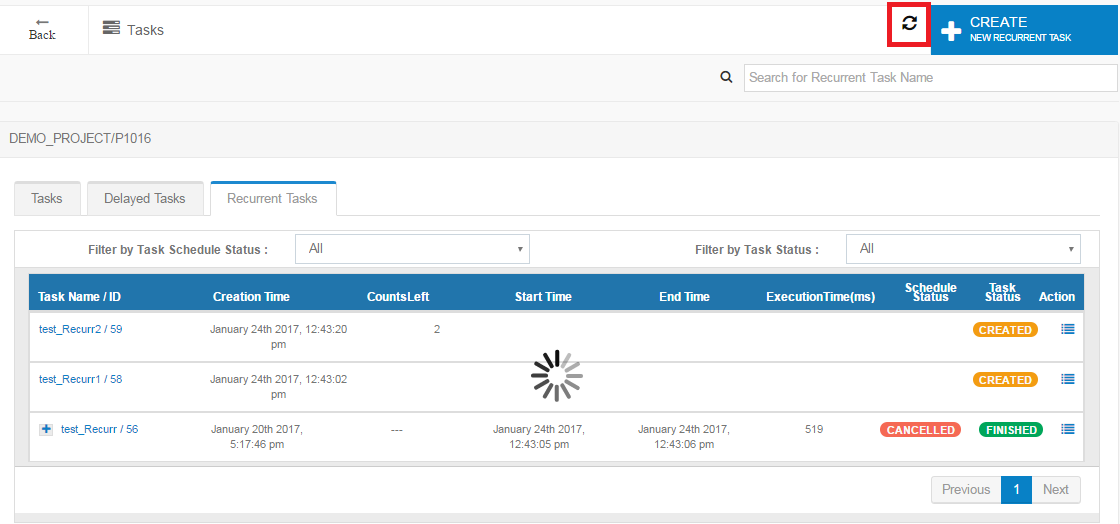
Refresh Recurrent Task List
The above button allows to refresh the current recurrent task list that appears on the page.
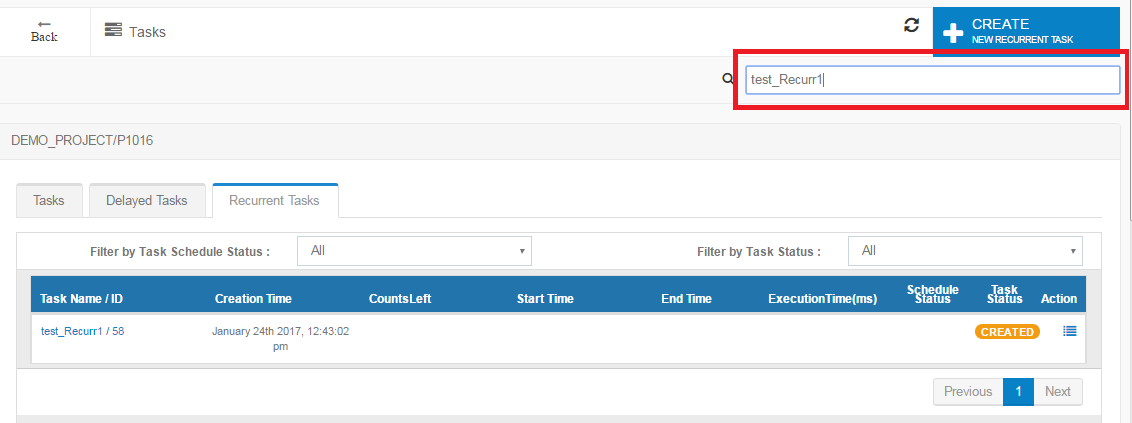
Search a Recurrent Task
Recurrent tasks can be searched by just typing the recurrent task name.
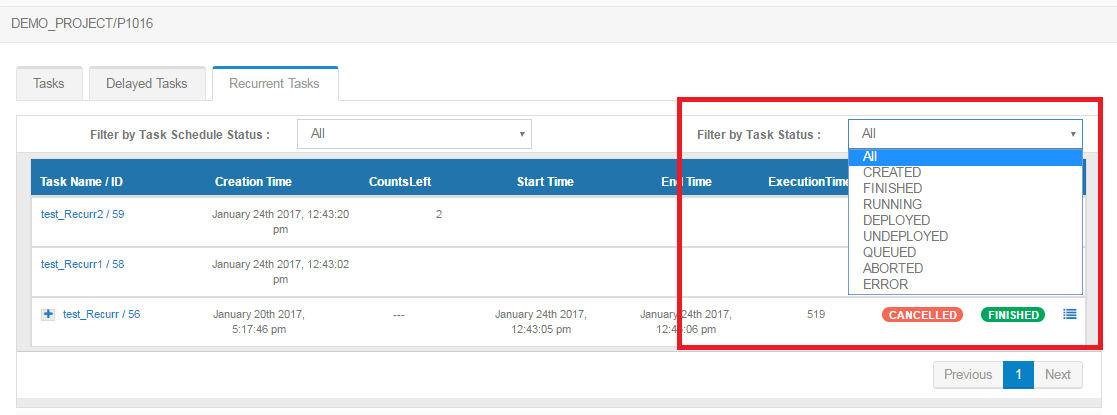
Filter Recurrent Task by Status
Recurrent tasks can be filtered by status by selecting the task status from the drop-down menu.
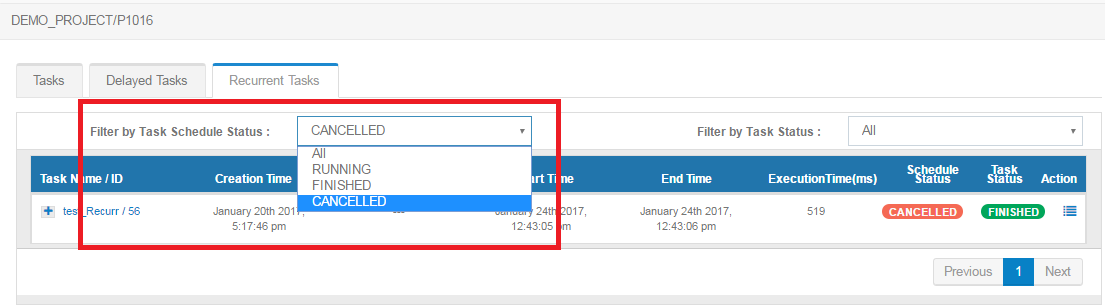
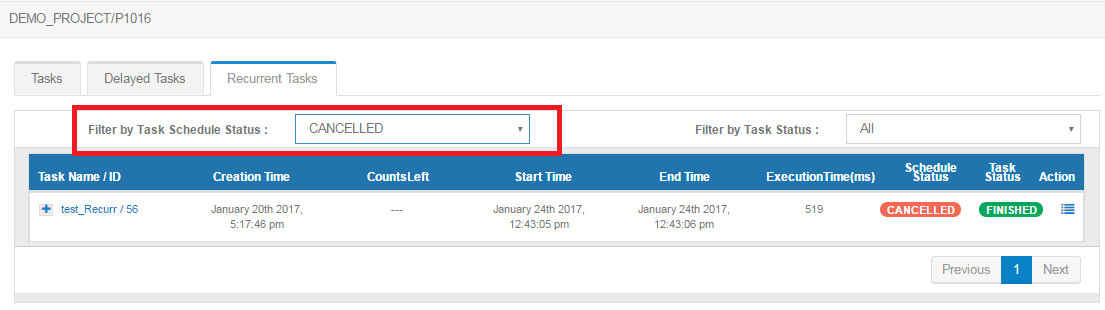
Filter Recurrent Task by Schedule Status
Recurrent task can also be filtered by schedule status by selecting the schedule status from the drop-down menu as shown below:
Deploy Recurrent Task
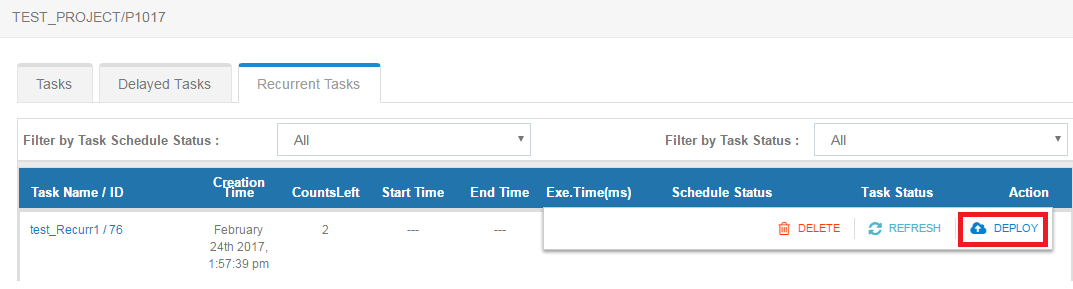
On clicking the deploy button the form described below appears:
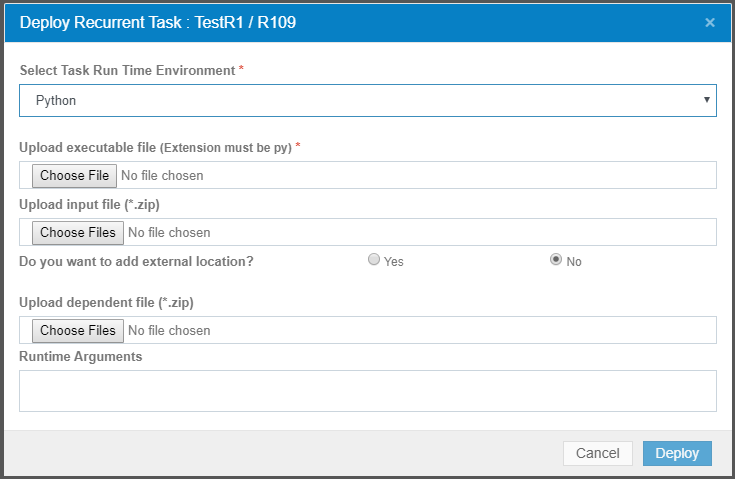
1. Select Task Run Environment
Here the run-time environment has to be selected in which the task will run. Python, Java, C, C++, Spark and Node-js are currently the supported formats.
2. Upload Executable File
Here the executable files have to be uploaded that will run according to the environment that was selected in the previous step.
3. Upload Input zip file
Here the input files have to be uploaded in zip format that are required for the executable file to run.
4. Upload dependent zip file
Here the dependent files have to be uploaded in zip format that are required for the executable file to run.
5. Runtime Arguments
Run-time arguments can be provided if it is required in the program that is uploaded.
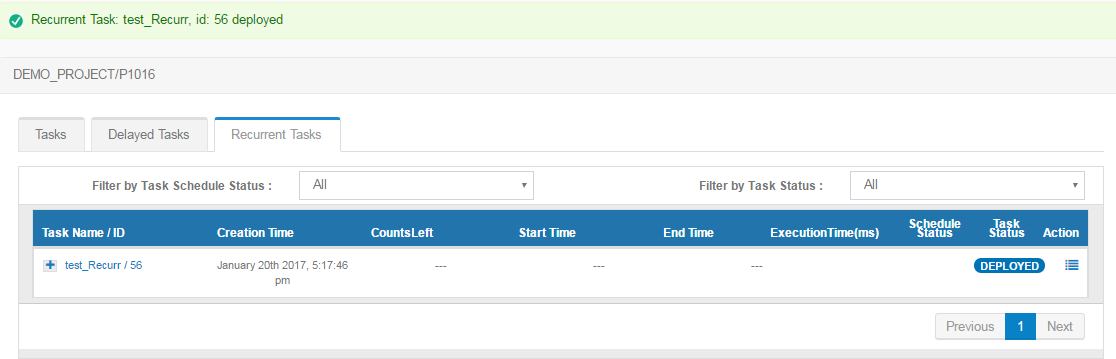
After filling up the required parameter, the ‘deploy’ button has to be clicked. The confirmation that the task is deployed will be visible as shown in the image below.
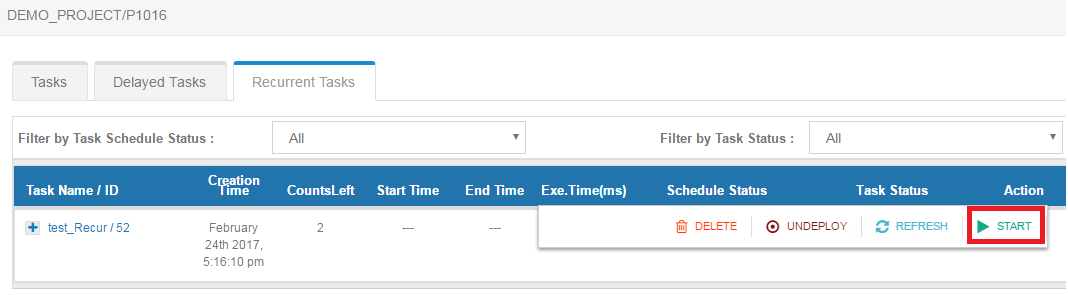
Start Recurrent Task
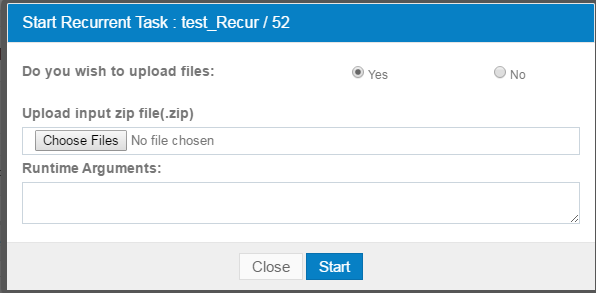
After the task is deployed, the execution can be started by clicking the START button.
Data files(.zip file) can be optionally uploaded and/or runtime arguments can be updated for the task execution.
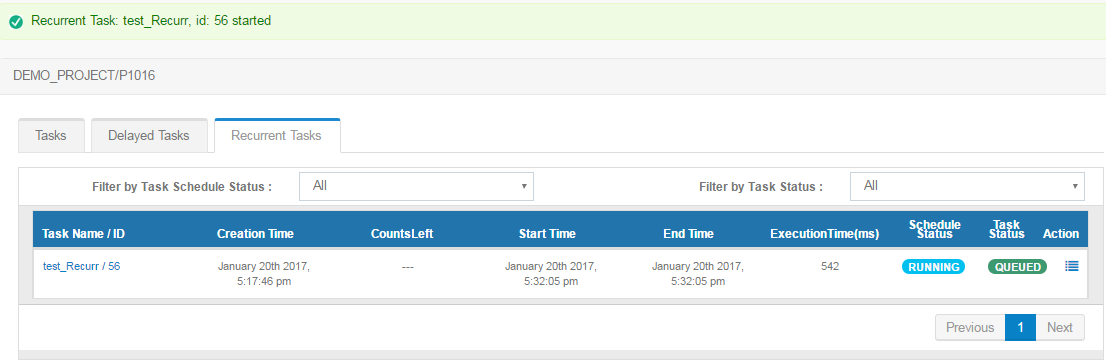
After clicking the start button the schedule status becomes RUNNING.
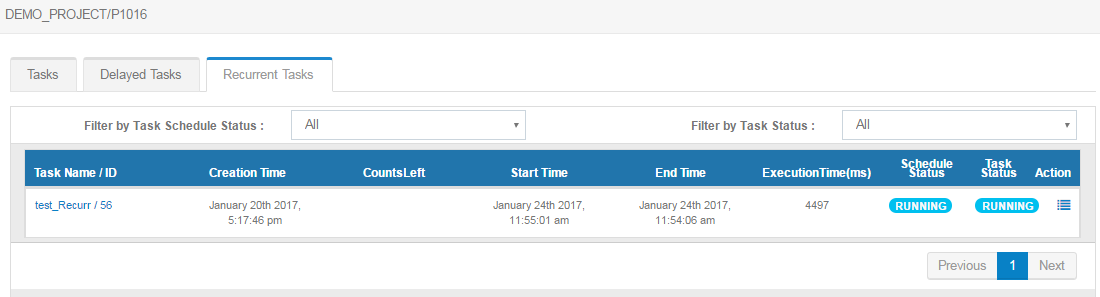
At given regular intervals, the program execution will start and the status will be set to RUNNING.
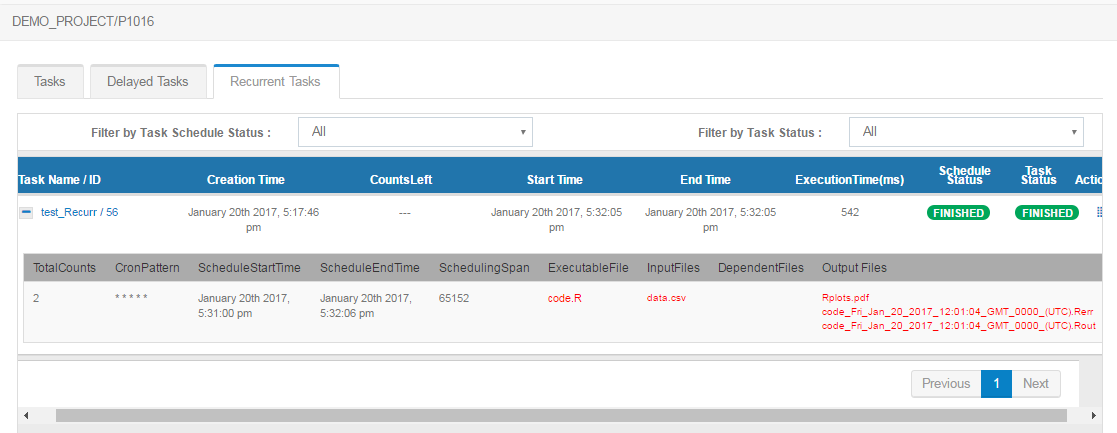
Once the execution of a particular recurrence is completed, the status is set to FINISHED. After the execution is complete, the output files generated,start time,end time and the time taken to complete the execution can be viewed.
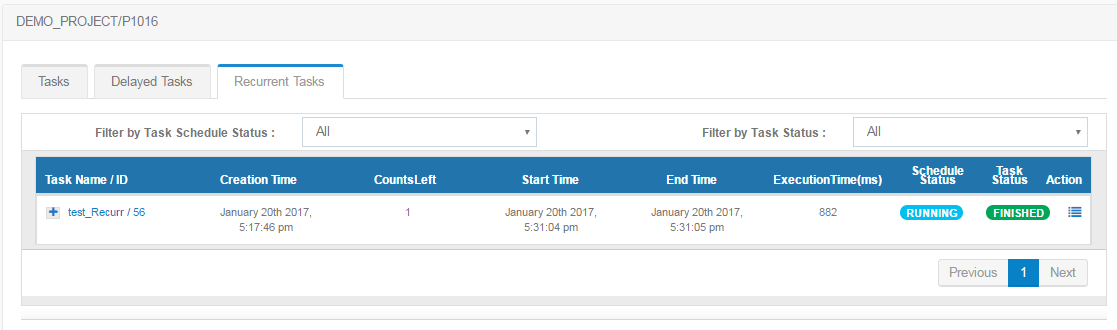
If a limited recurrence count is set, the schedule status is set to FINISHED after the count of execution is reached.
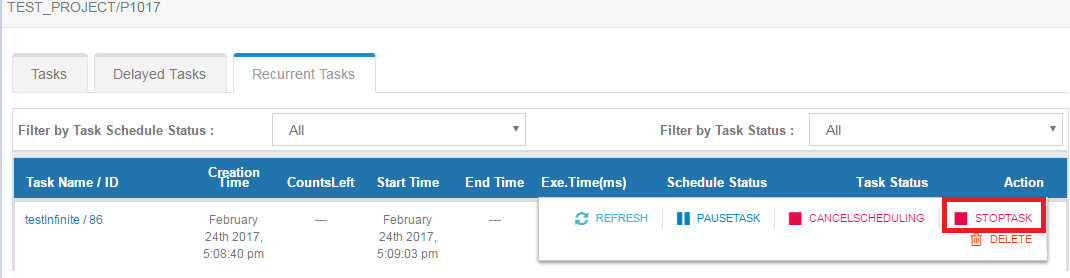
Stop Recurrent Task
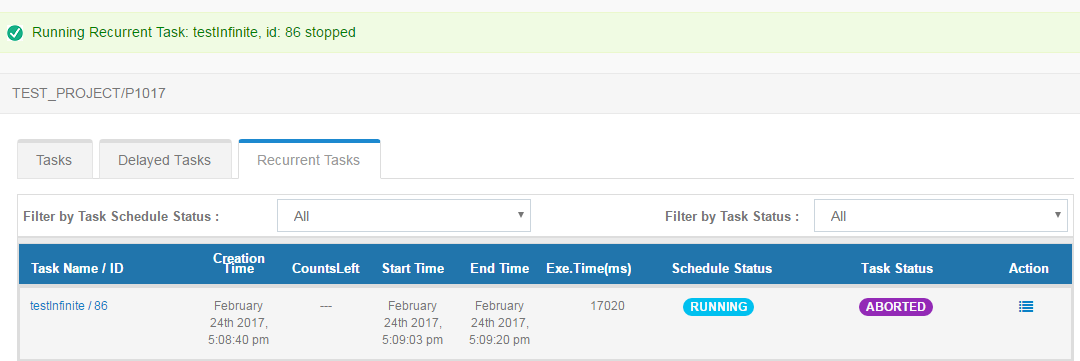
A particular recurrent task can be stopped by clicking the STOPTASK button.
Once stopped the status of the recurrent task becomes ABORTED.
Pause Recurrent Task
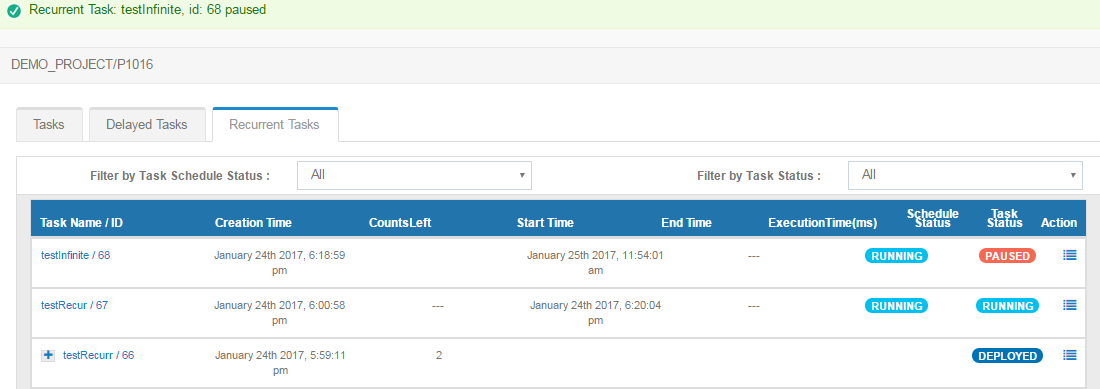
Particular recurrent task can be paused by clicking the PAUSETASK button.
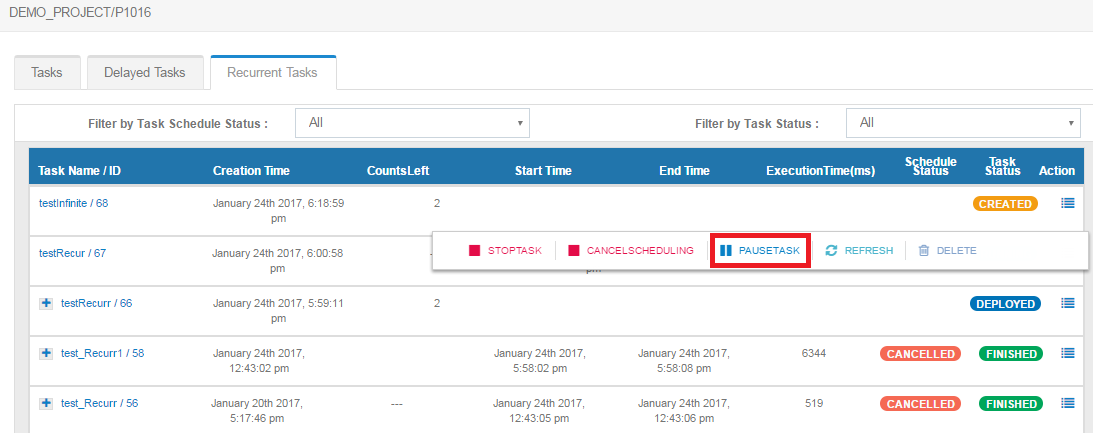
The status of the recurrent task becomes PAUSED.
Resume Recurrent Task
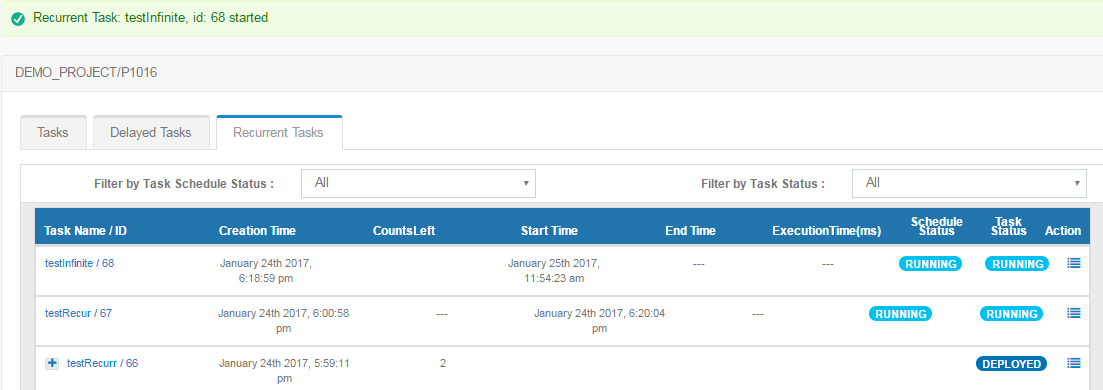
Any particular recurrent task can be resumed by clicking the RESUMETASK button.
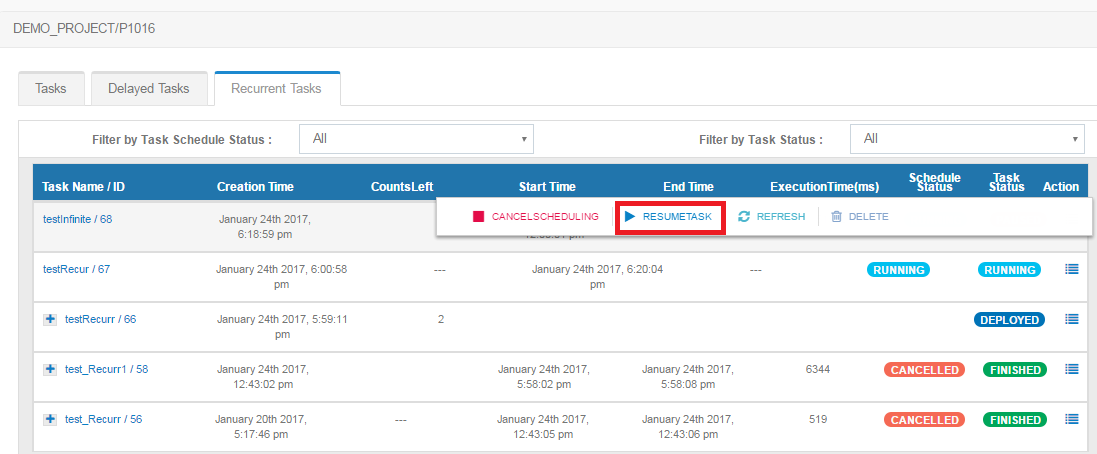
The status of the recurrent task becomes RUNNING/QUEUED.
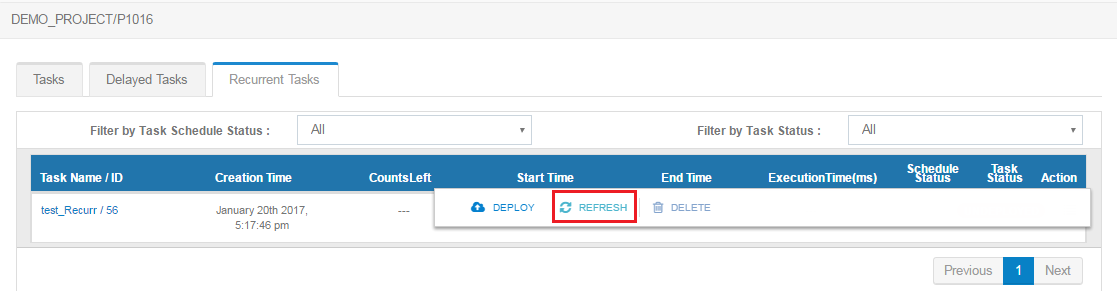
Refresh a Recurrent Task
Any particular task can be refreshed by clicking the REFRESH button.
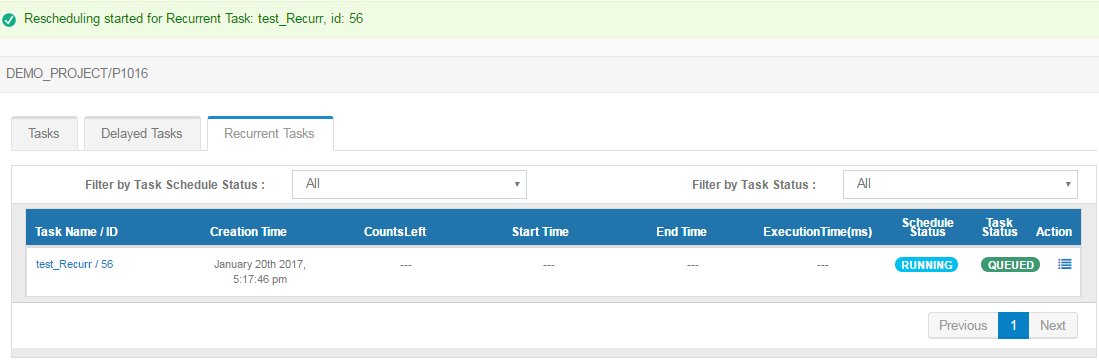
Reschedule Recurrent Task
Any particular recurrent task can be rescheduled by clicking the RESCHEDULE button.

On clicking the reschedule button the following form appears.
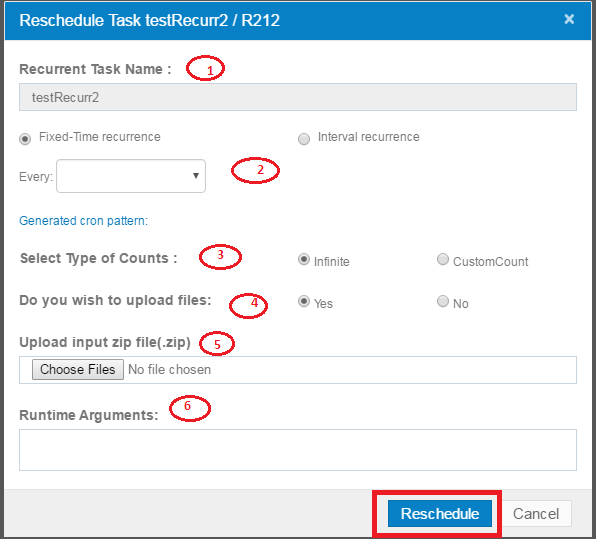
1. Recurrent Task Name
This is the name of the task.
2. Cron Pattern
This allows to select the cron pattern of the recurrent task.
3. Counts
This allows to set the recurrence limit. If not set, i.e. set at 0, the task will schedule and run infinitely.
4. Select Upload of Input File
This gives the option of selecting whether or not to upload the input files.
5. Input Files(Optional)
This is the input files(.zip file) required for execution.
6. Runtime Arguments(Optional)
This is the runtime arguments for task execution.
The recurrent interval of the task can be as follows:
a. Second
b. Minute
c. Hour
d. Day
e. Week
f. Month
g. Year
Two types of cron pattern can be set:
1. Tasks can be run at a fixed time of a day,every day, or a fixed day and time of a week for every week, etc. For example, 7:30 AM every day, or 12:00 PM Monday, Tuesday, Wednesday every week, etc.
2. Task can be run at a regular interval of seconds or minutes. For example, every 15 minutes or every 30 seconds etc.
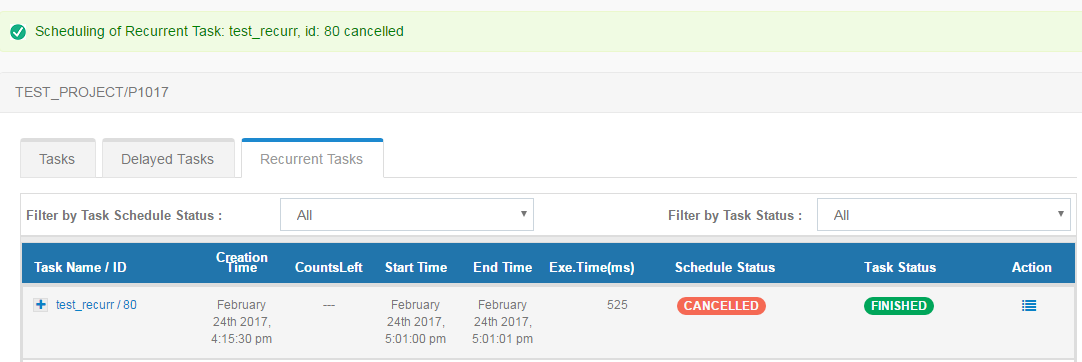
Cancel Recurrent Task
Scheduling for a particular recurrent Task can be cancelled by clicking the CANCEL button.
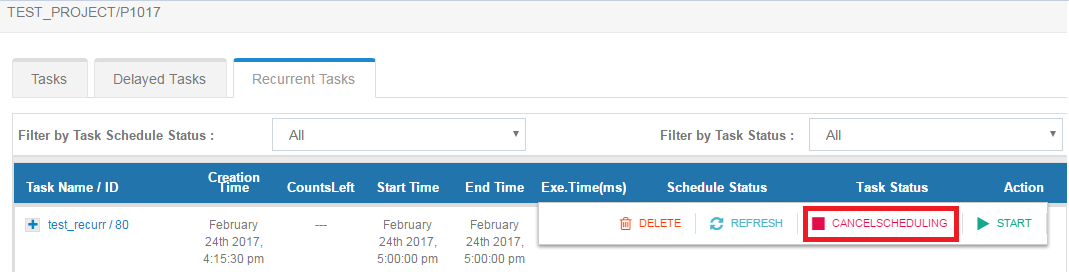
The scheduling status is updated to CANCELLED.
Undeploy Recurrent Task
A particular recurrent task can be undeployed by clicking the UNDEPLOY button.
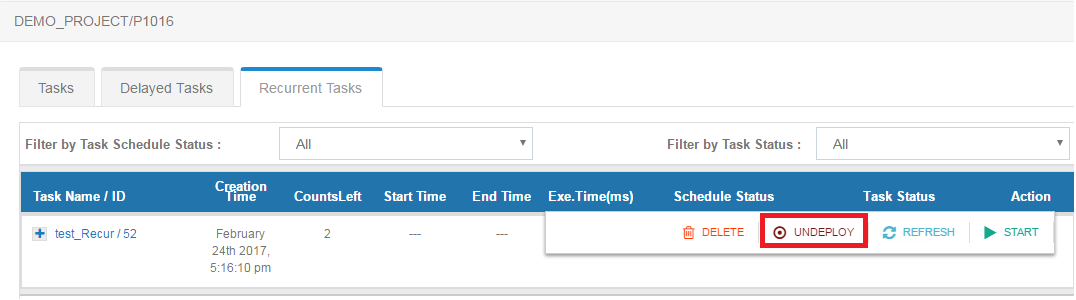
The status of the recurrent task becomes UNDEPLOYED.
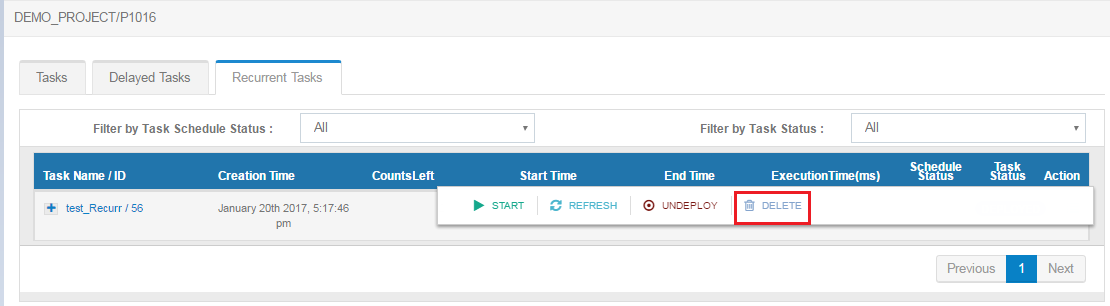
Delete Recurrent Task
Any particular recurrent task can be deleted clicking the DELETE button.
A popup appears to confirm whether to proceed with the deletion.
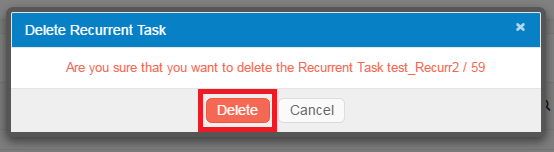
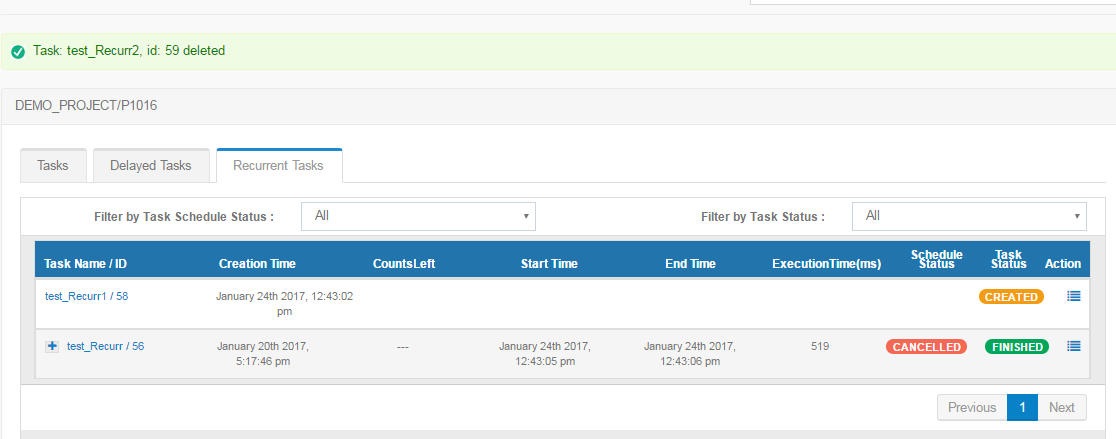
Upon confirmation the recurrent task gets deleted successfully.
Note
Running a long running job in a recurrent task must be avoided.
Rescheduling of a recurrent task can only be done when the scheduling status is FINISHED/CANCELLED and the job state is ABORTED/FINISHED