Device Management(DM)
Introduction
TCUP Device Management (DM) service makes it easy to connect a wide range of devices and gateways to the cloud and allows to remotely monitor and manage them. A device being managed by TCUP Device Management service runs a special software called the Device Management agent. Each device needs to be registered with the server. Once the device is registered and the agent runs in the device, users are able to monitor and operate the devices using TCUP Device Management portal or API calls.
Different phases of DM service are as follows:
Generating the pre shared key
Running device agent in device, registering the device and executing read or write operations on device.
Purpose of the Document
The following section describes how to work with DM service using the portal. After going through this document a user will be able to connect a laptop (device) to TCUP DM service and update its parameters.
Any device can be connected in a similar fashion.
Reference Document
Please refer to the following documents to get more details on Device Management service:
To understand the basic concepts of device management please refer to the Concept guide.
For API details please refer to the API guide.
DM Service Using Portal
Accessing the Portal
To navigate to Device Management service portal after signing in TCUP, click on Services on the left hand side menu and then click on Devices. After clicking on Devices there would be three sub headings as shown in the image below.
Manage Device
Upgrade Software
Running Device Agent, Register and Communication with Device
The next step is to run the device agent in the device. The device agents are either JAVA based or C based . Please refer to Device Agent for agent details. The device agent will register the device in TCUP Device Management Service and then start communicating between the device and TCUP.
For windows based laptop, the agent should start from command prompt. The parameter for running the agent are EPN ID of the device, IP of the TCUP instance and API key of the TCUP user. It also requires the ID and pre shared key as received from the pre registration step.
The following is the example of the command where device agent is a jar file named sampledmagent.jar.
java -jar sampledmagent.jar -ep "<end id>" -ip "<TCUP IP>" -key "<x-api-key>" -id "<device id>" -psk "<device psk key>" -p <port number like 5684>
The following is the screen shot of the command when run from the command prompt:
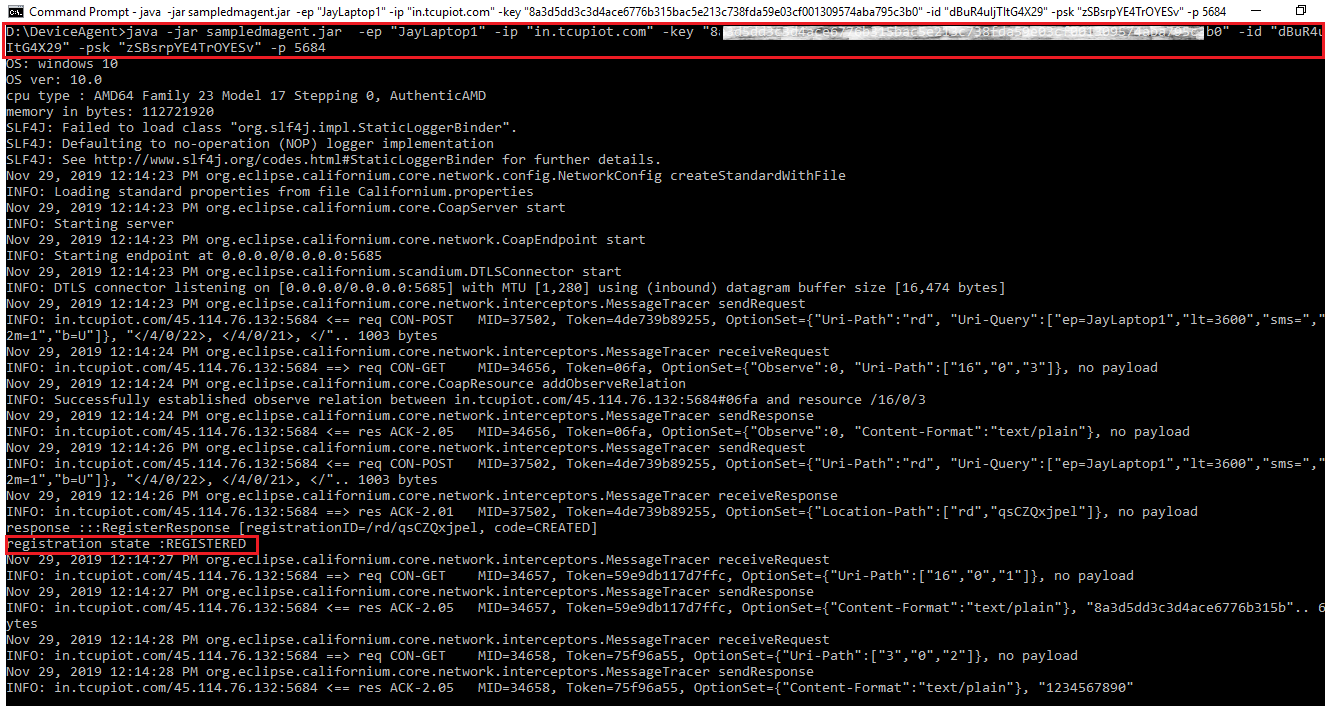
Once the agent starts running and successfully registers the device, the connection status becomes
Device Connectedand the status becomes green in the portal as shown in the image below: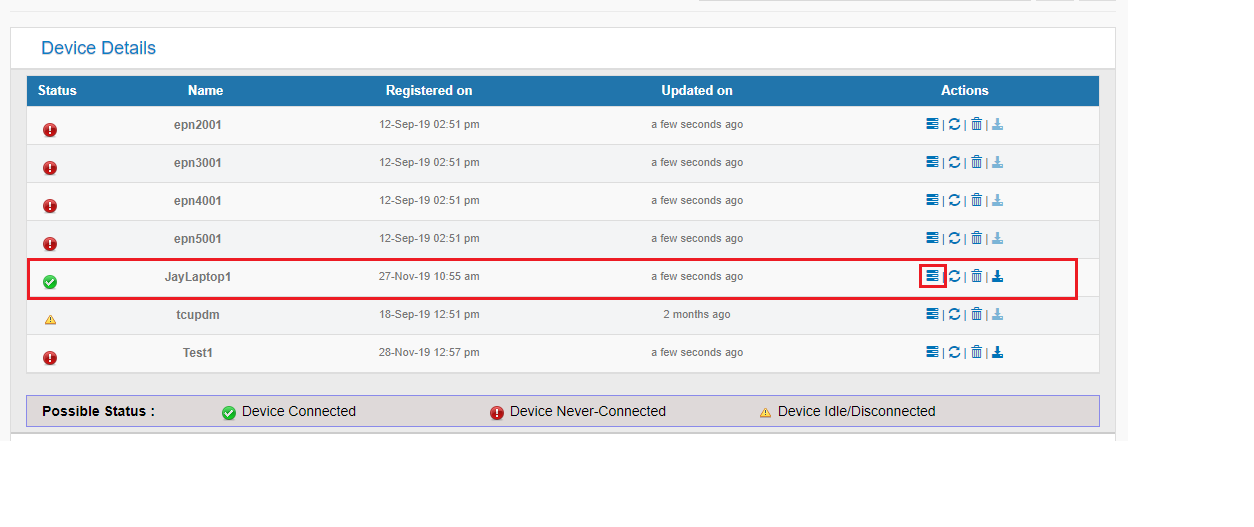
By clicking the view button, the users will be able to find the different resource values of the device under different tabs.
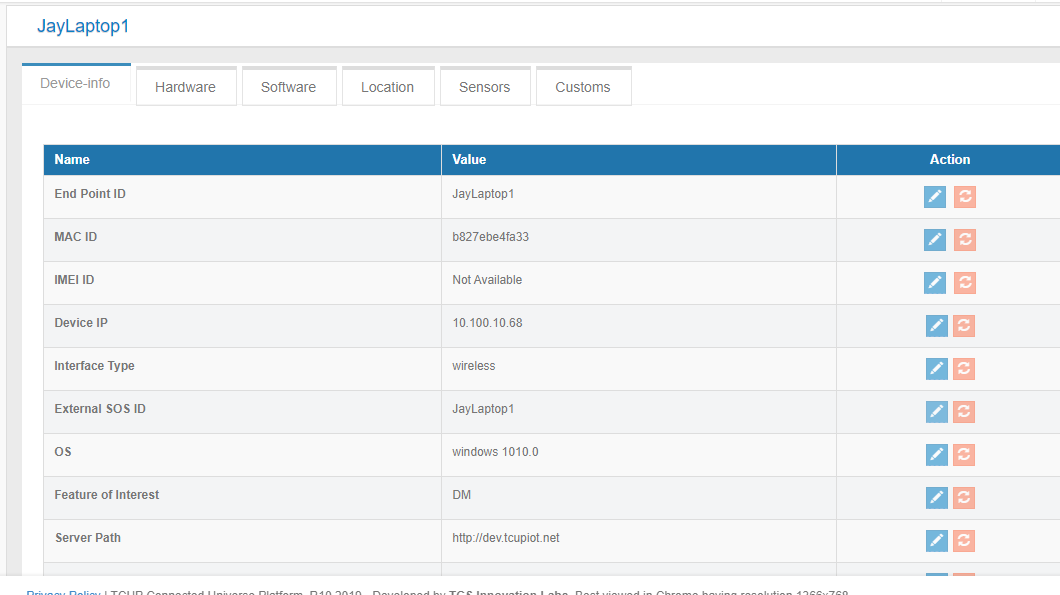
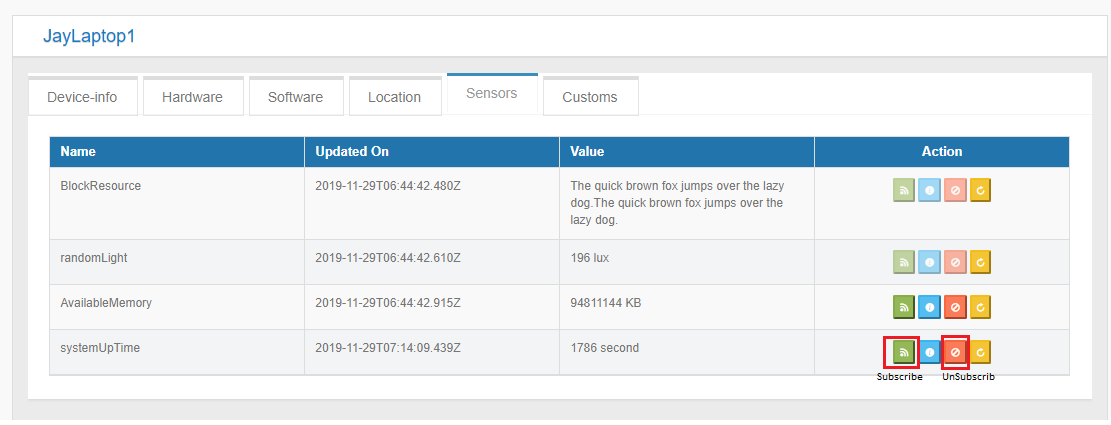
The information under the sensors tab are dynamic information. As shown in the screen below for the laptop the resource ‘systemUpTime’ and ‘AvailableMemory’ are active and they are reflecting the current values. There is also the option to subscribe or unsubscribe a sensor and check the status of the sensor.
Update Resource Value of Device Using Command
The resource value of the device can be updated using command API. From ACl API in swagger, the users will be able to find the resource value which can be updated.
Note
Only the resources for which updatable is true can be updated using the command.
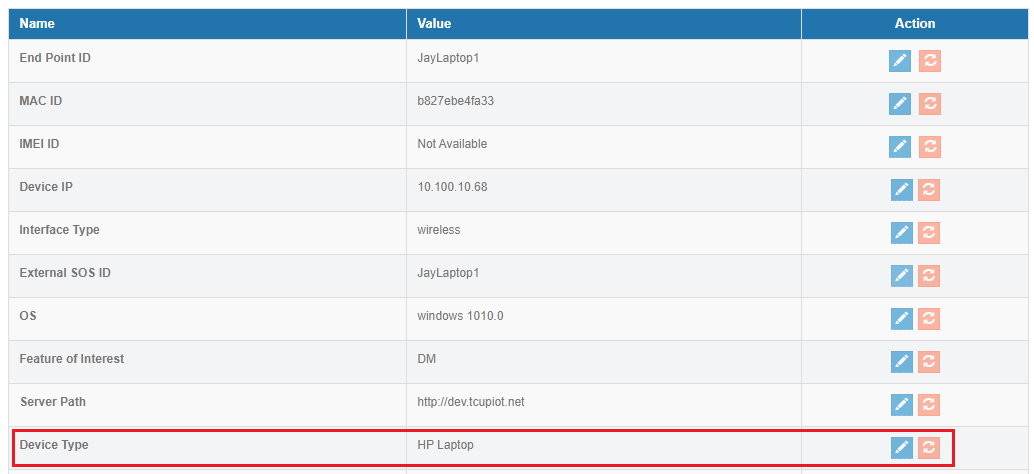
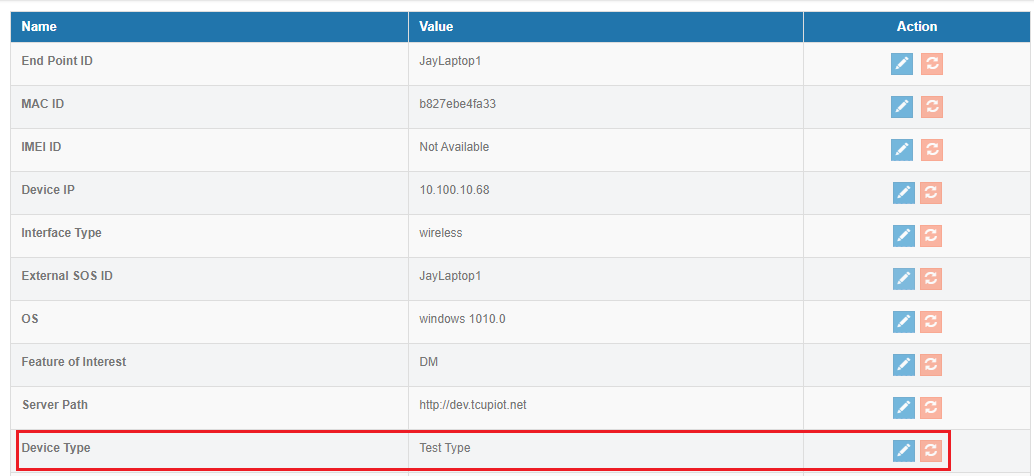
For example in this case we are trying to update the resource value of DeviceType (this is updatable) from ‘Test Type’ to ‘HP Laptop’
In Swagger open Create Command under the Command API.

Use the following JSON, EPN ID and API Key to update the value.
{
  "interval": "10s",
  "mandatory": true,
  "resourceid": "deviceType",
  "value": "HP Laptop"
 }
Click on Try It Out. The command gets created and executed as per schedule. Once executed successfully the value of DeviceType gets updated as shown in the image below.
