App Guard Management Service
Introduction
Authentication and authorization are the quintessential features for any application. On boarding new user, login/logout of user, assigning role, creating role-based access control of application resources are the standard requirements for any application. Also, there are many authentication mechanisms such as username/password-based authentication or password less OpenID. Developing and maintaining these essential features require tremendous amount of effort, skill, and time. Major effort comes with database design, software design, interface with third-party provider, quality secure code development, testing etc. TCUP App Guard Management is an authentication and authorization service which helps to add authentication and authorization in applications without much effort. It reduces development time from month to days and delivers quality secure code which is tested and developed by experts. App Guard provides user federation, strong authentication, user management, fine-grained authorization etc. with a pragmatic set of APIs which can be used in application
Purpose of the Document
The following section describes how to work with App Guard Management service using the portal as an App Guard Organization admin, App Guard Tenant and as Appguard Tenant-Users and User.
Reference Document
Please refer to the following documents to get more details on AppGuard Management service:
To understand the basic concepts of AppGuard Management Service please refer to the Concept guide.
For API details please refer to the API guide.
App Guard Organization Admin (‘Org-Admin’)
Every App Guard installation has at least one user defined once the installation is complete. This user is called ‘Org Admin’. The ‘Org Admin’ user can only be created by host operating system administrators having special privileges. The ‘Org Admin’ user is a super user, and it is used for creating application, creating user, creating tenant and other platform related administration work.
Features of ‘Org-Admin’
- ‘Org Admin’ has the following features:
Create and delete user, tenants, role, permission
Complete access to the portal
Assign/detach role to tenant
Create/delete permission
To access this web application from any device (Laptop/Tablet etc.) open the browser and enter the URL in the format https://<domainName>or<ipAddress>/ (This web application is supported on Chrome and Firefox browser)
Enter user credential here it’s for(org_admin)
After logging in, all the application list created will be visible.
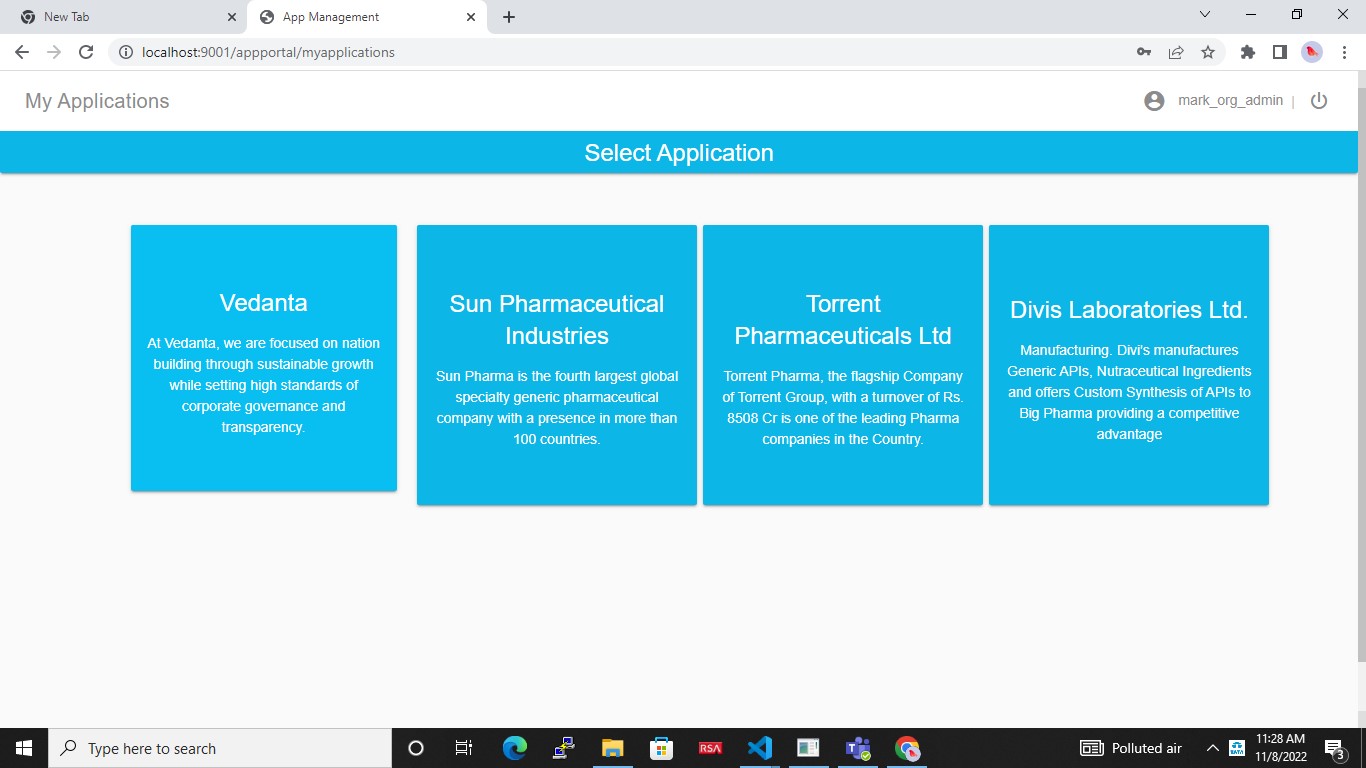
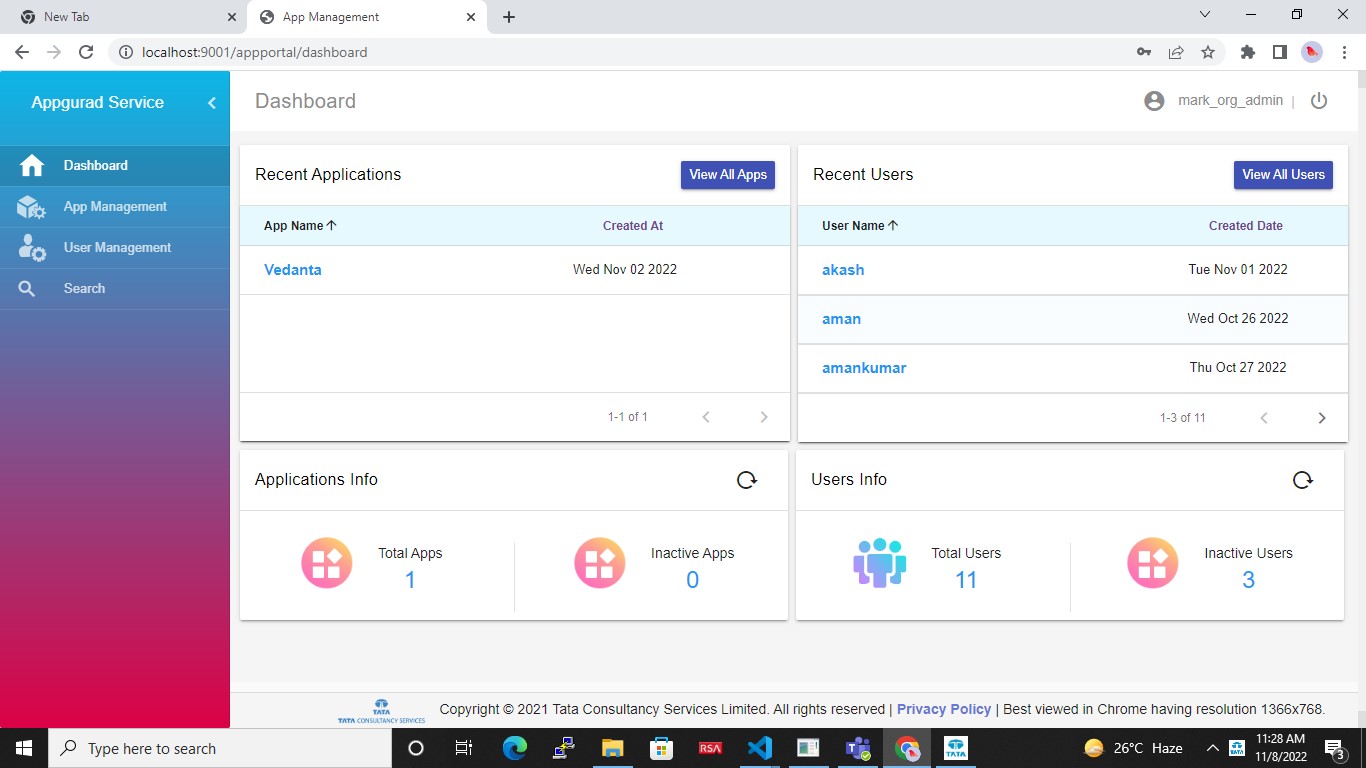
Once you select an app, it will redirect you to the dashboard. By clicking on view all apps button you will be redirected to the app management page. The view all user button will redirect you to the user management page.
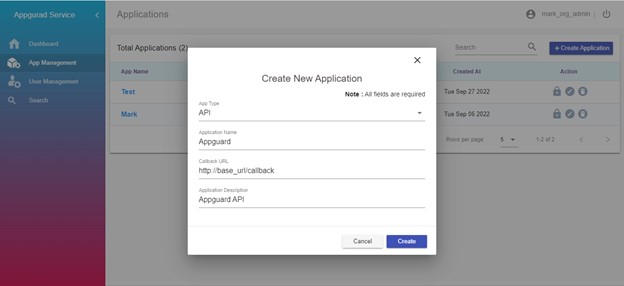
By clicking on create application on top right corner, you can fill in the necessary details as shown in the screenshot below:
To update any application, click on edit icon and you can edit the callback url from there.

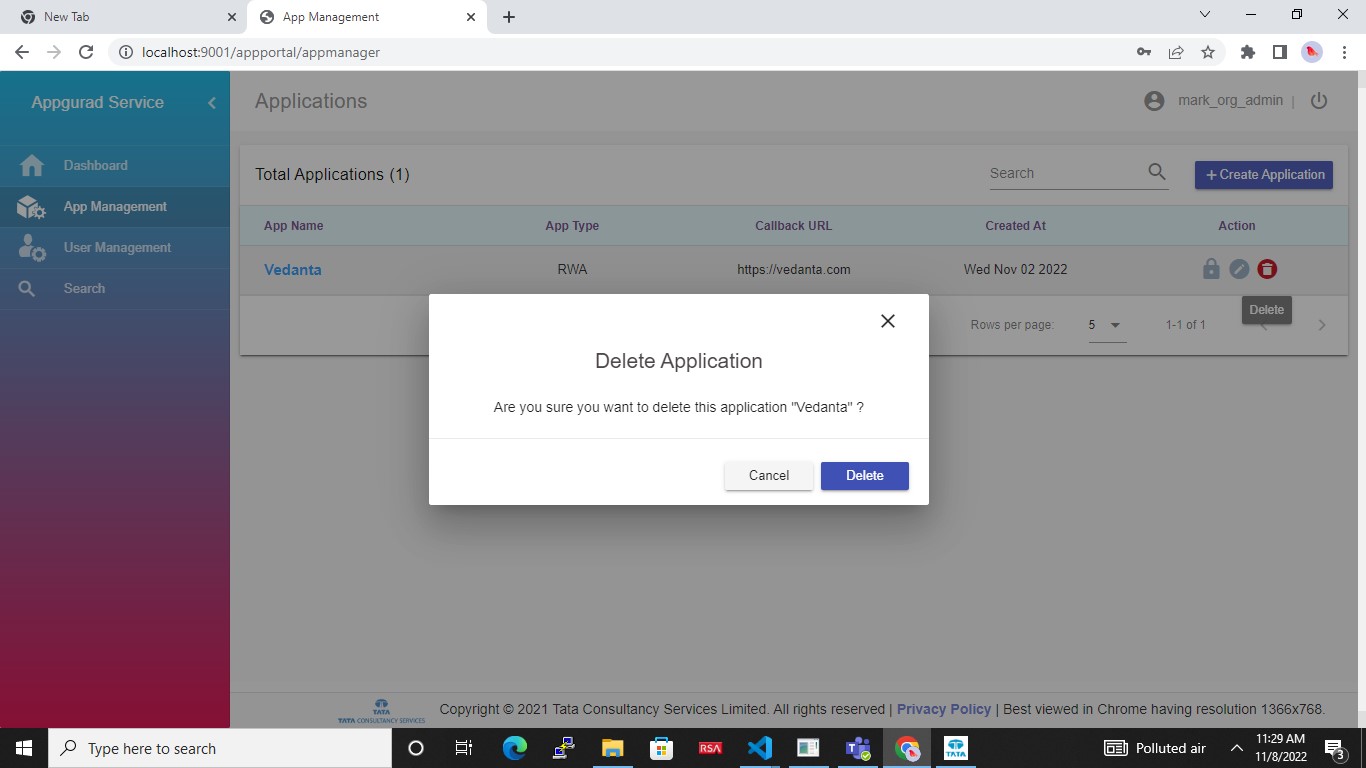
Click on delete to delete your application.
When you click on application name, it will redirect you to the application details page, here you will see permission list first.
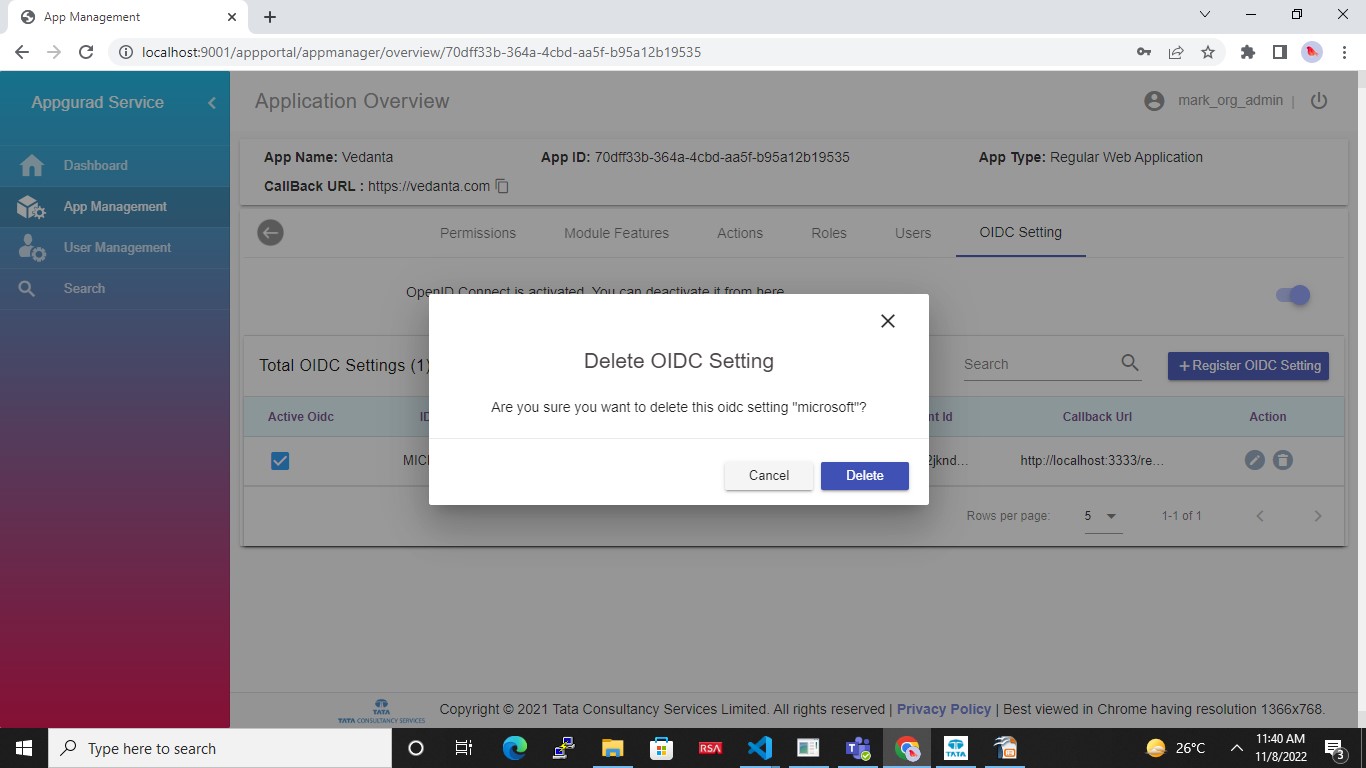
Click on delete to remove one setting from an application.
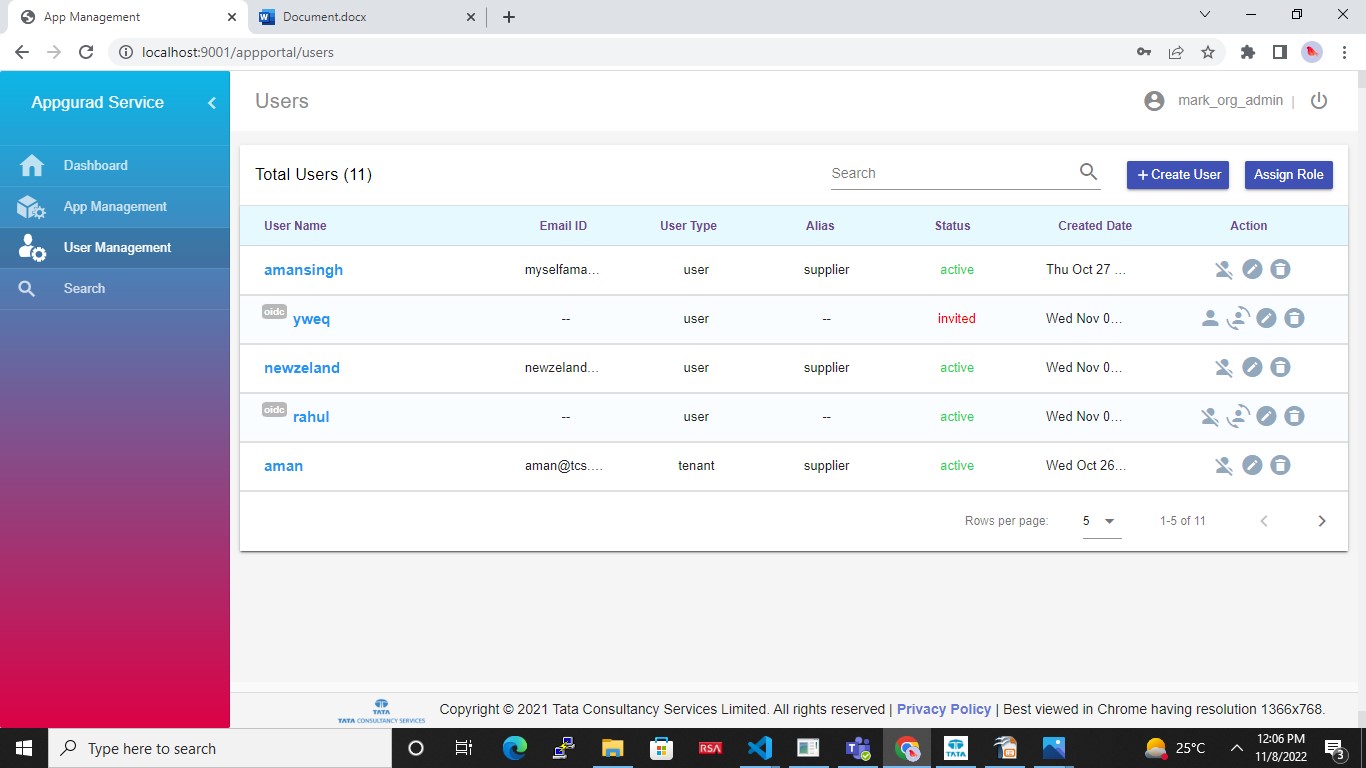
You can click on User Management tab on the left side of the screen to view all the users registered on appguard platform.
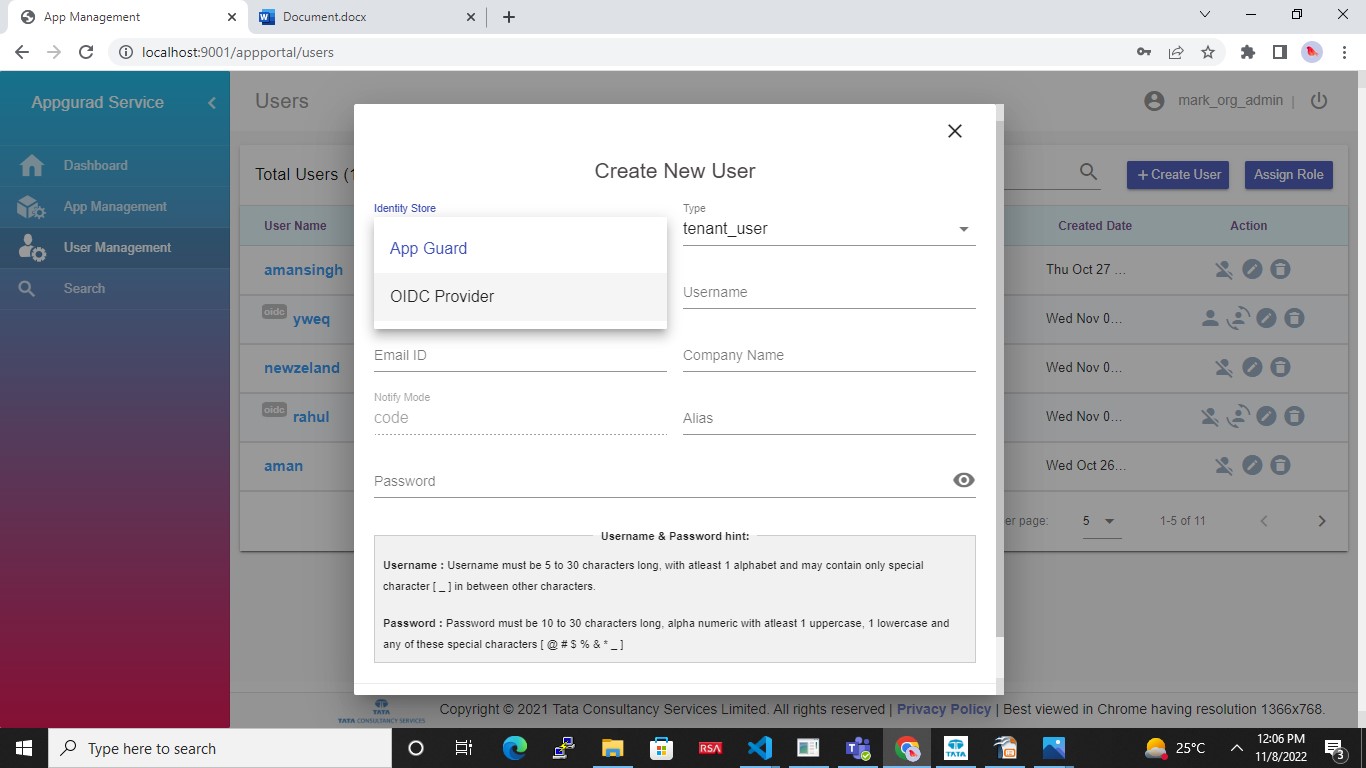
- Click on create user to create a new one, where you can create:
appguard user
2. oidc provider user There are three types of users – tenant, user, tenant_user
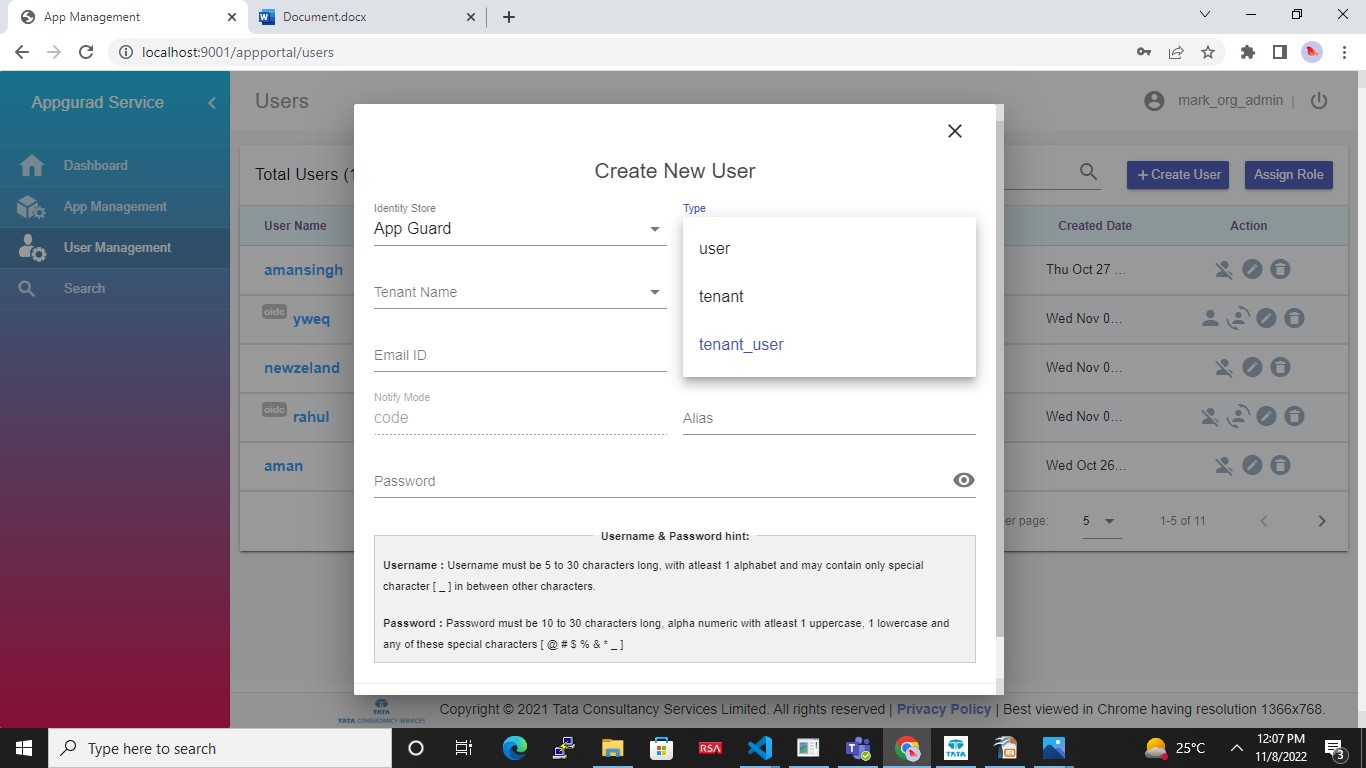
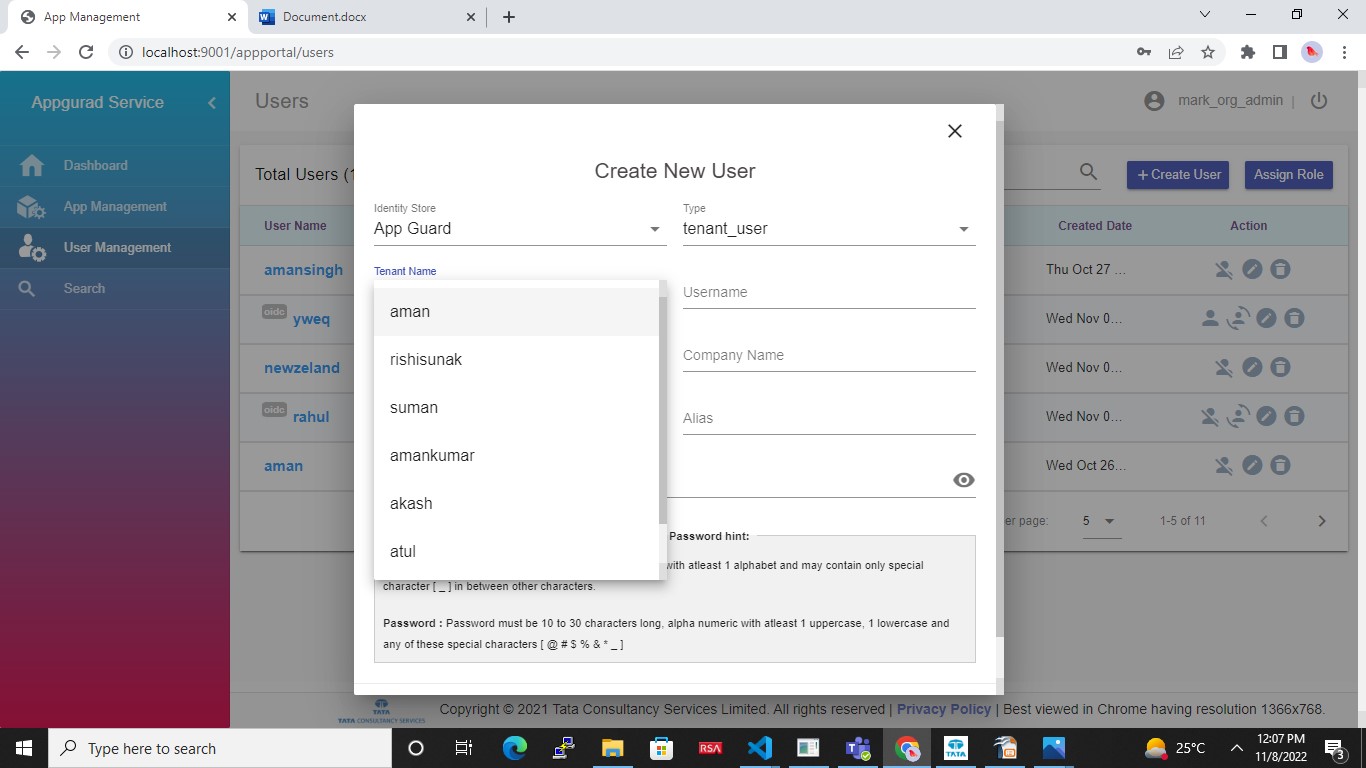
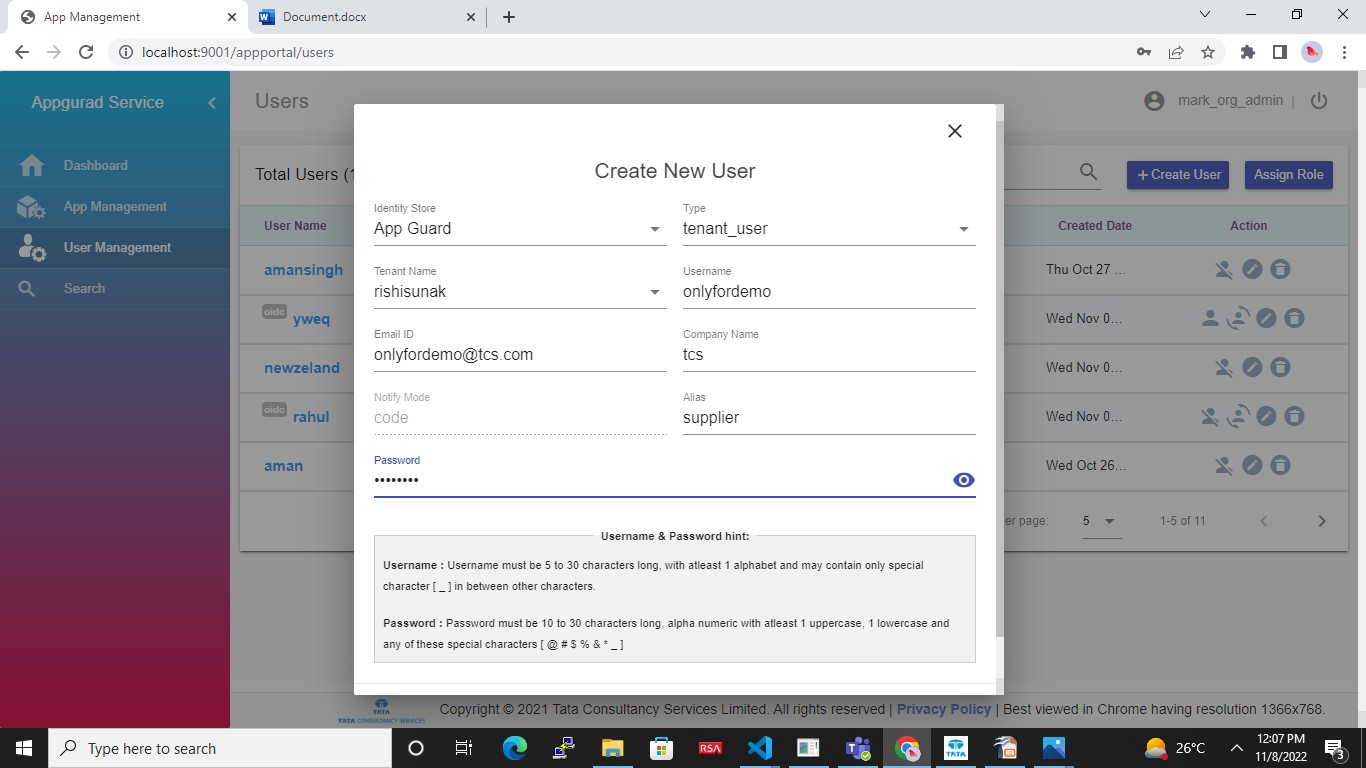
Click on assign user to assign a role to a user.
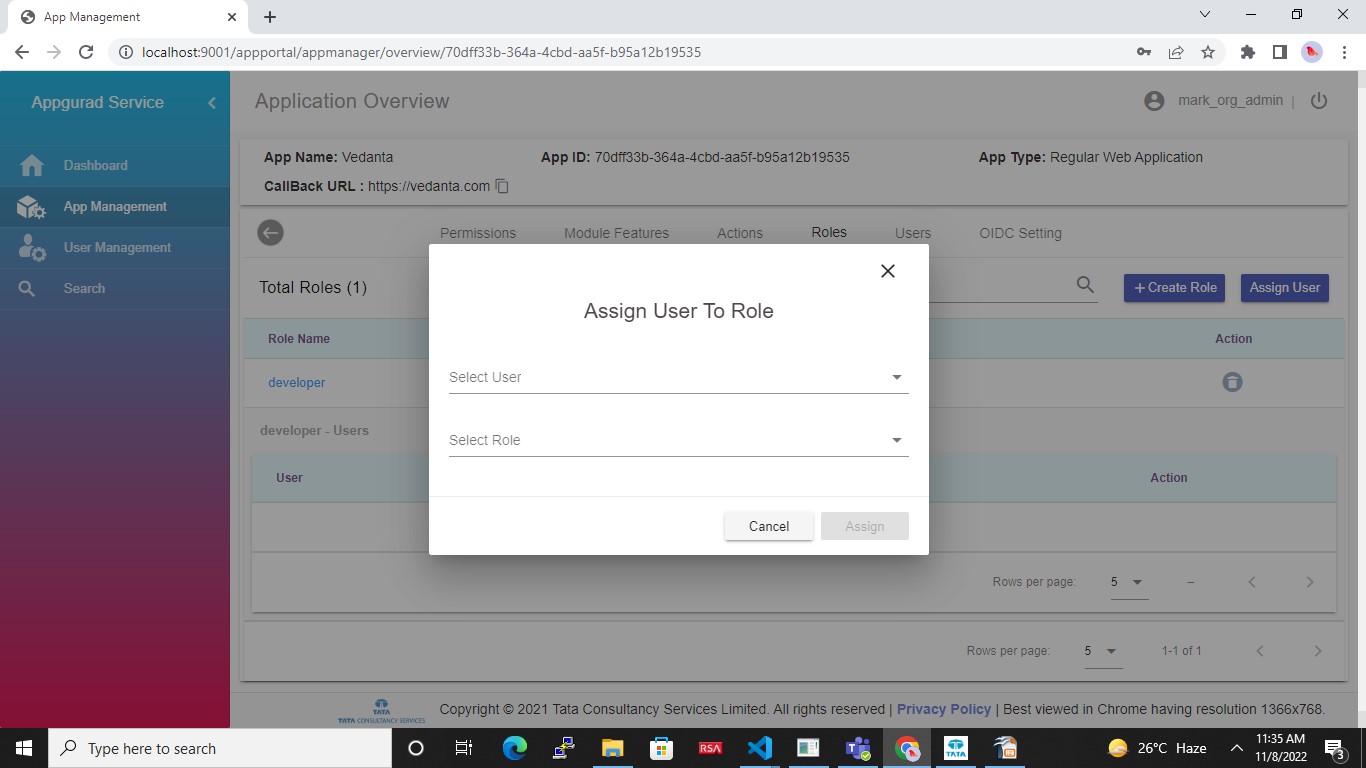
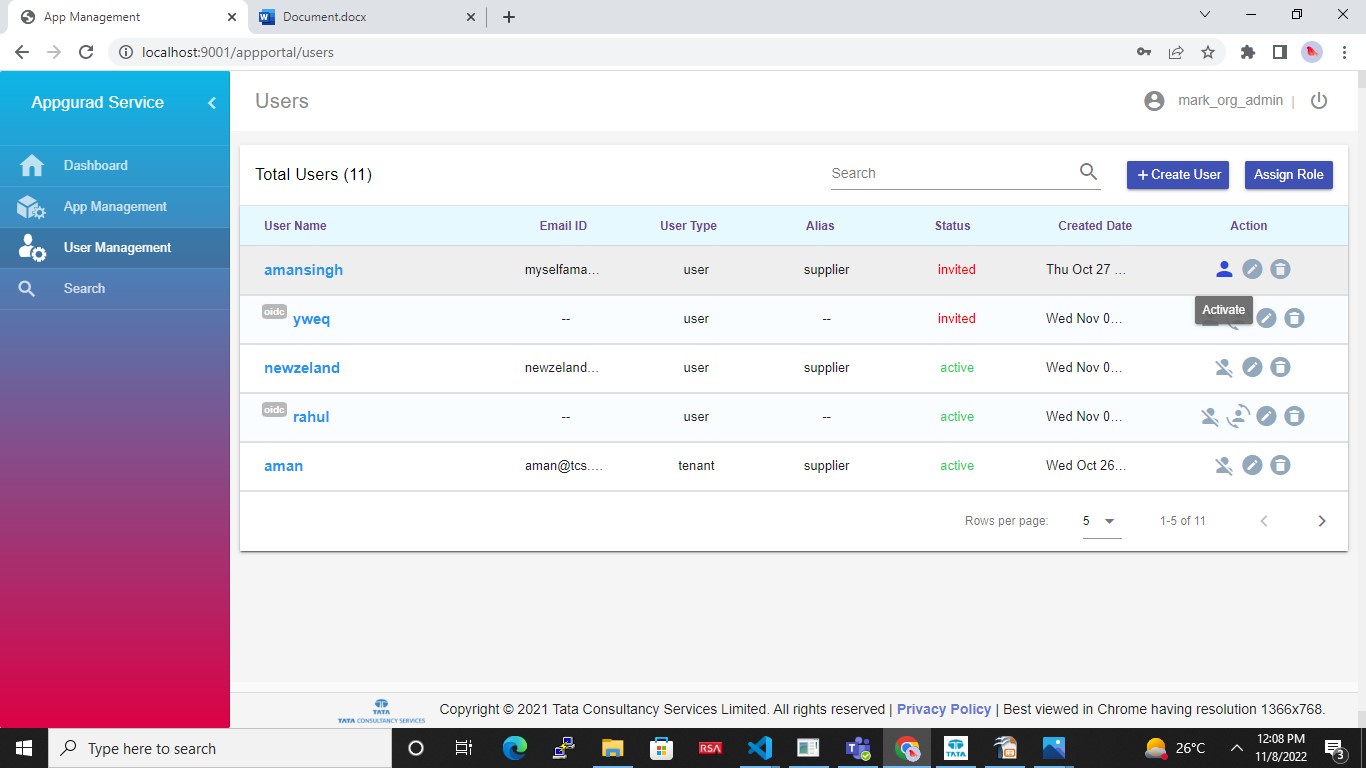
After the user is registered successfully, the admin needs to activate them by clicking on user icon or vice versa.
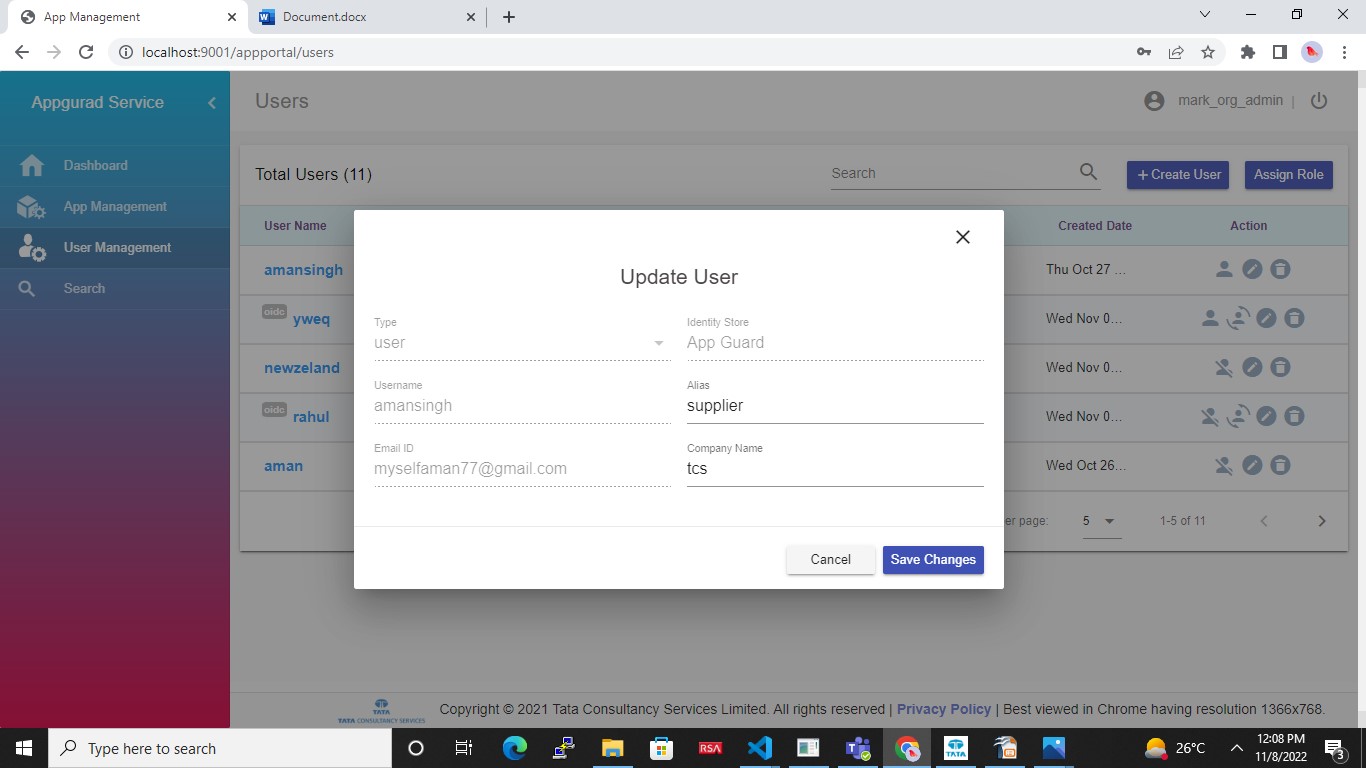
Click on edit icon to update user details
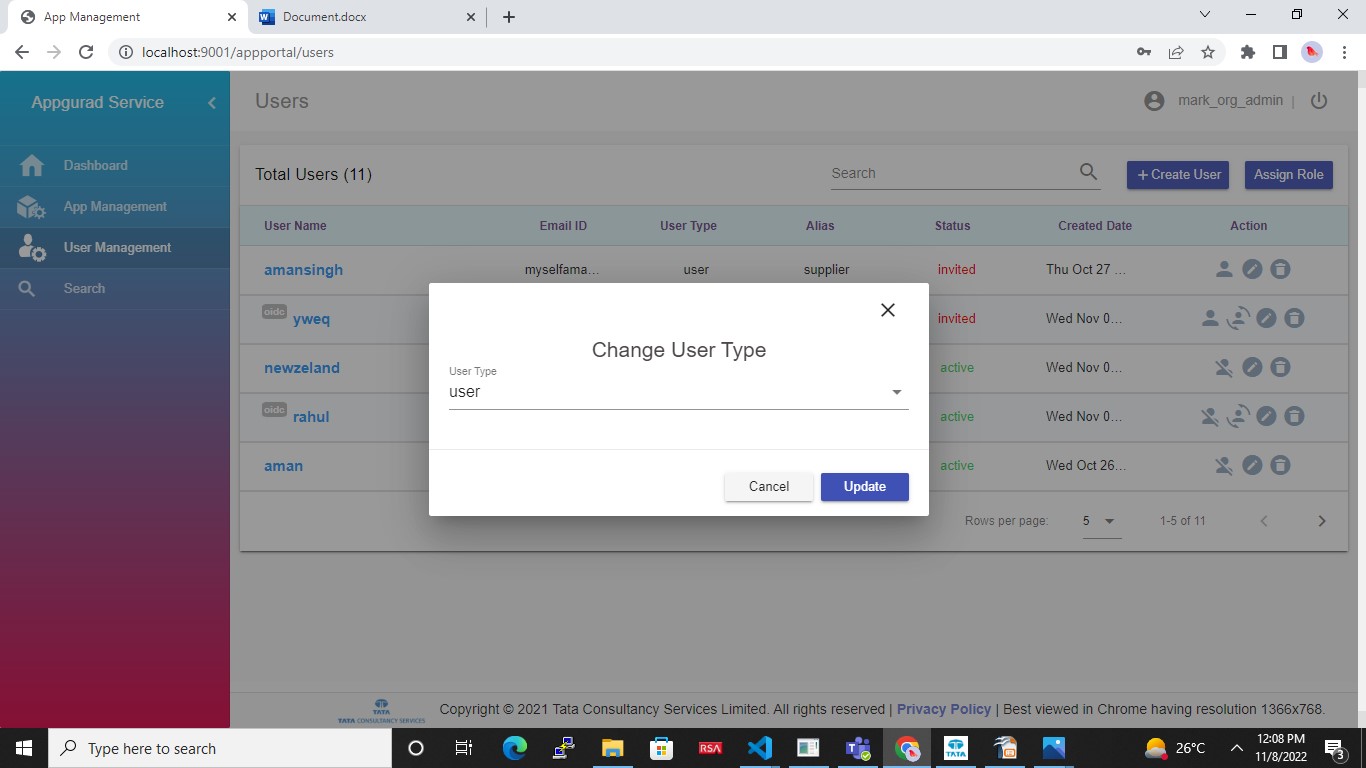
The admin can also change the user type of the registered users only for those who are directly registered in this platform
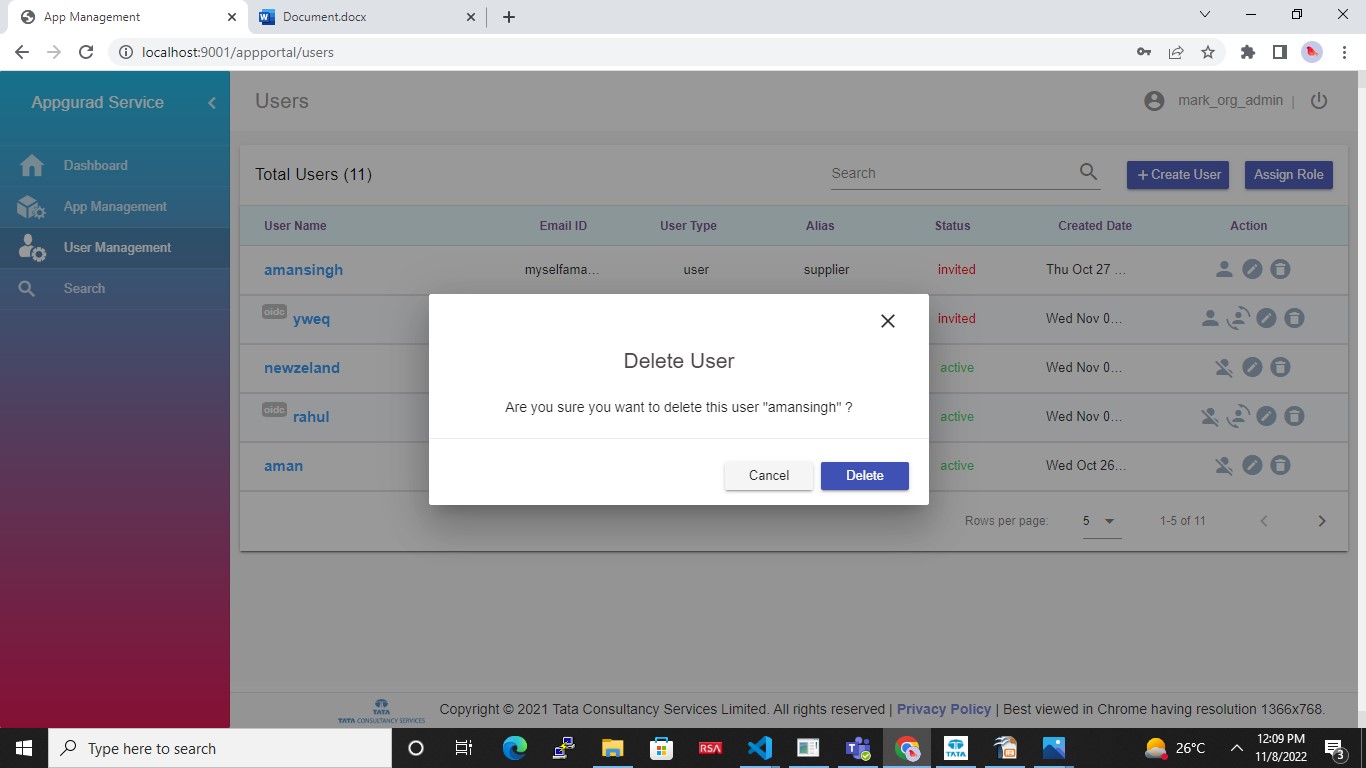
Click on delete icon to delete a user.
If you click on username it will redirect you to user details page
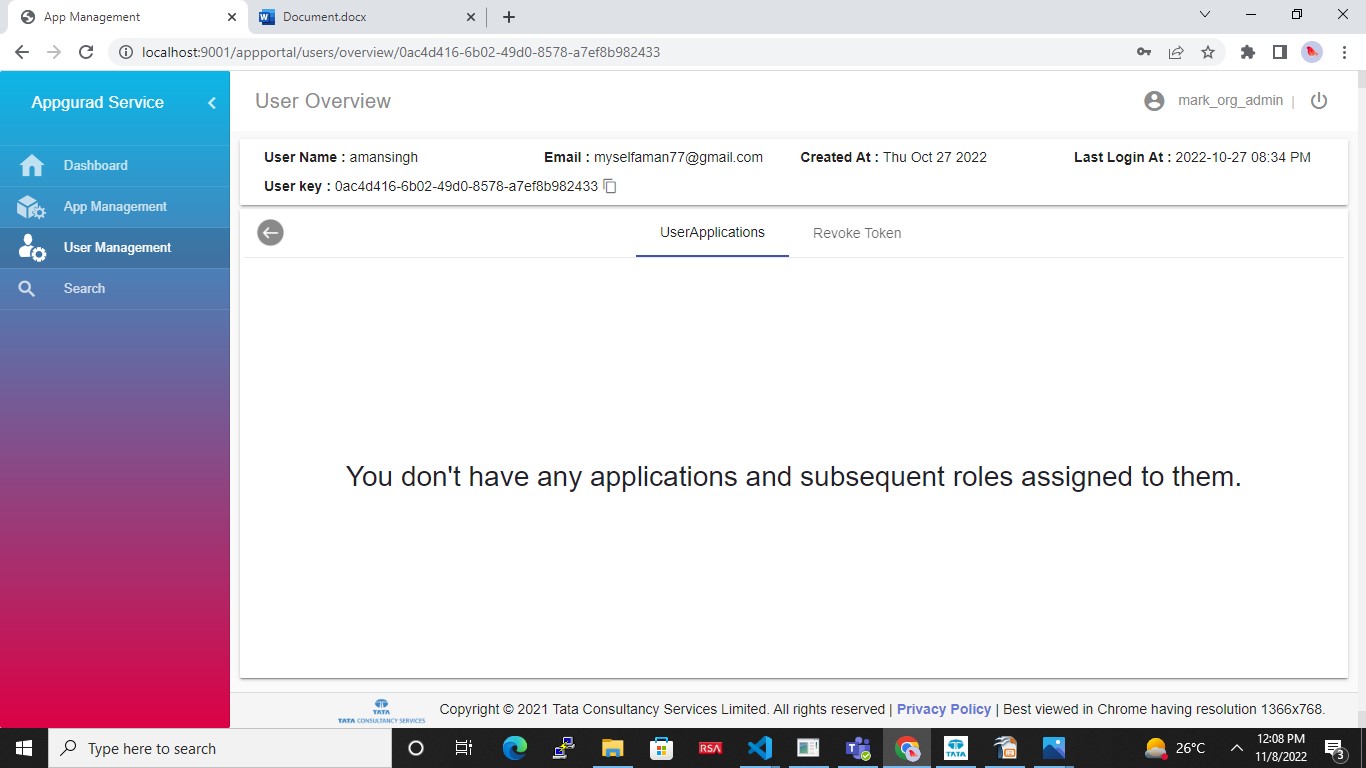
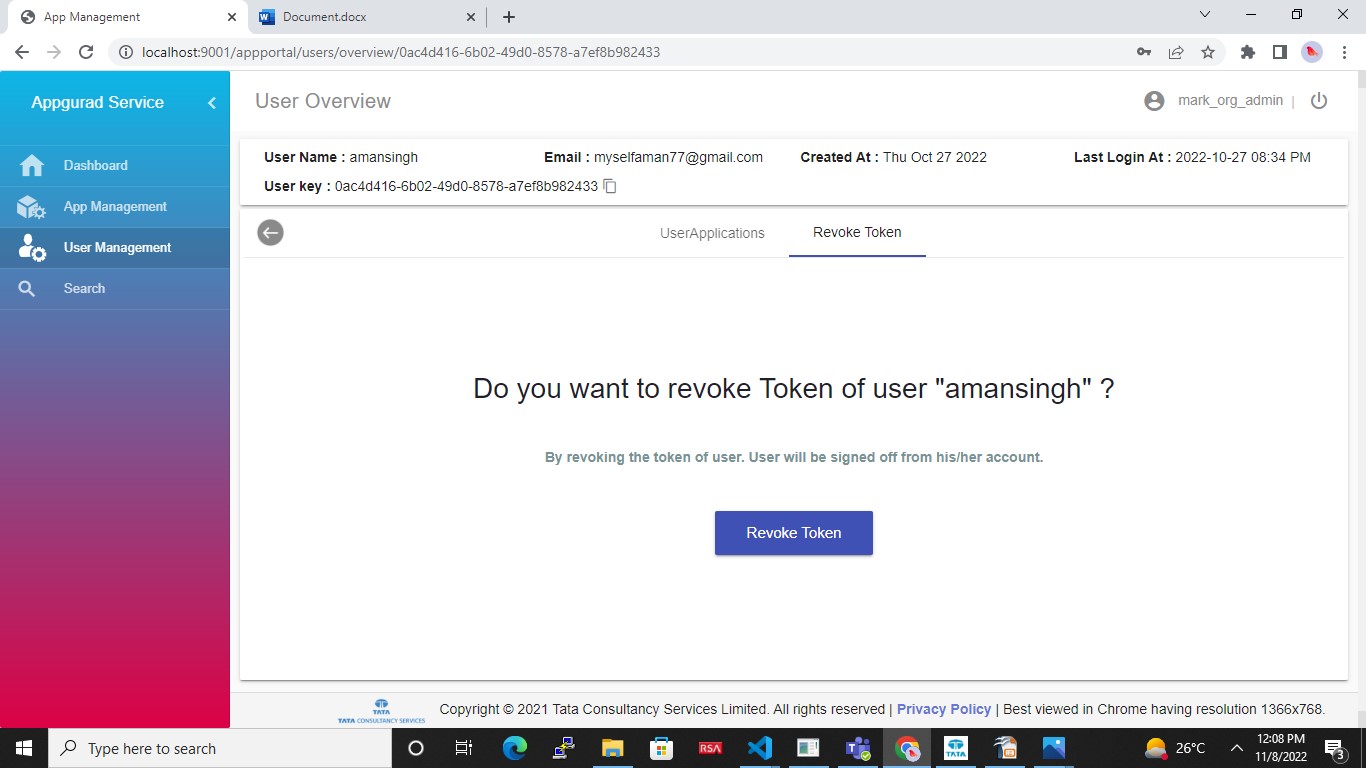
To revoke access token, click on revoke token. It will immediately take access for the selected user and log him out from the platform.
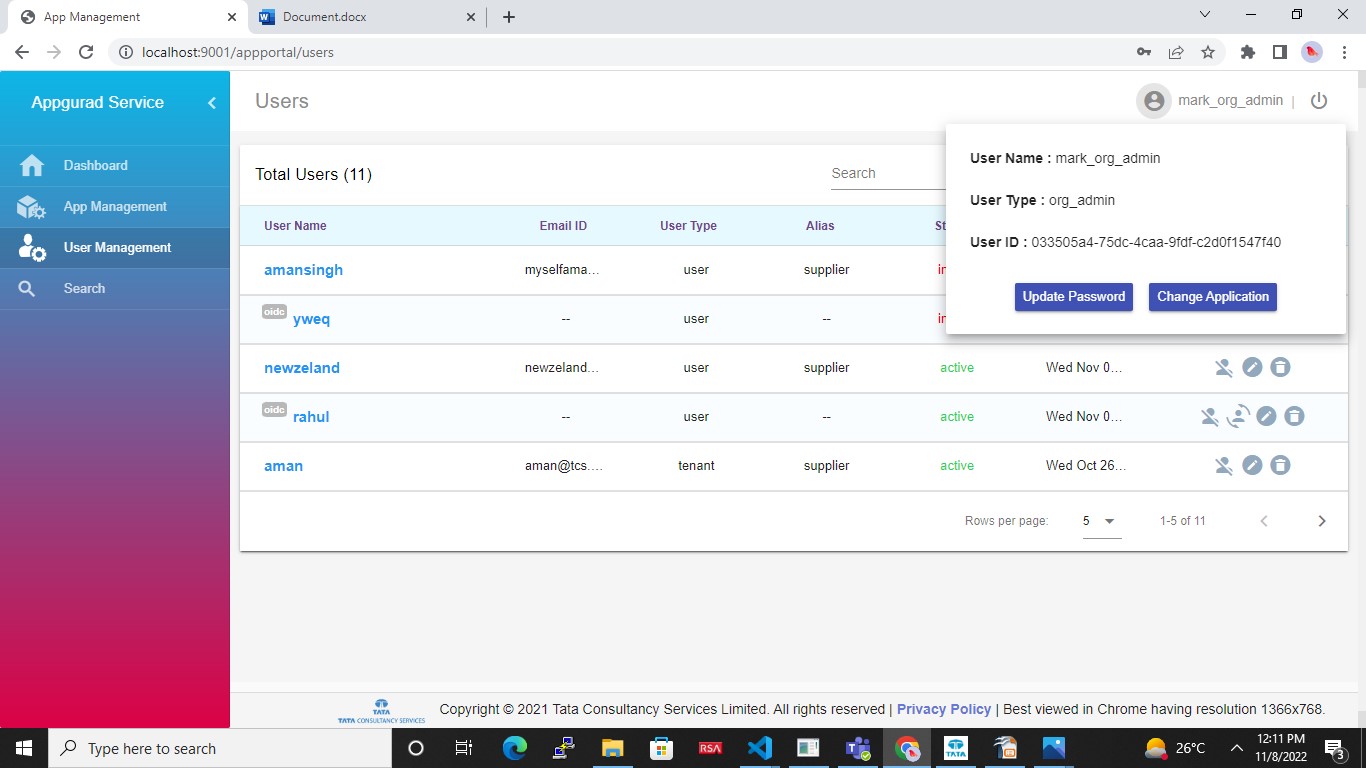
You can click on the profile icon on top right corner to see all the information of the logged in user.
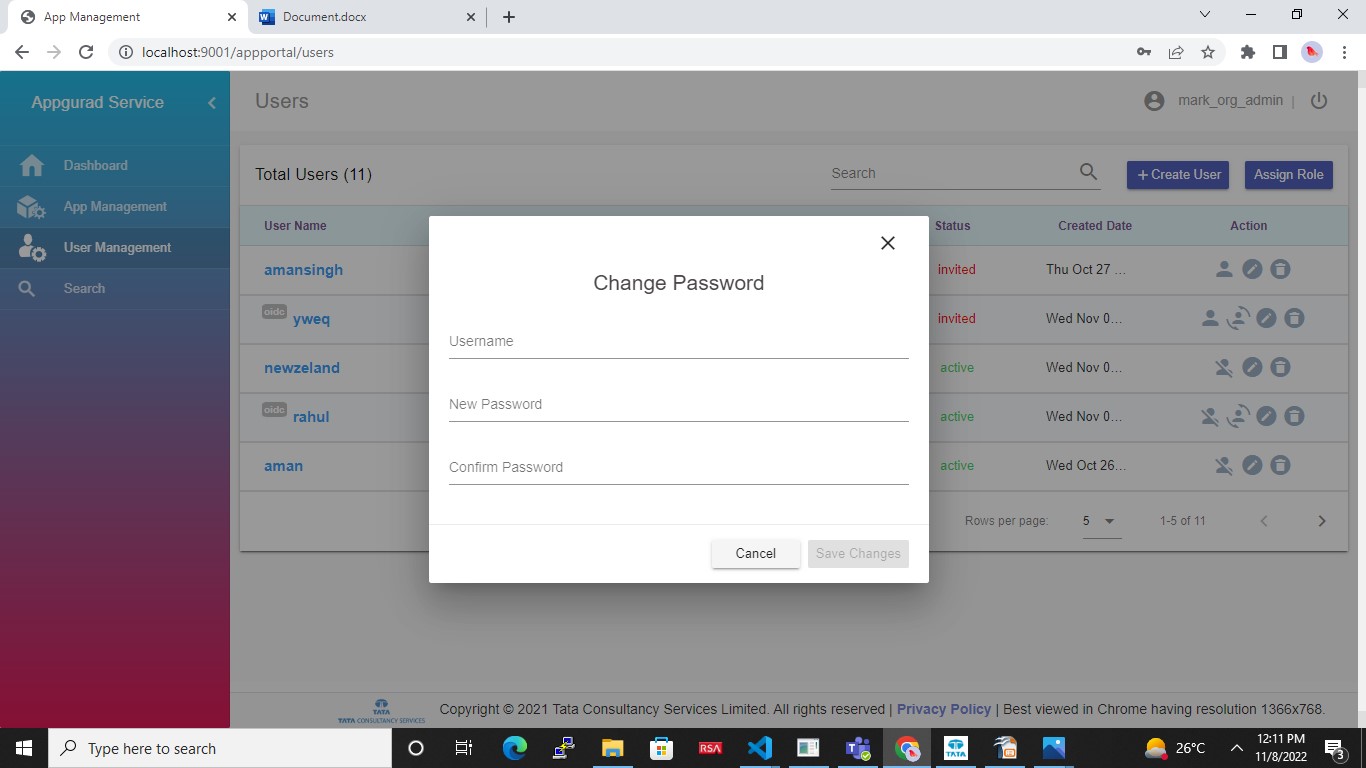
You can click on update password from the options shown above and update your password
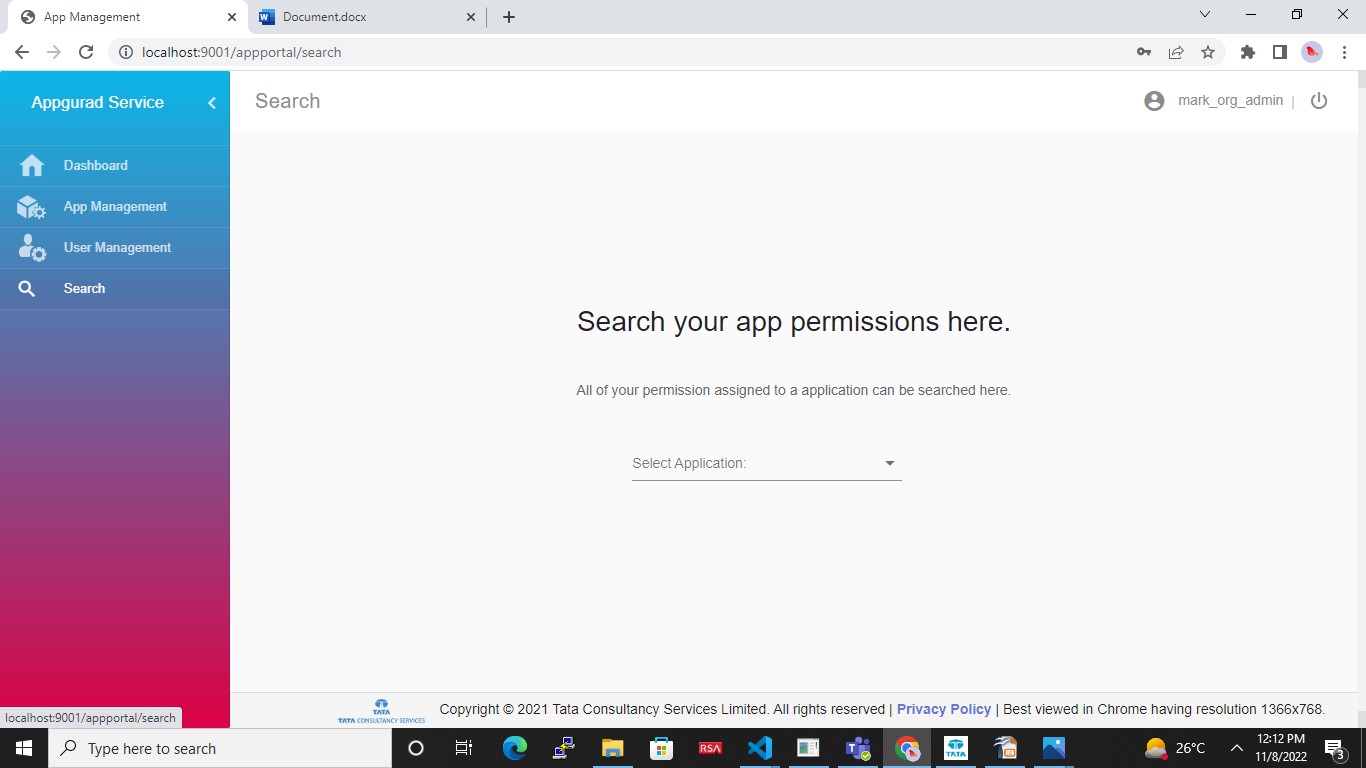
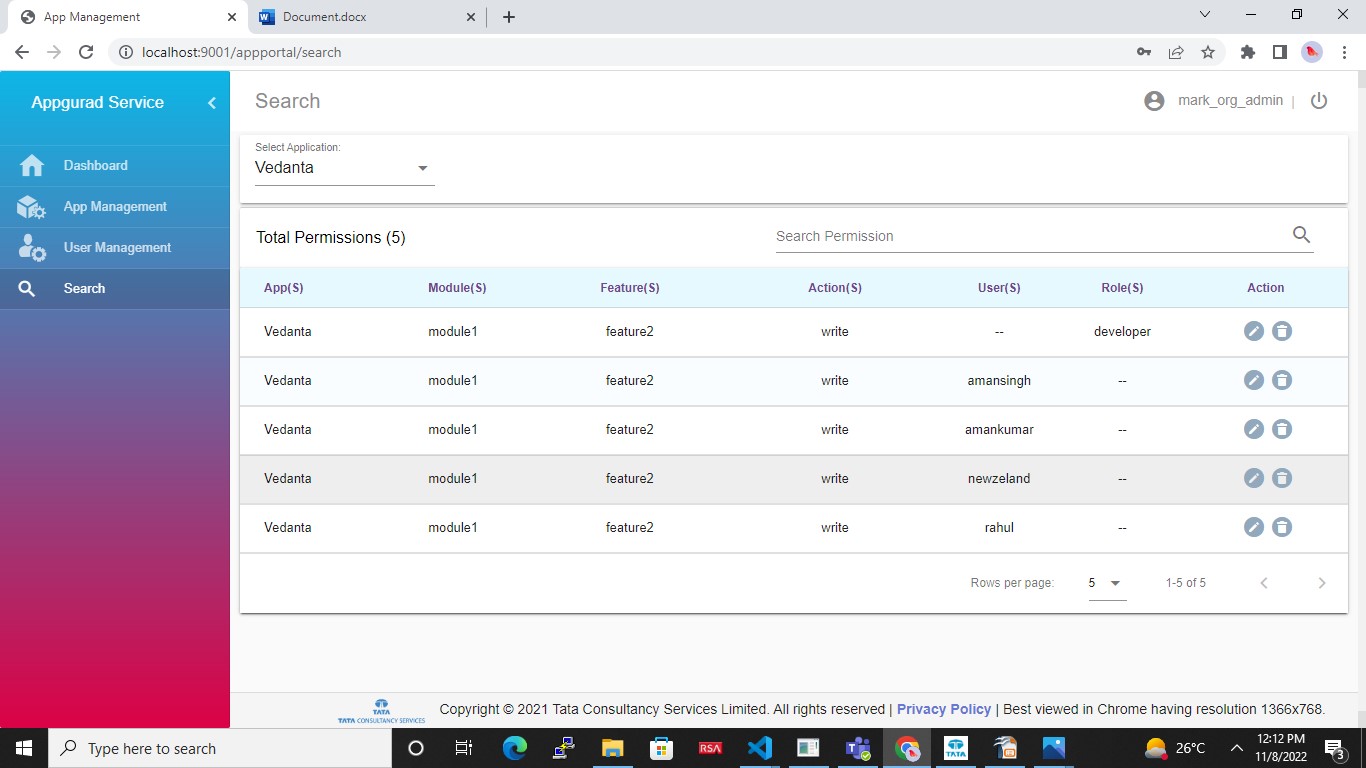
Click on search icon to search permissions for a selected application.

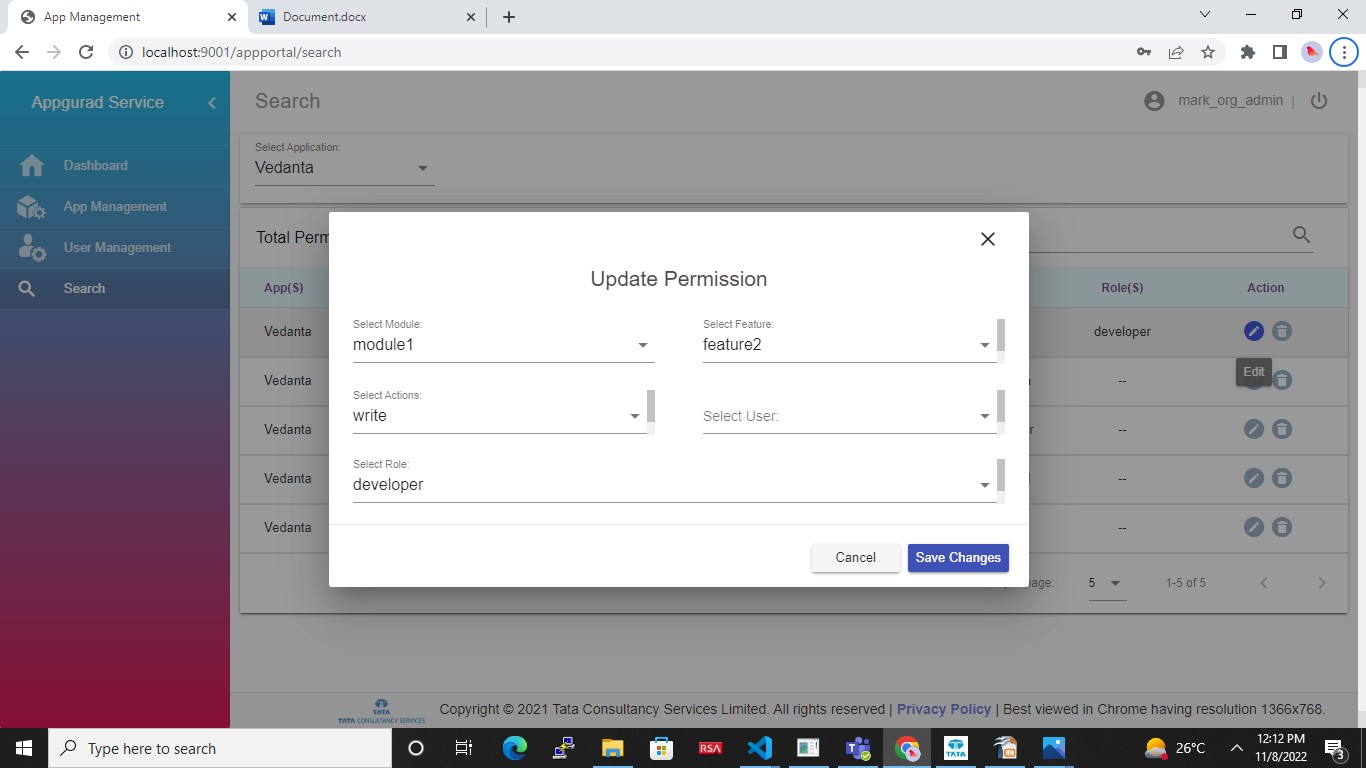
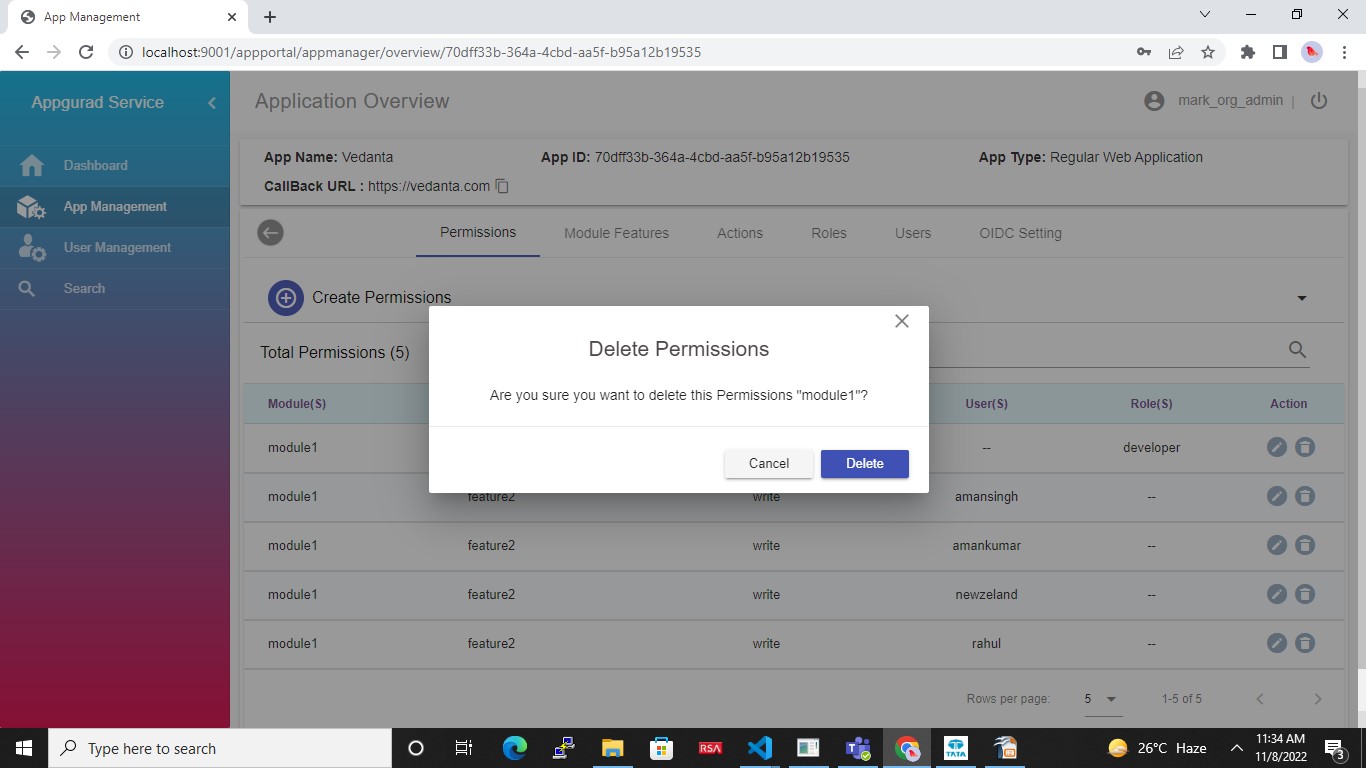
Similarly, you can update or delete permissions from here.
App Guard Tenant
An application can create as many tenants aka customers per application. Each tenant is administered by a tenant specific administrator called “Tenant”. The “Tenant” user is created by the “Org Admin” through the App Guard administration portal or API
Features of Tenant
- Tenant has the following features:
Create/delete users/role
Assign/detach role to tenant users
Create permission for tenant users
To access this web application from any device (Laptop/Tablet etc.) open the browser and enter the URL in the format https://<domainName>or<ipAddress>/ (This web application is supported on Chrome and Firefox browser)
Enter user credential here it’s for(tenant/tenant_user/user) – it’s the same for all types of users.
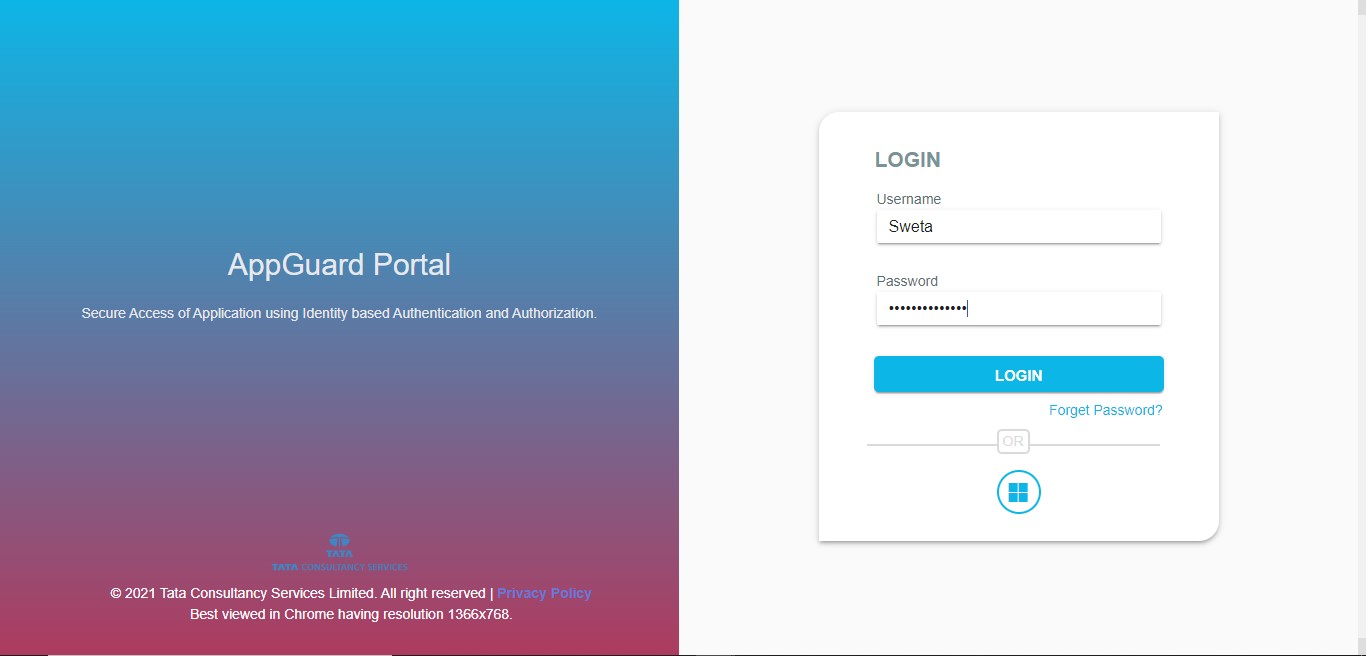
After clicking on login you can see all applications list created.
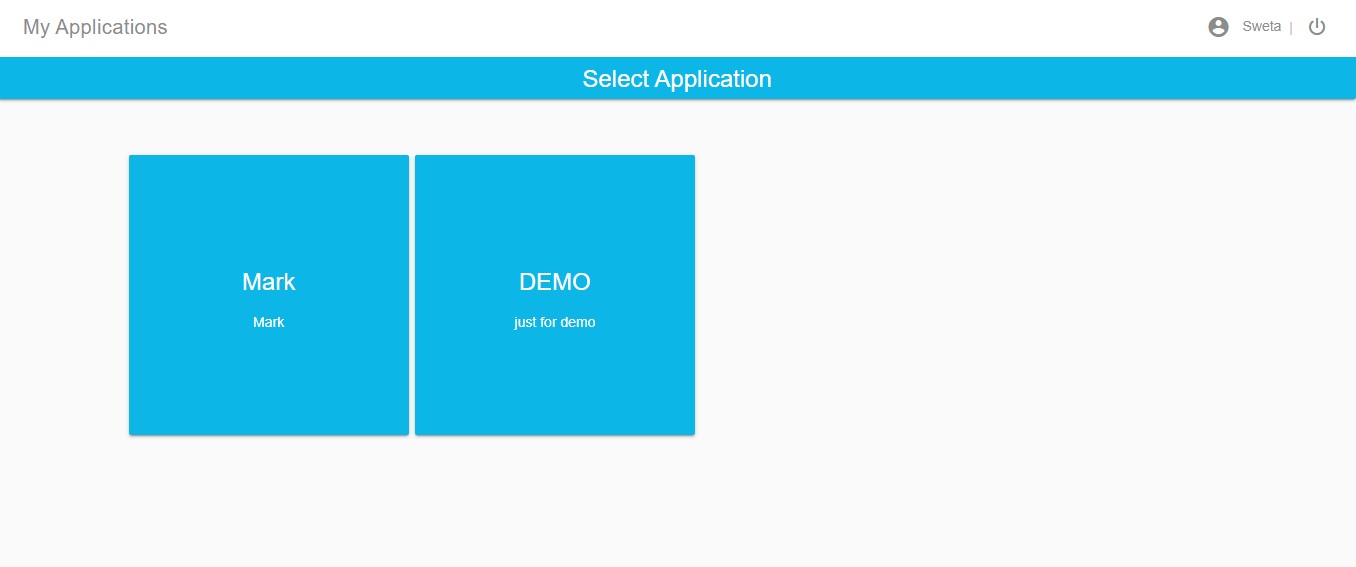
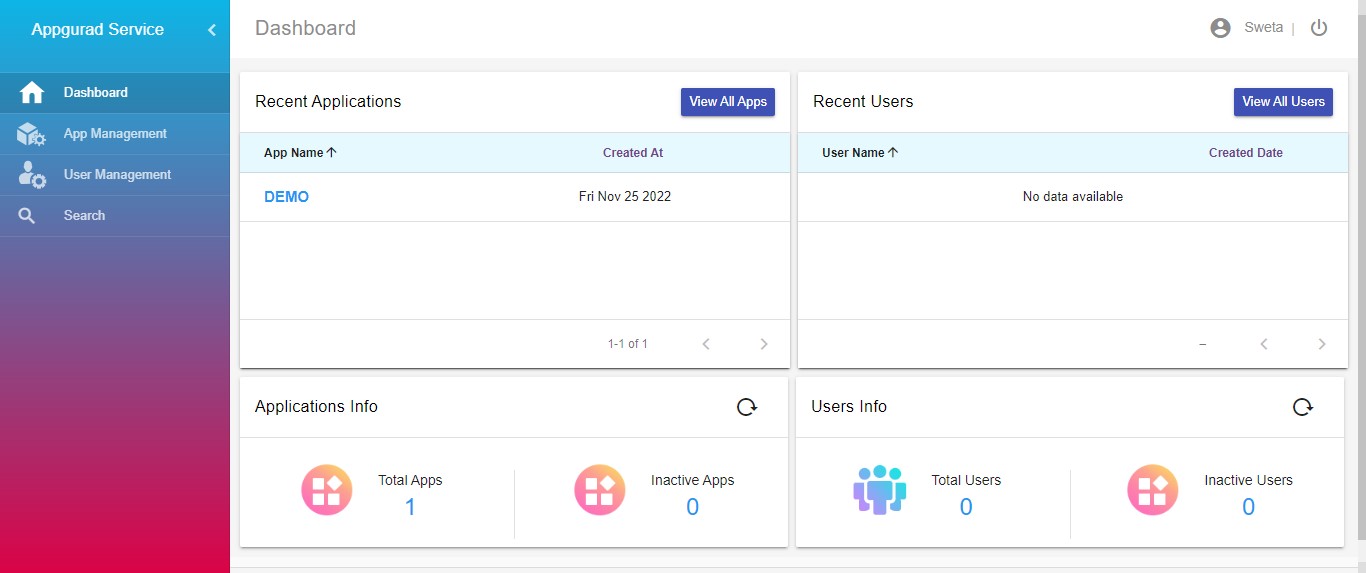
You can select one application and that will redirect you to the dashboard. By clicking on view all apps button you will be redirected to app management and if you click on view all user button you will be redirected to user management.
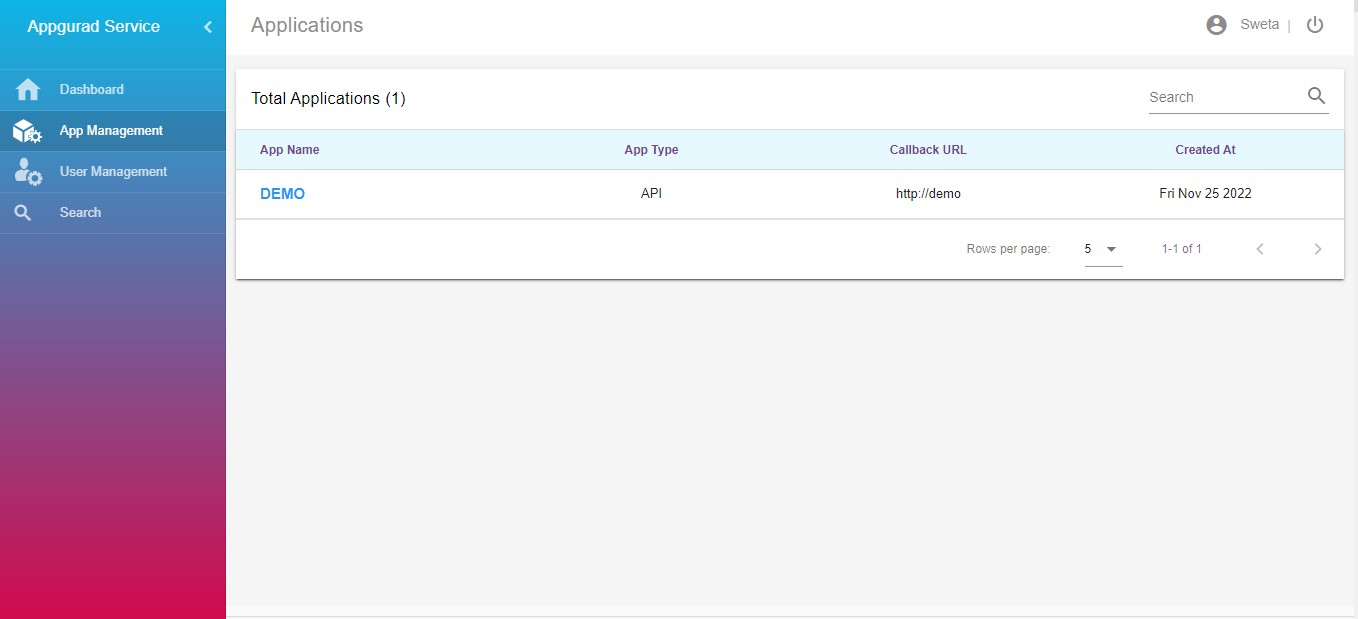
If you click on App Management on the left side of the screen, it will show you the selected application name.
If you click on the application name, it will redirect you to the application details page where first you will get to see the permission list.
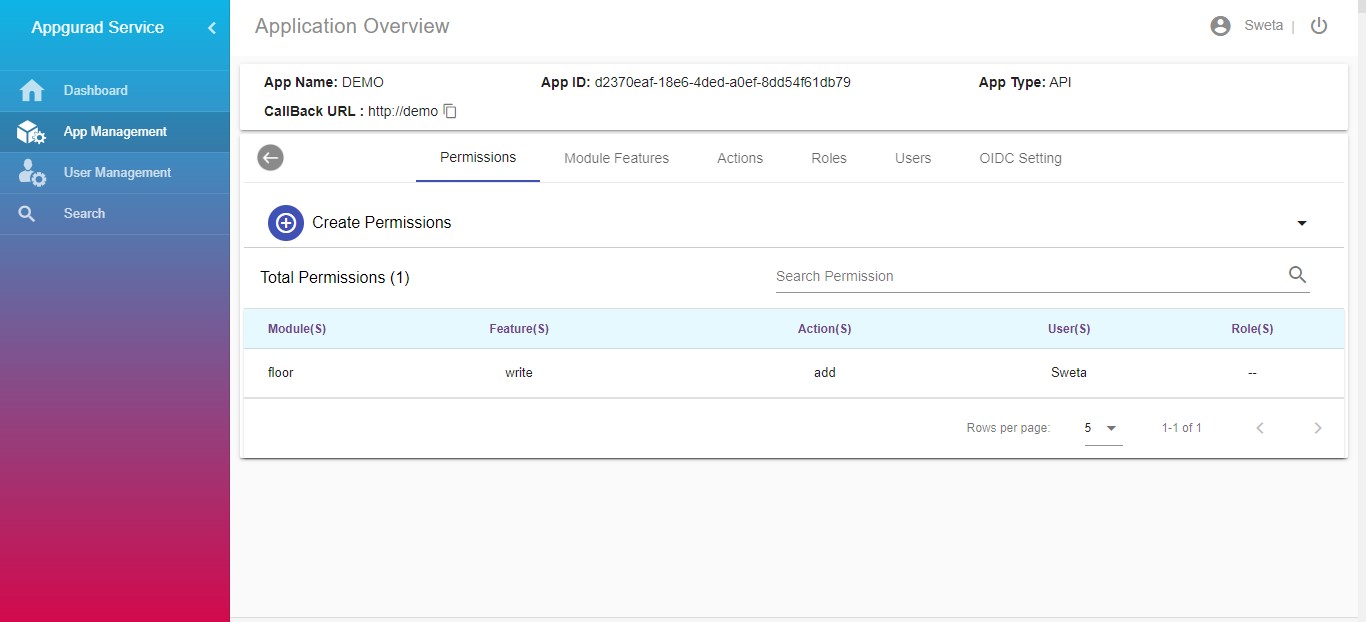
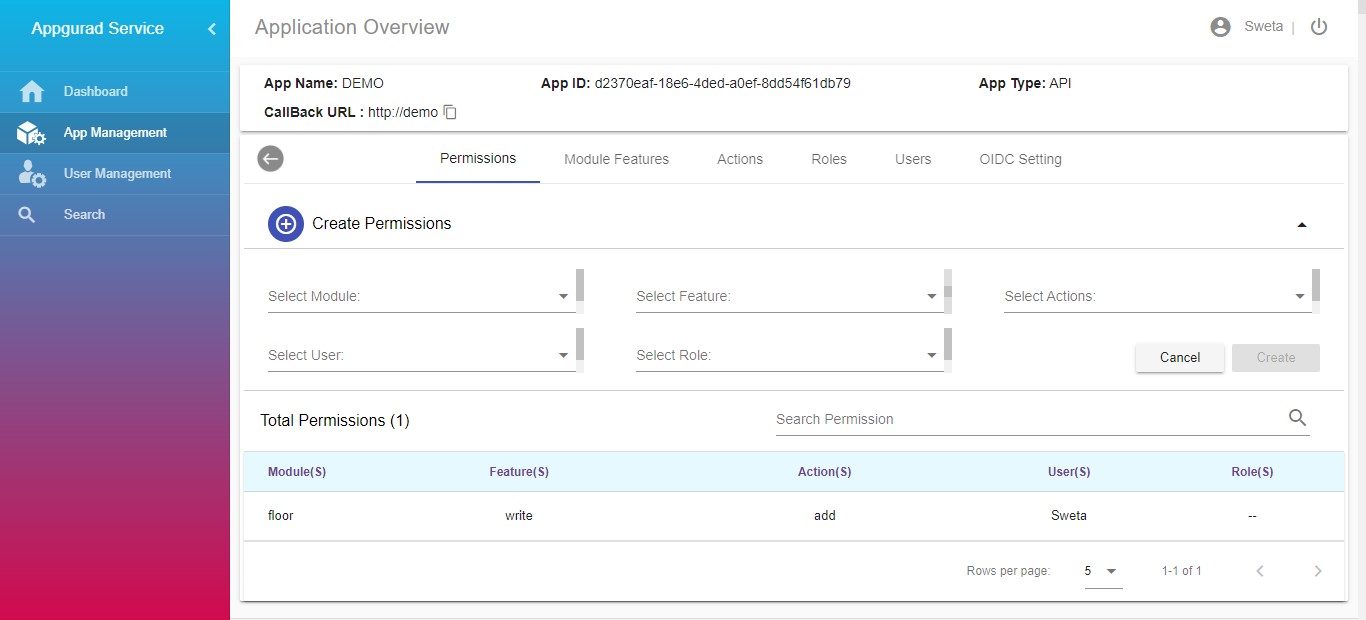
Click on create permission and fill the necessary details to create a new one.
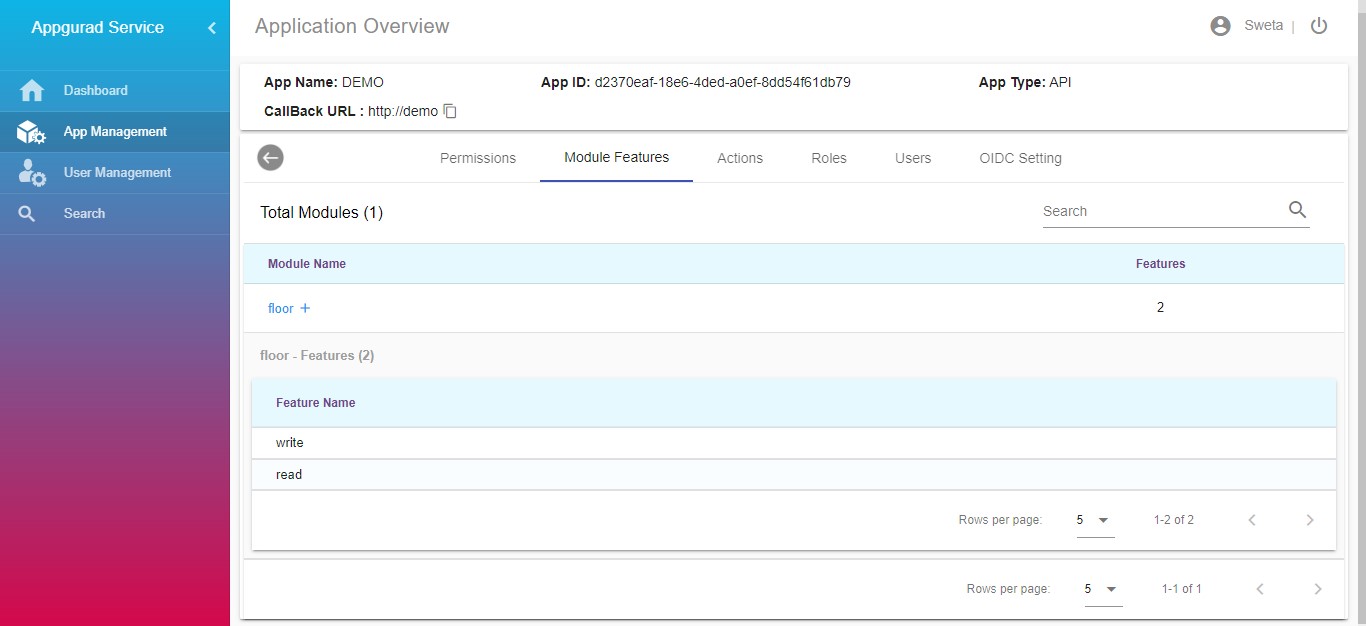
When you select the module feature tab, you can view all the list of modules and the features under one module.
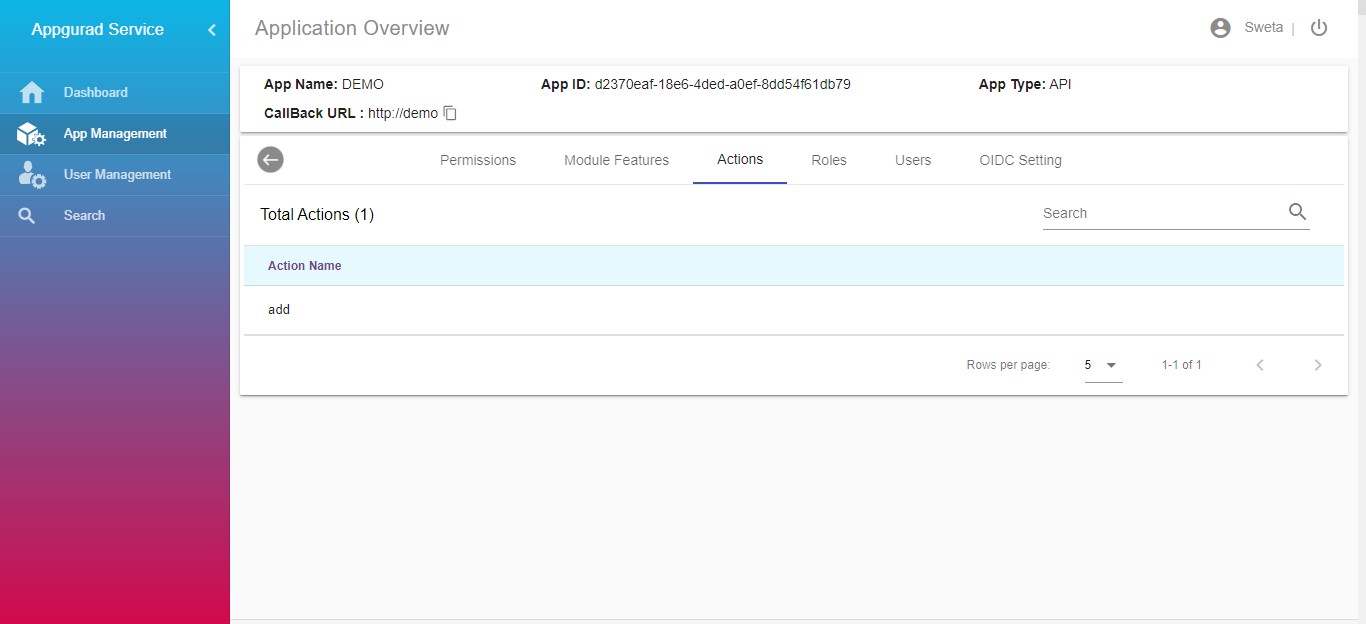
You can click on action tab to view all the actions of an application.
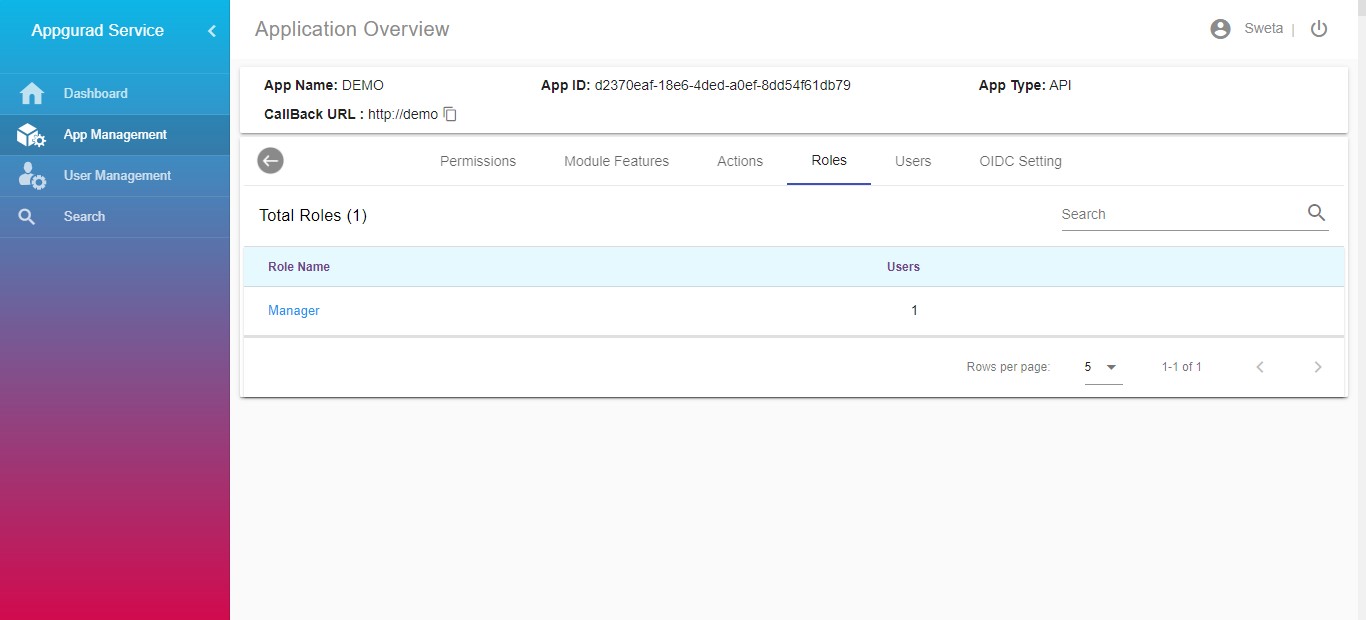
In the role tab you can view all the roles list of an application.
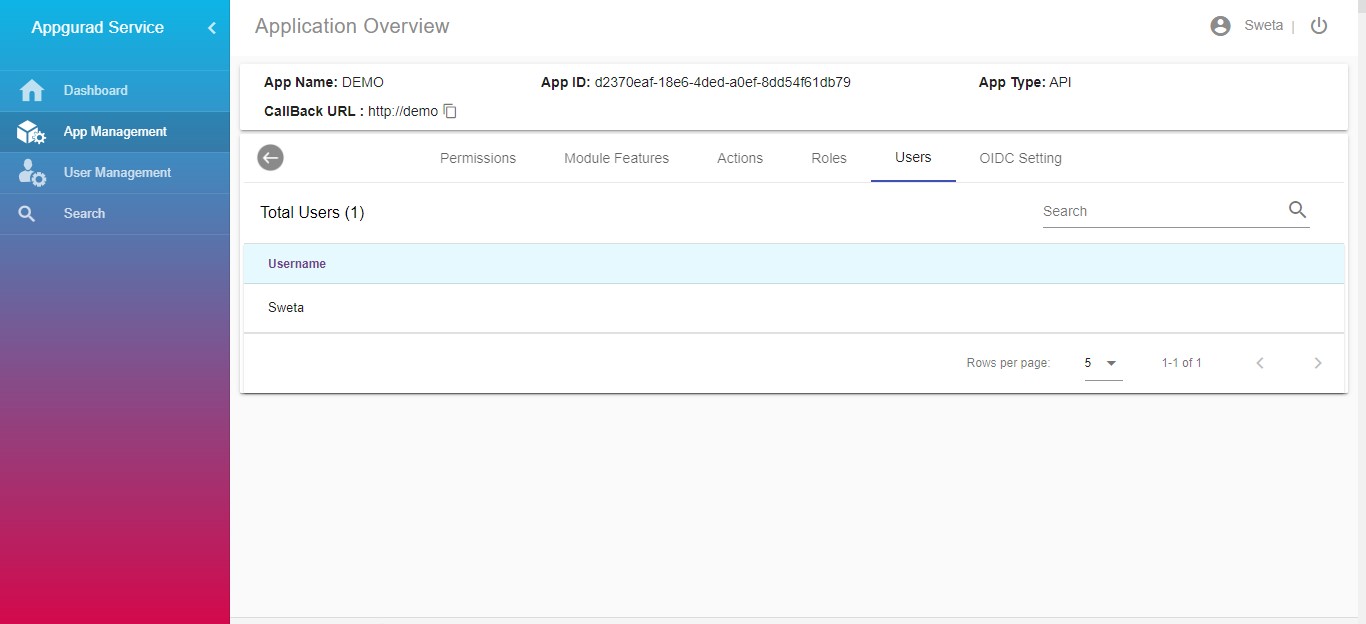
By clicking on the user tab, you can view all the users who have the permissions to an application.
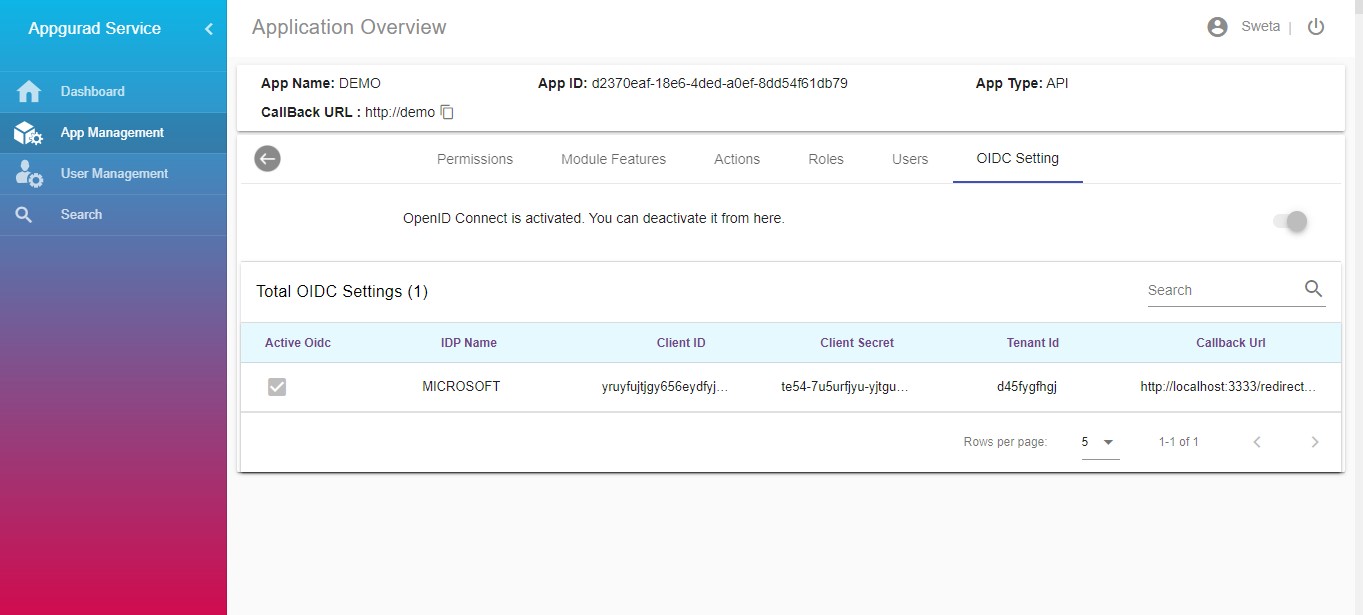
The OIDC Setting tab will show the list of OIDC settings for an application.
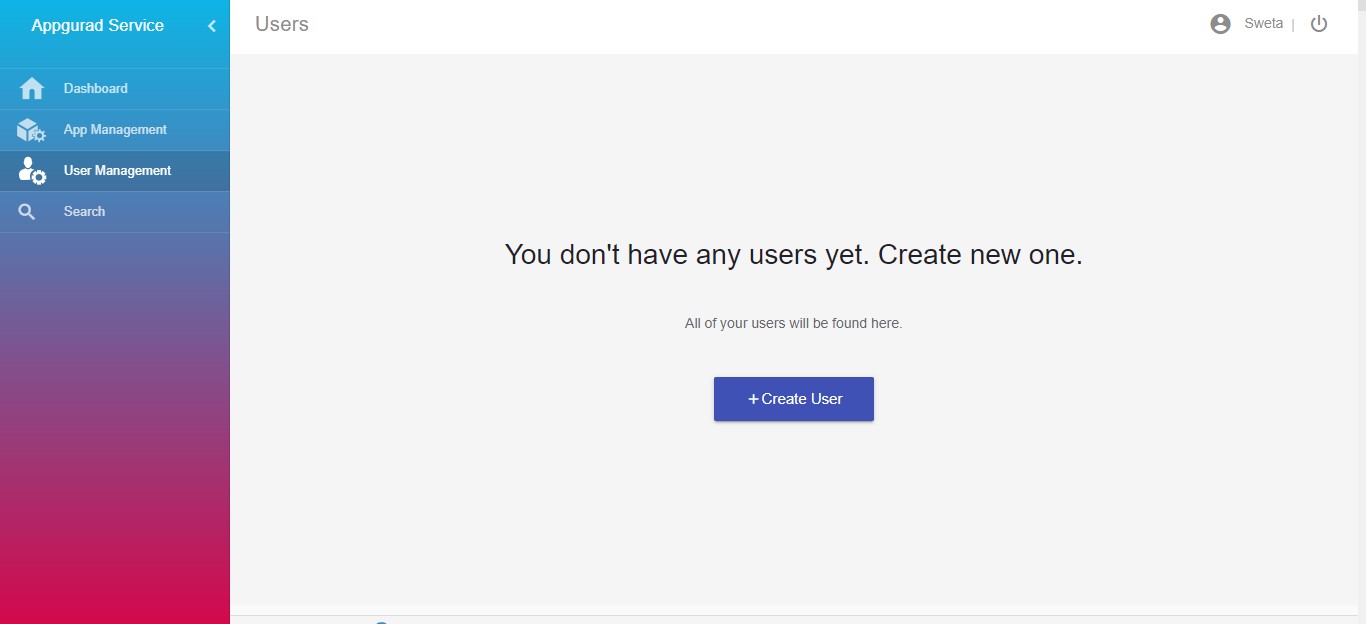
By clicking on User Management on the left side of the screen, you can view all the users registered on App Guard platform. You can click on create user add a new one.
If one user is registered, then the list of users can be seen. There is another button on top to create a user. Click on create user to create a new one, you can create user 1. Appguard user 2. OIDC provider user and there are three types of user – tenant_user
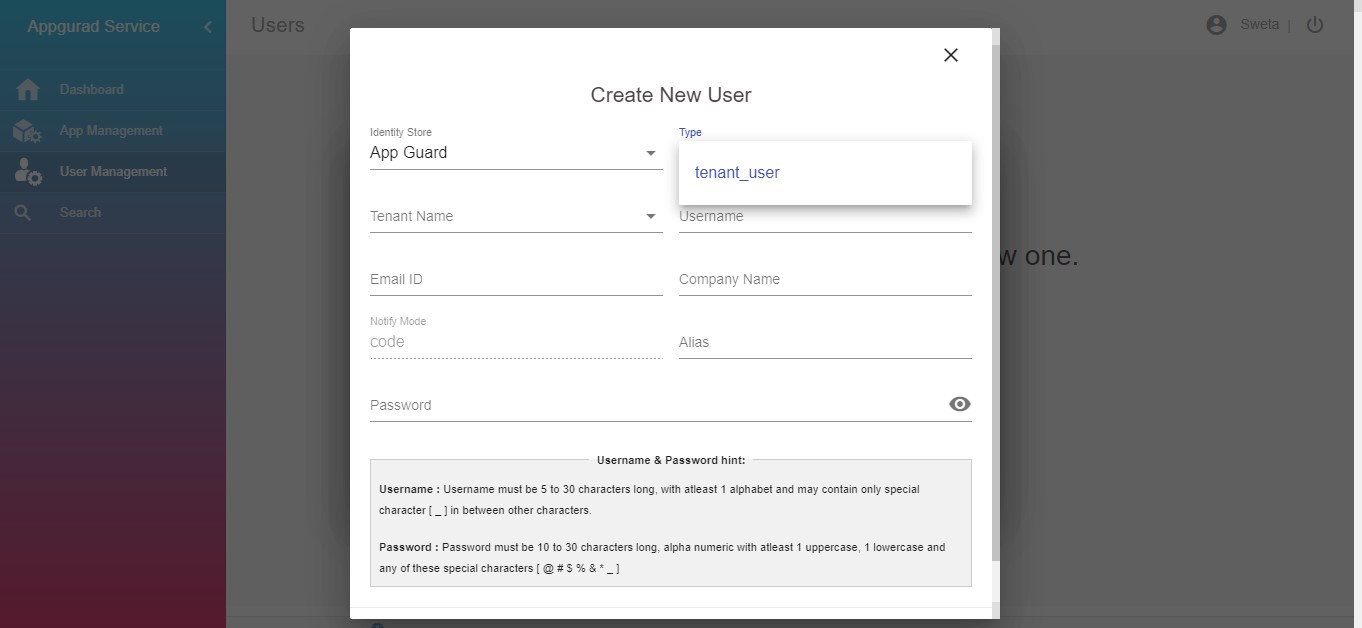
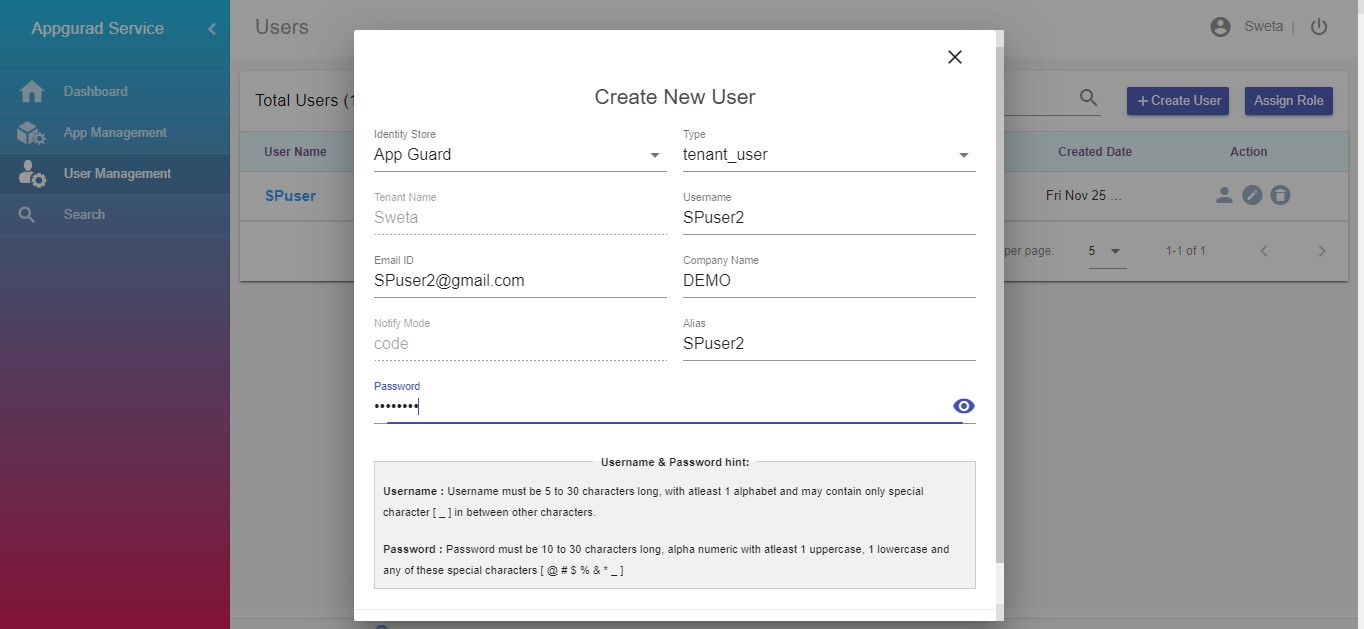
Once the user is registered successfully the tenant need to be activated by clicking on user icon or vice versa.
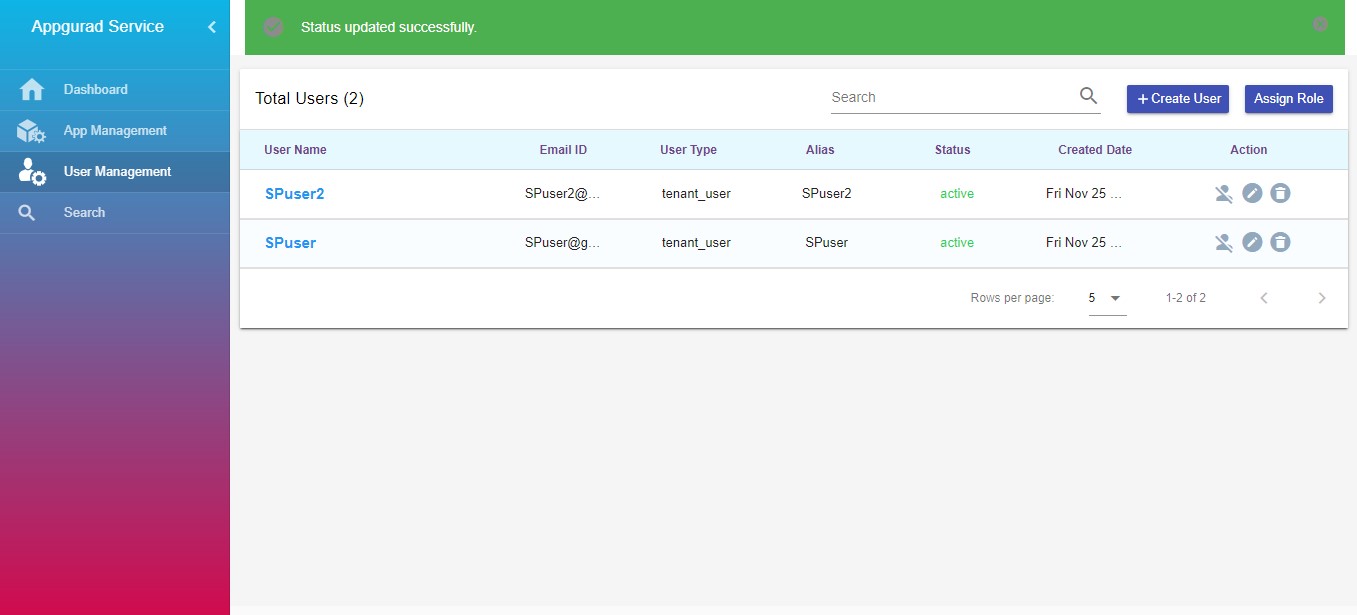
Click on assign role to assign a role to the users.
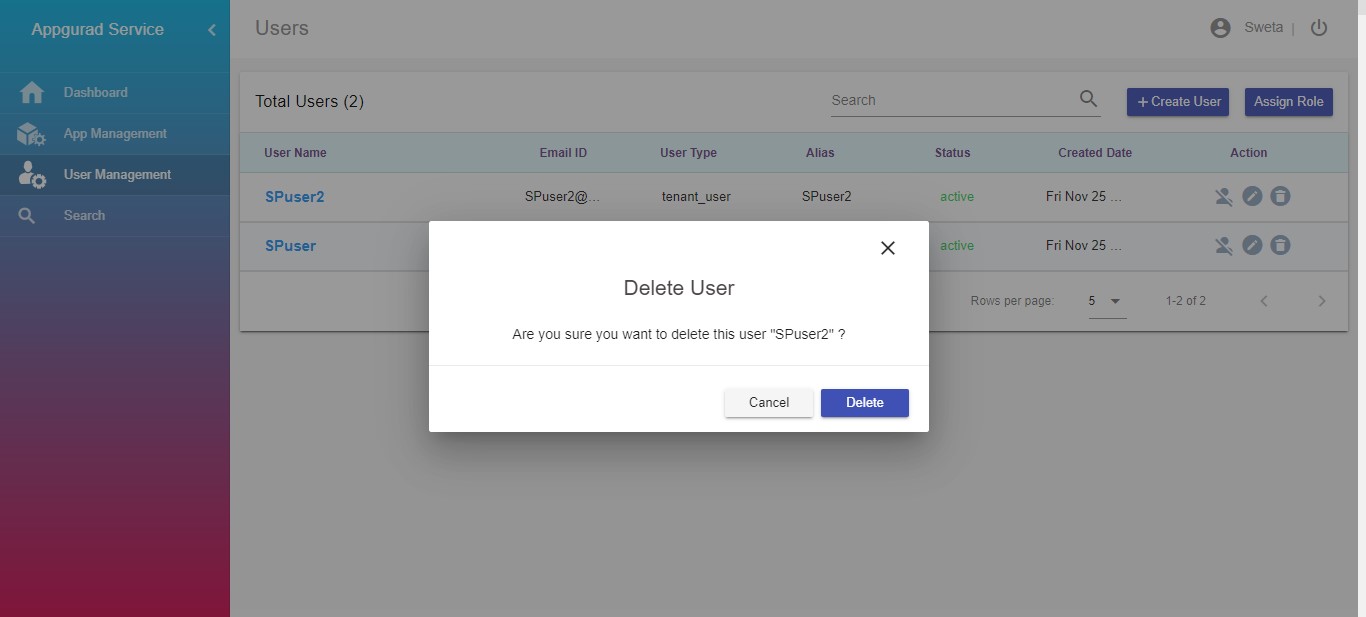
To delete a user, click on delete icon
If you click on user name, it will redirect you to user details page.
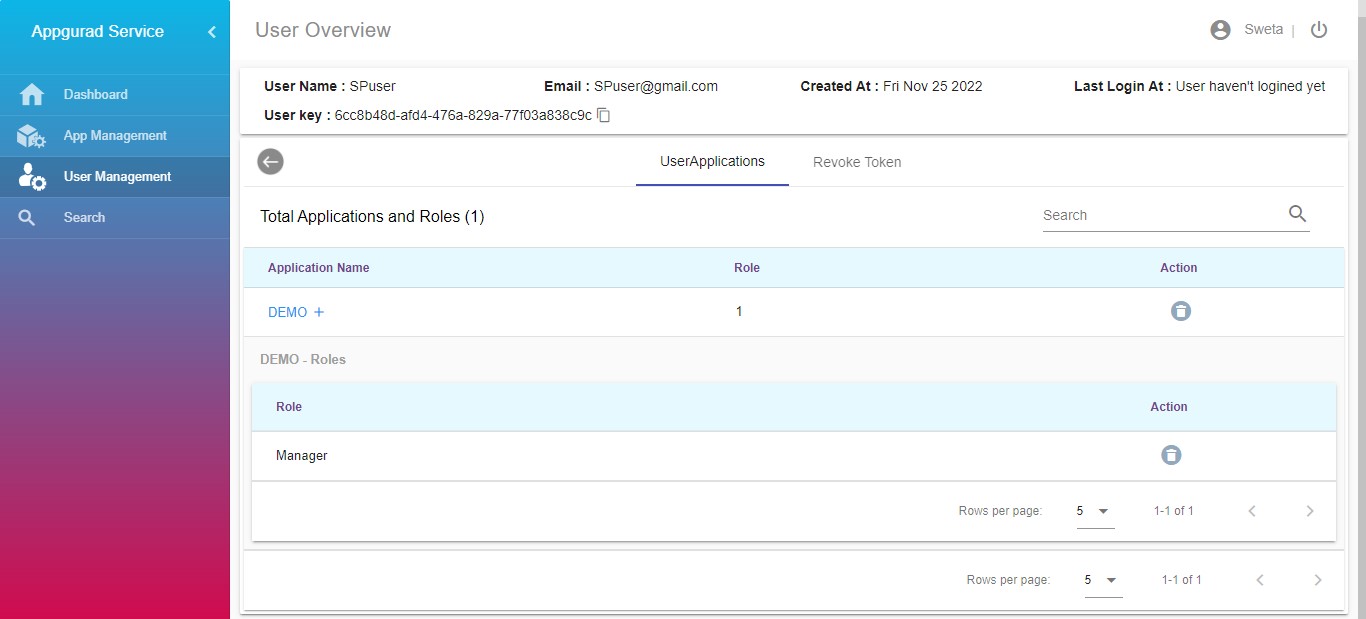
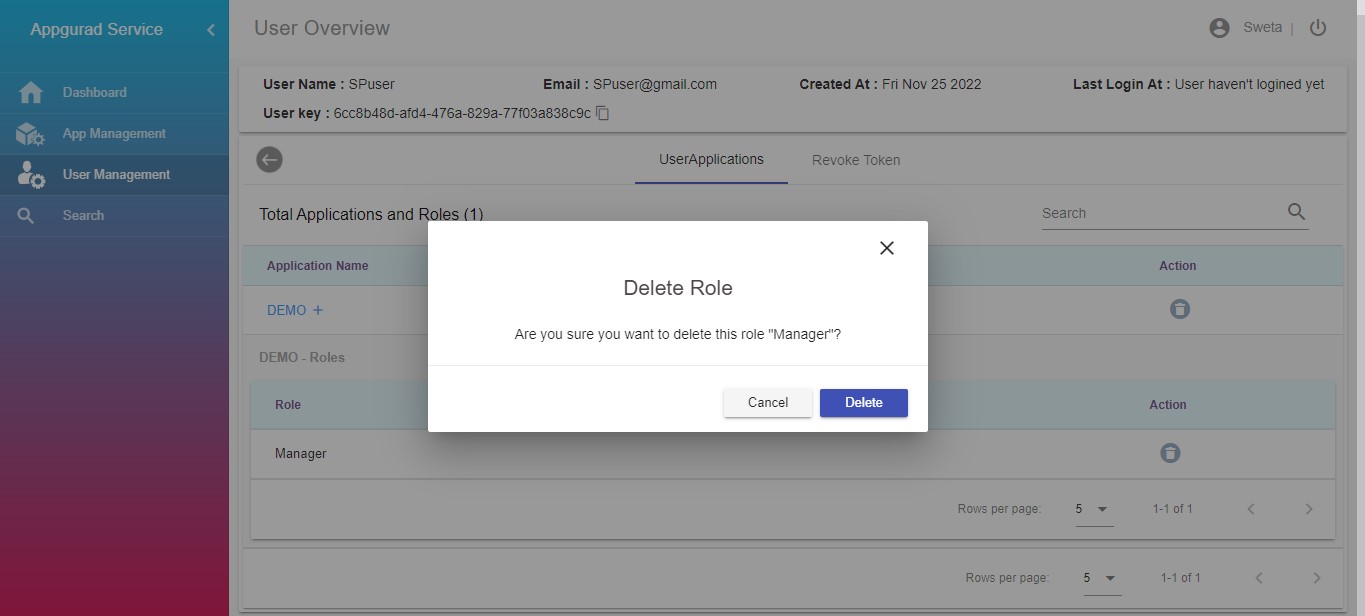
To remove the role from the user, click on the delete icon.
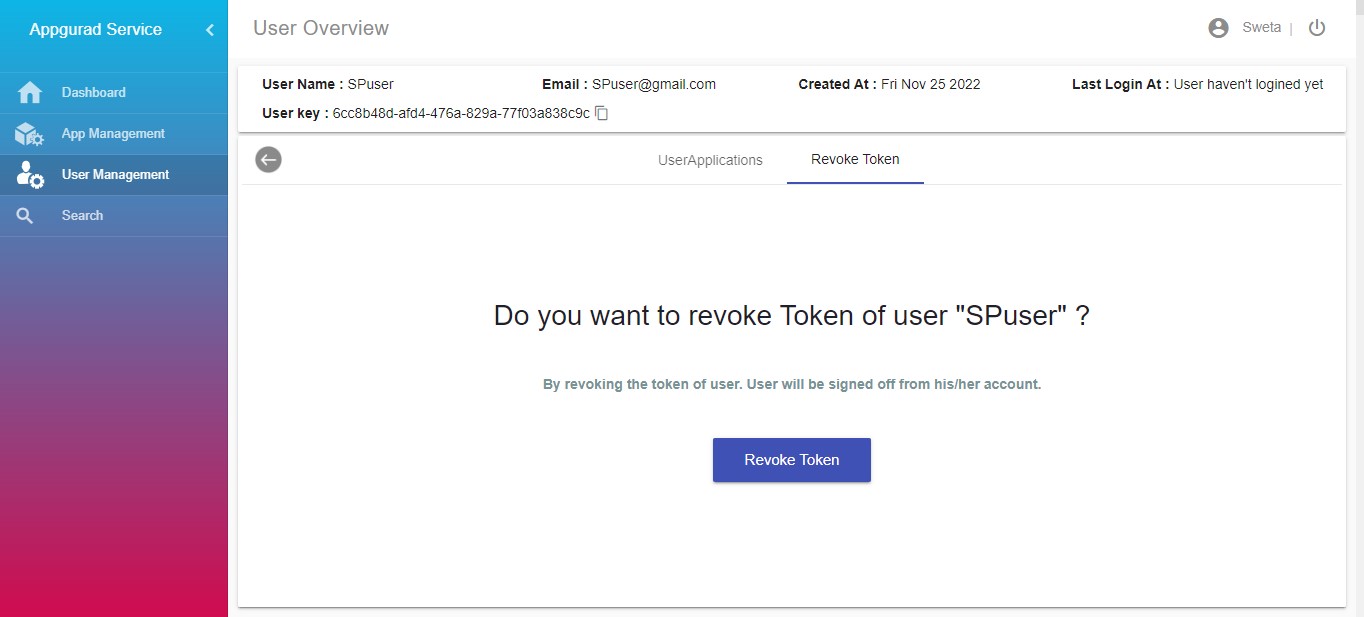
To revoke access token of the users click on revoke token. This will immediately take the acess for the selected user and log him out
If you click on profile icon on top right corner you will see all the information of the logged in user.
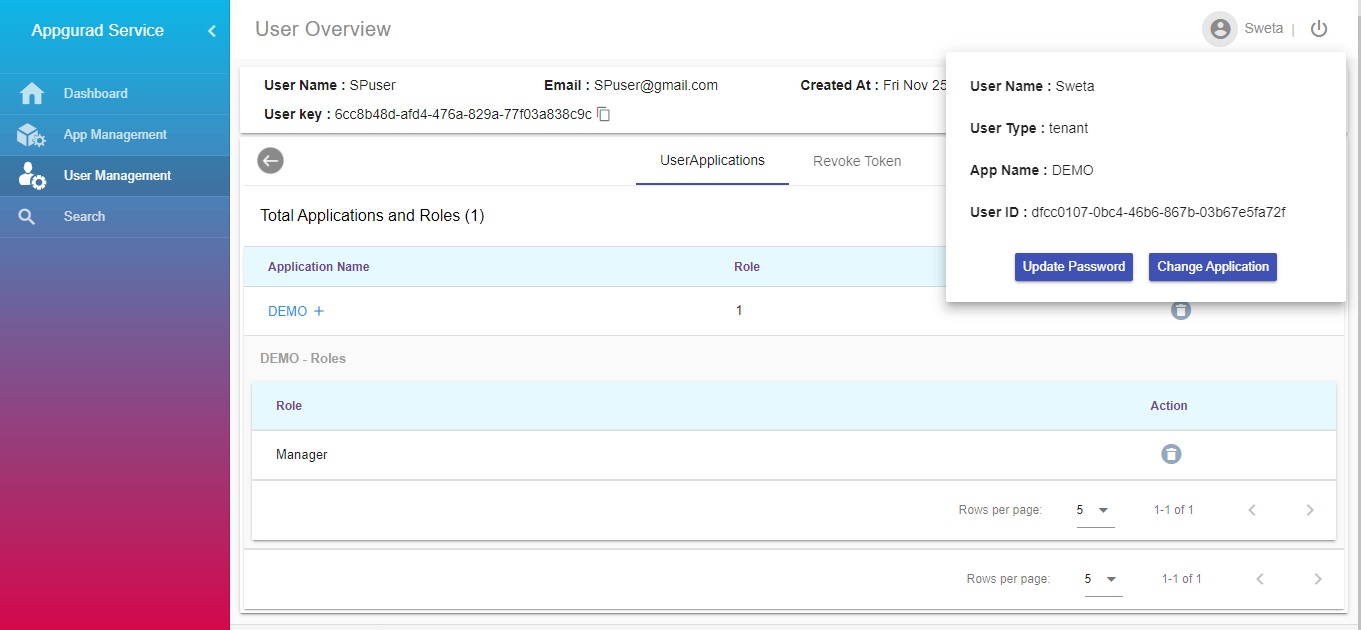
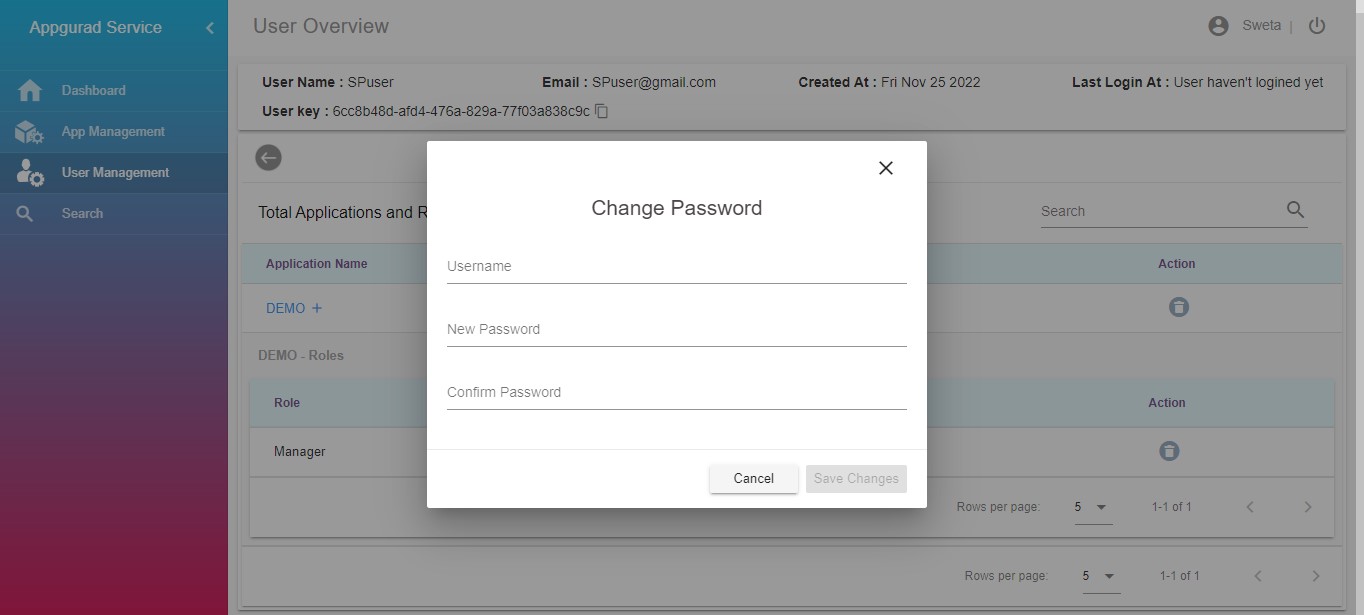
Click on update password from the options shown above and update your password.
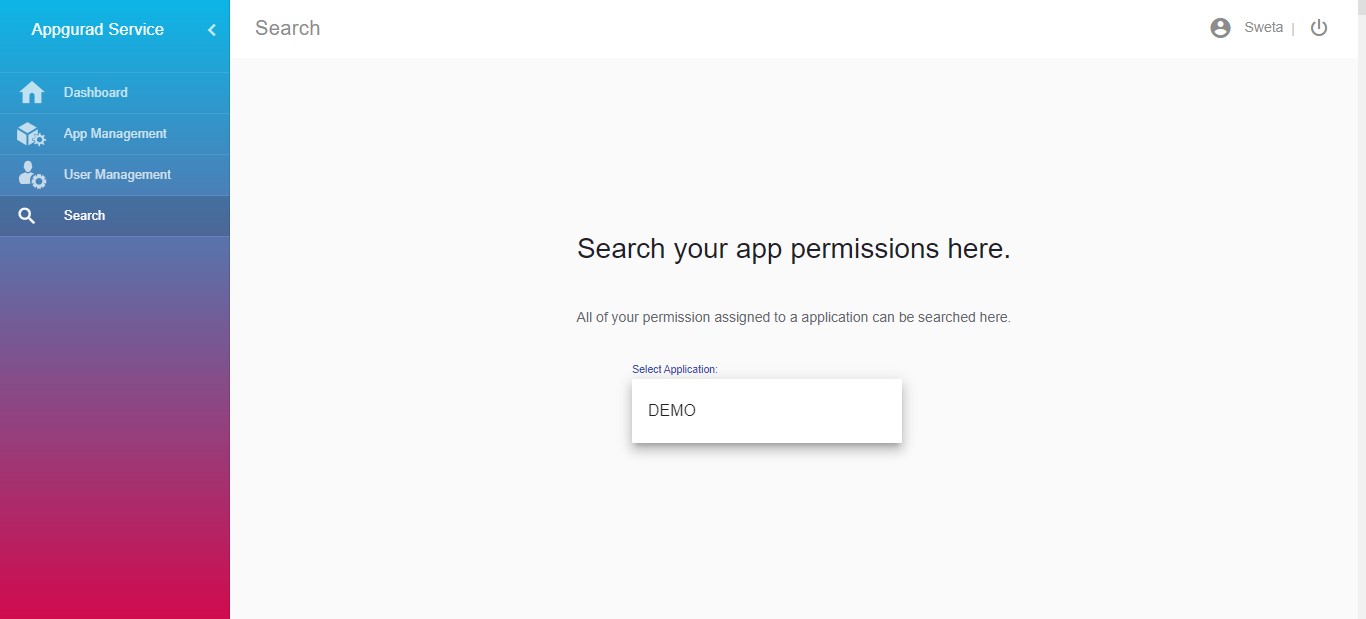
Click on search to search the permissions for a selected application.
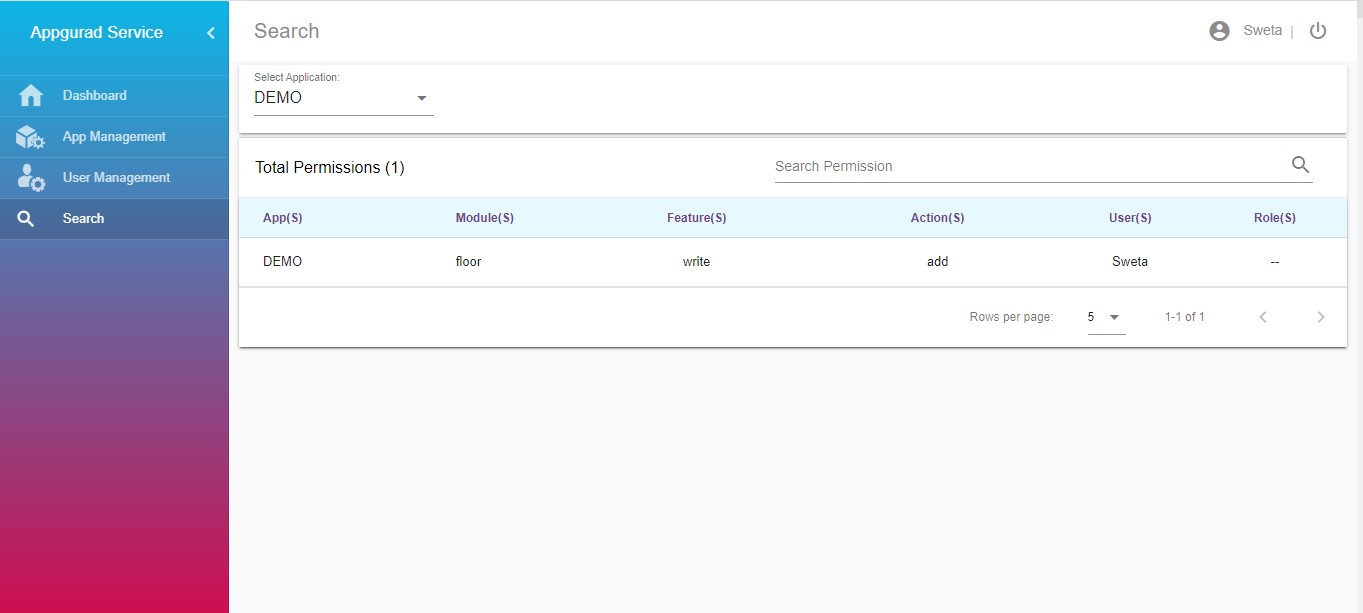
The tenant can view all the privileges after searching.
App Guard Tenant-Users and User
A tenant sub-user can be created under each application. This is done by the tenant admin. For each created user, fine grained access control policies can be defined within the App Guard service. All users have their own credentials (username and password) and JWT keys to access authorized services. Users can be created under each application. This is done by the org admin. For each created user, fine grained access control policies can be defined within the App Guard service. All users have their own credentials (username and password) and JWT keys to access authorized services.
Features of Tenant-Users and User
Tenant Users cannot create/delete any elements in App Guard under a tenant. They can get a view of the roles, and permission assigned to it, if any. Users cannot create/delete any elements in App Guard. They can get a view of the roles, and permission assigned to it, if any.
To access this web application from any device (Laptop/Tablet etc.) open the browser and enter the URL in the format https://<domainName>or<ipAddress>/ (This web application is supported on Chrome and Firefox browser)
Enter user credential here it’s for(tenant/tenant_user/user) – same for all type of users.
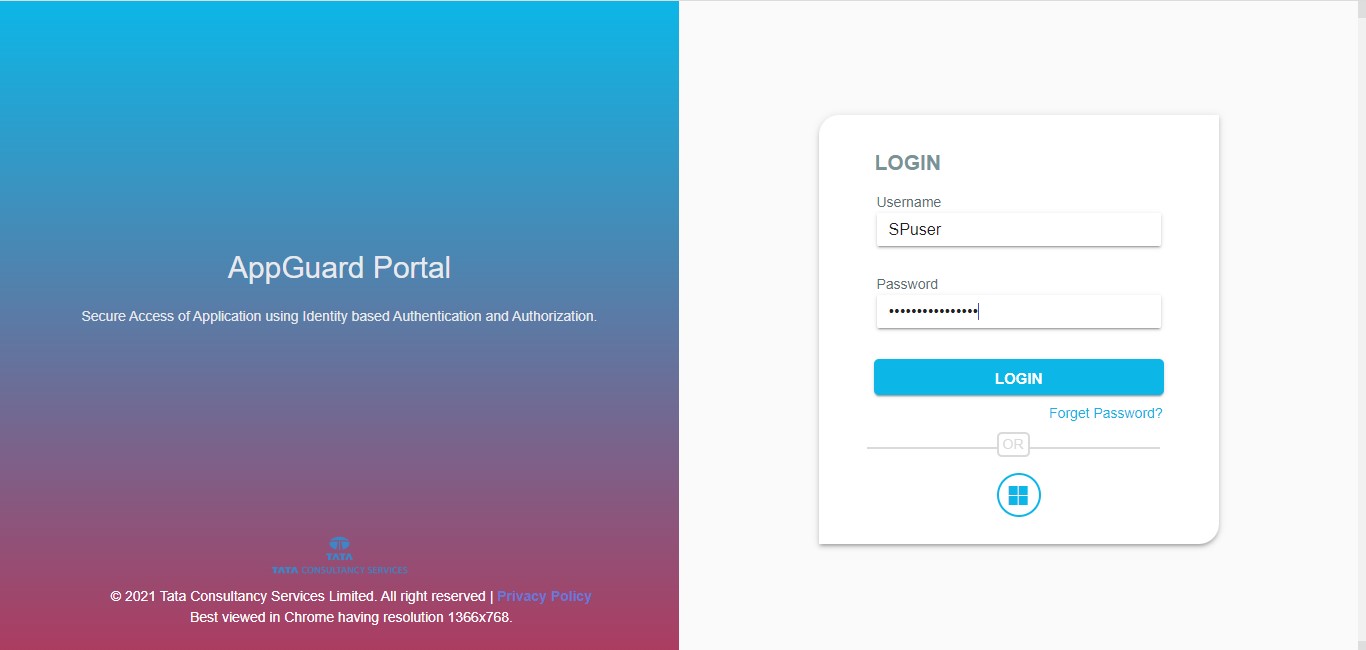
After clicking on login you will be able to see all applications list created.
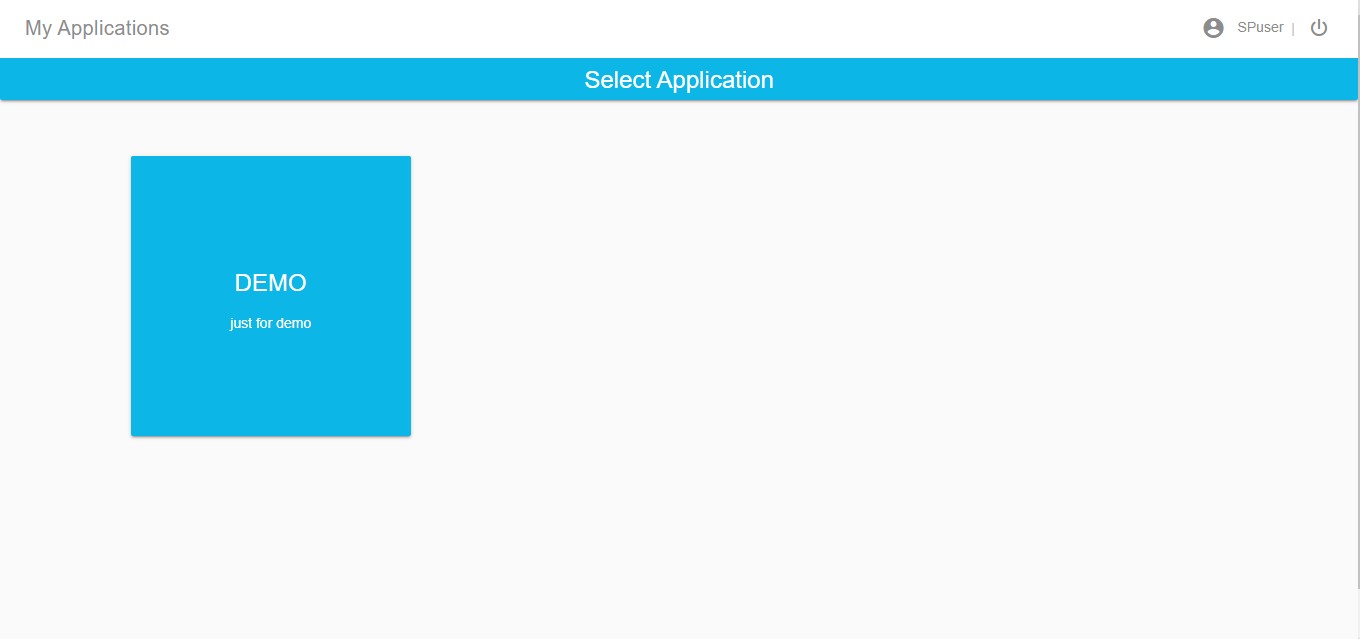
Select one application and that will redirect you to the dashboard.
By clicking on view all apps button you will be redirected to app management and by clicking on view all user button, you will be redirected to user management screen.
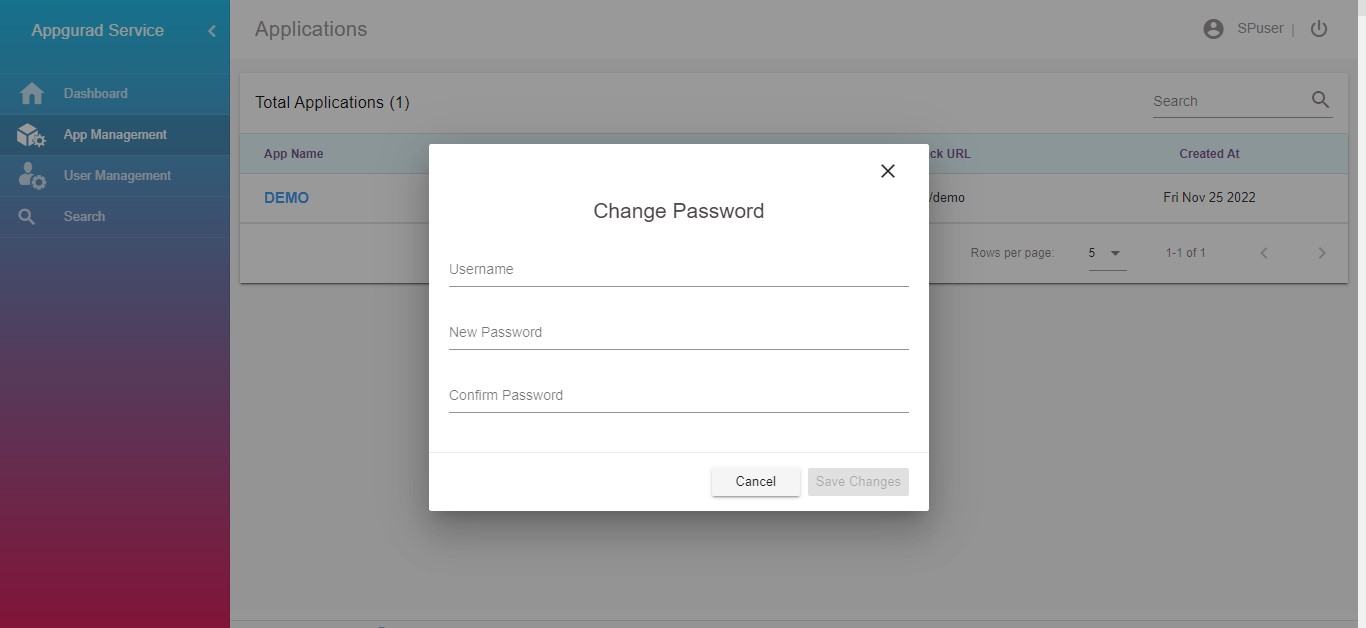
You can click on the update password as shown above and update your password.
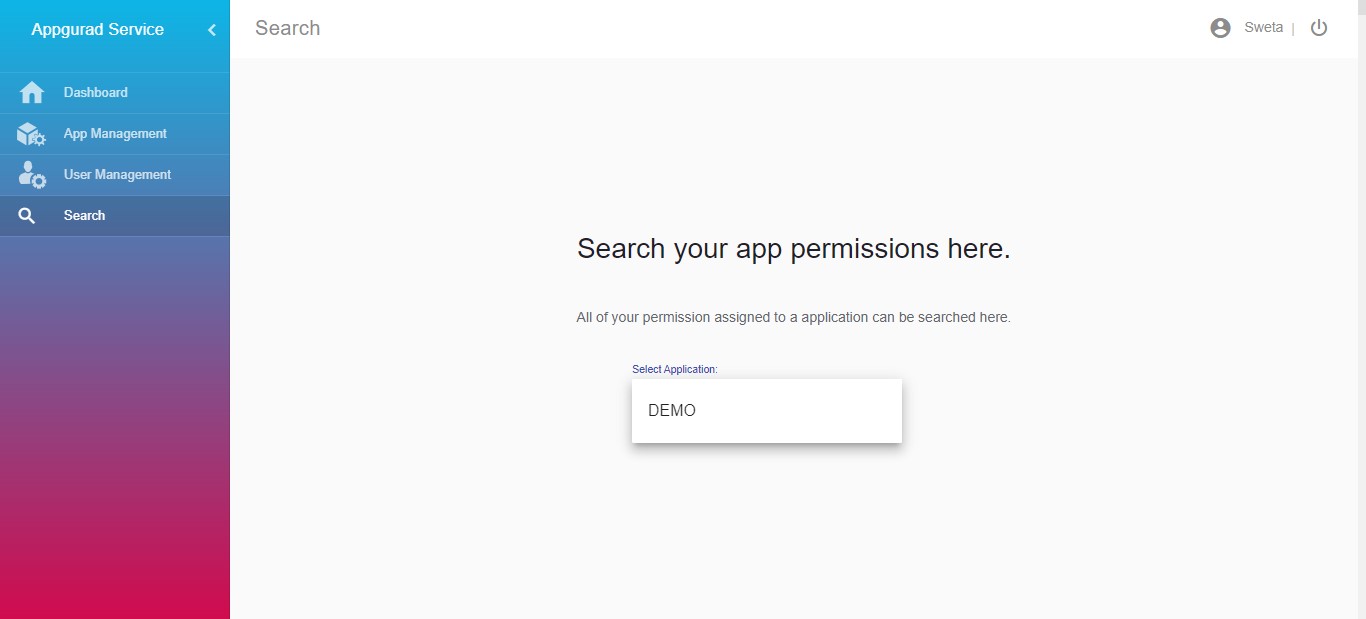
Click on search to search permissions for a selected application
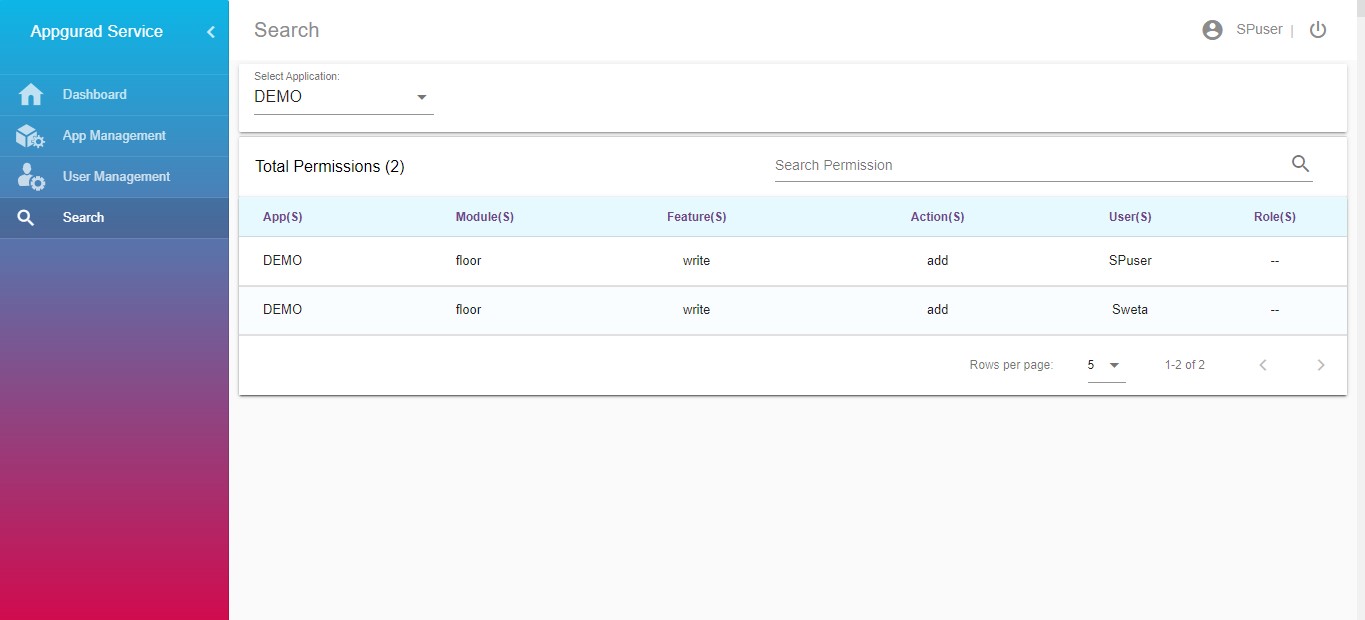
You can view all the privileges after searching but you cannot modify or delete any.
Running Device Agent, Register and Communication with Device
The next step is to run the device agent in the device. The device agents are either JAVA based or C based . Please refer to Device Agent for agent details. The device agent will register the device in TCUP Device Management Service and then start communicating between the device and TCUP.
For windows based laptop, the agent should start from command prompt. The parameter for running the agent are EPN ID of the device, IP of the TCUP instance and API key of the TCUP user. It also requires the ID and pre shared key as received from the pre registration step.
The following is the example of the command where device agent is a jar file named sampledmagent.jar.
java -jar sampledmagent.jar -ep "<end id>" -ip "<TCUP IP>" -key "<x-api-key>" -id "<device id>" -psk "<device psk key>" -p <port number like 5684>
The following is the screen shot of the command when run from the command prompt:
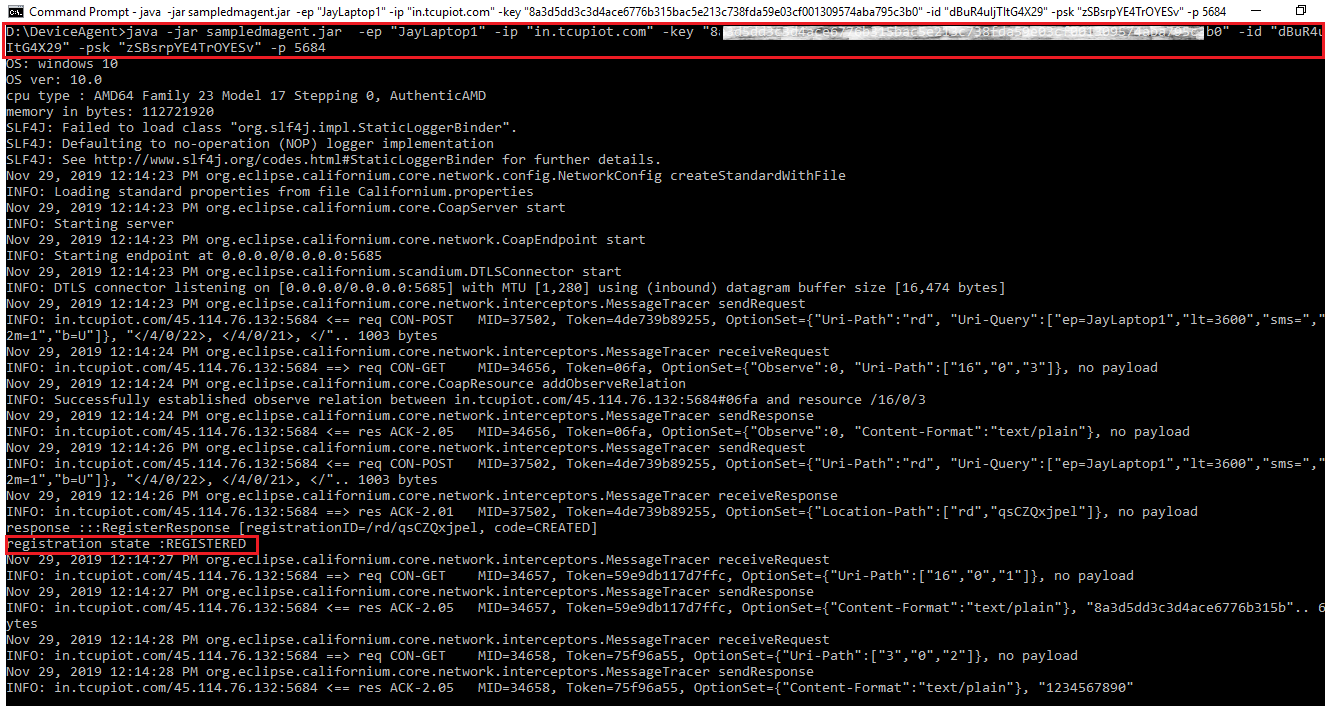
Once the agent starts running and successfully registers the device, the connection status becomes
Device Connectedand the status becomes green in the portal as shown in the image below: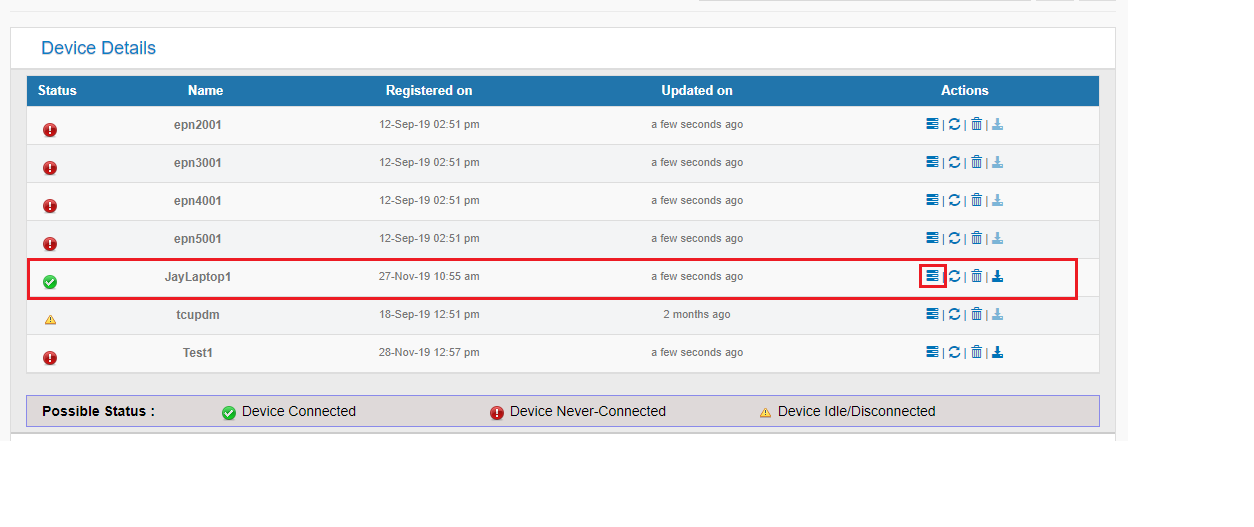
By clicking the view button, the users will be able to find the different resource values of the device under different tabs.
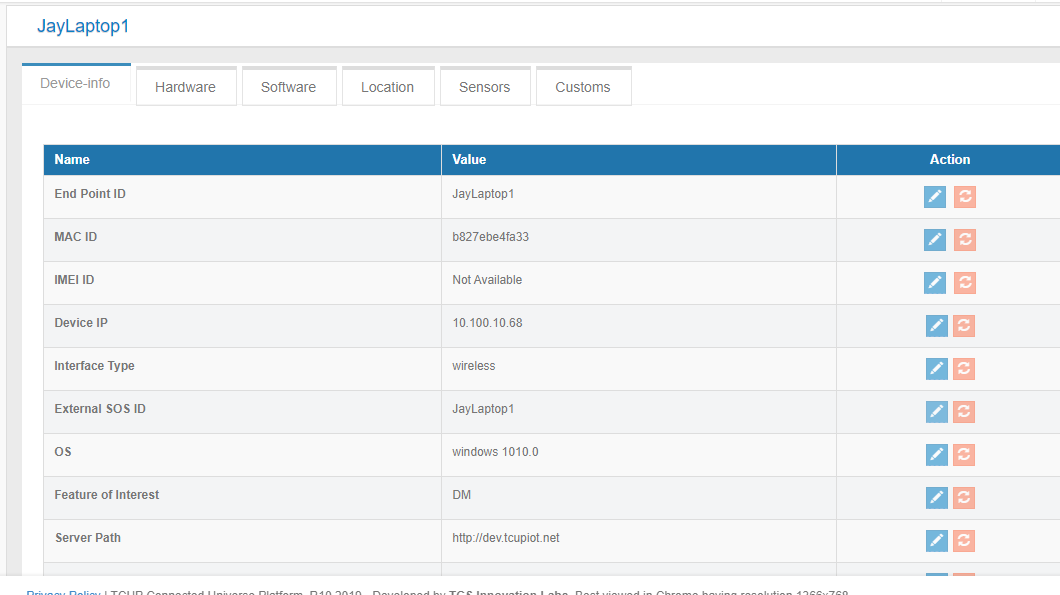
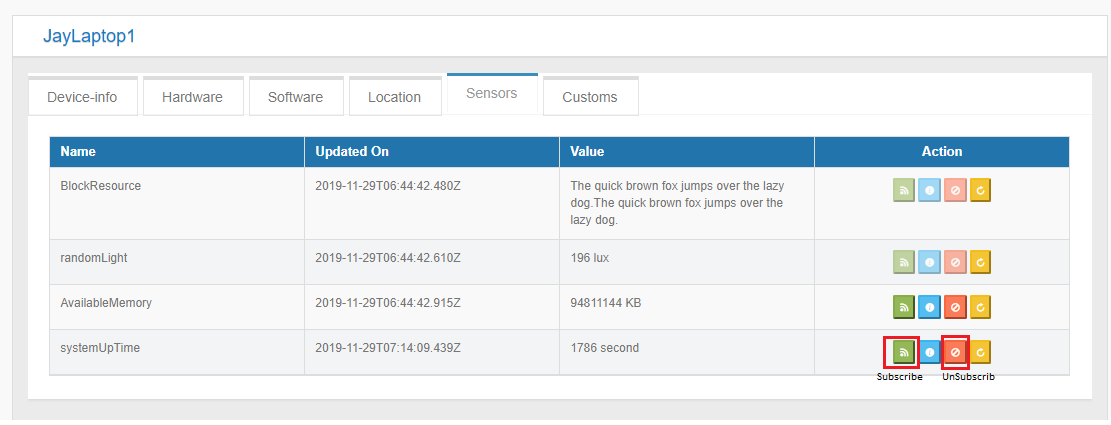
The information under the sensors tab are dynamic information. As shown in the screen below for the laptop the resource ‘systemUpTime’ and ‘AvailableMemory’ are active and they are reflecting the current values. There is also the option to subscribe or unsubscribe a sensor and check the status of the sensor.
Update Resource Value of Device Using Command
The resource value of the device can be updated using command API. From ACl API in swagger, the users will be able to find the resource value which can be updated.
Note
Only the resources for which updatable is true can be updated using the command.
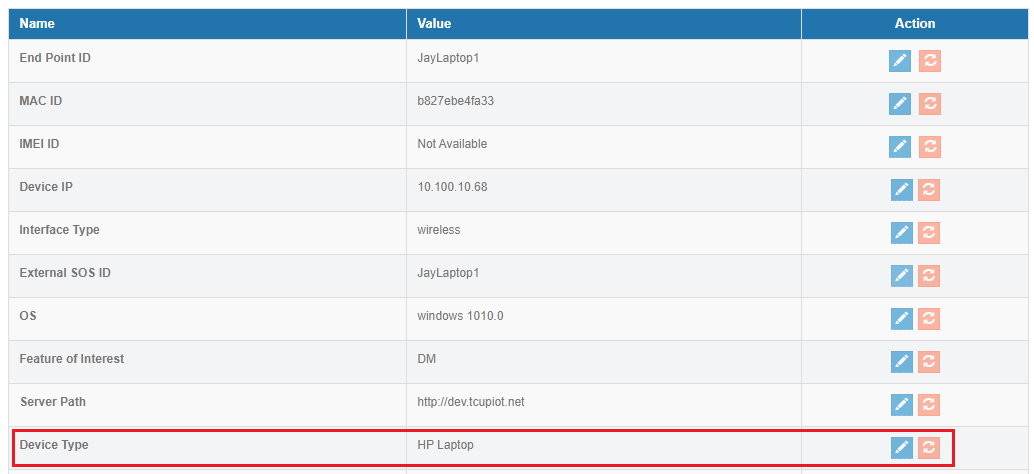
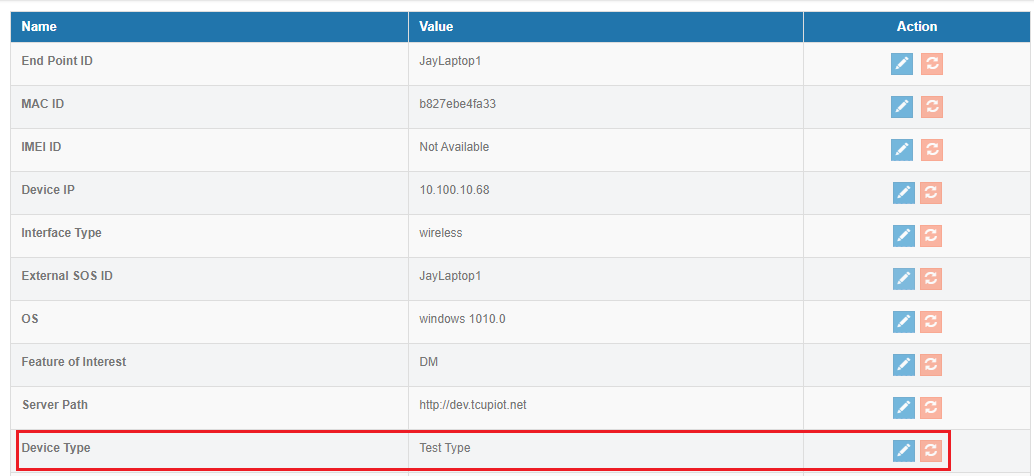
For example in this case we are trying to update the resource value of DeviceType (this is updatable) from ‘Test Type’ to ‘HP Laptop’
In Swagger open Create Command under the Command API.

Use the following JSON, EPN ID and API Key to update the value.
{
  "interval": "10s",
  "mandatory": true,
  "resourceid": "deviceType",
  "value": "HP Laptop"
 }
Click on Try It Out. The command gets created and executed as per schedule. Once executed successfully the value of DeviceType gets updated as shown in the image below.
